|
Last Updated 04/14/2021, updates highlighted in yellow |
|
|
Blog about the Cars in My Collection
Generally Speaking
The car collecting hobby is a full time activity requiring the devotion of precious resources: time, money, patience, research, space and labor to name a few. These requirements compound as one adds more vehicles to their collection. I opine that there is a threshold of the number of cars that separate merely collecting cars that collect dust and collecting cars that are maintained and run. I feel that I’m on that line of that threshold. With six cars (five classics and one new car), keeping them clean and washed is a chore in itself. Keeping them all running in top shape, ready for any road trip is another story all together.
It has always been said that it is better to buy a car that someone else has restored. That is true to the extent that it saves you time and money. However, one misses out on the fun (and frustration) of working on the cars. I know I would only get a fraction back of the money I have invested in these vehicles if I ever sold them. But I would have missed out on so much more: the learning, the scraped knuckles, the camaraderie and the stories.
While my cars have been on many road trips and to various car shows (and winning awards), those details are lacking on the blog right now. I'll be adding those comments going forward. For now, I've added the list of repairs, to-date, on my cars. It'll give you readers an idea of how much work it takes to keep the cars running and looking good. But I hope it doesn't discourage you. --- James |
|
|
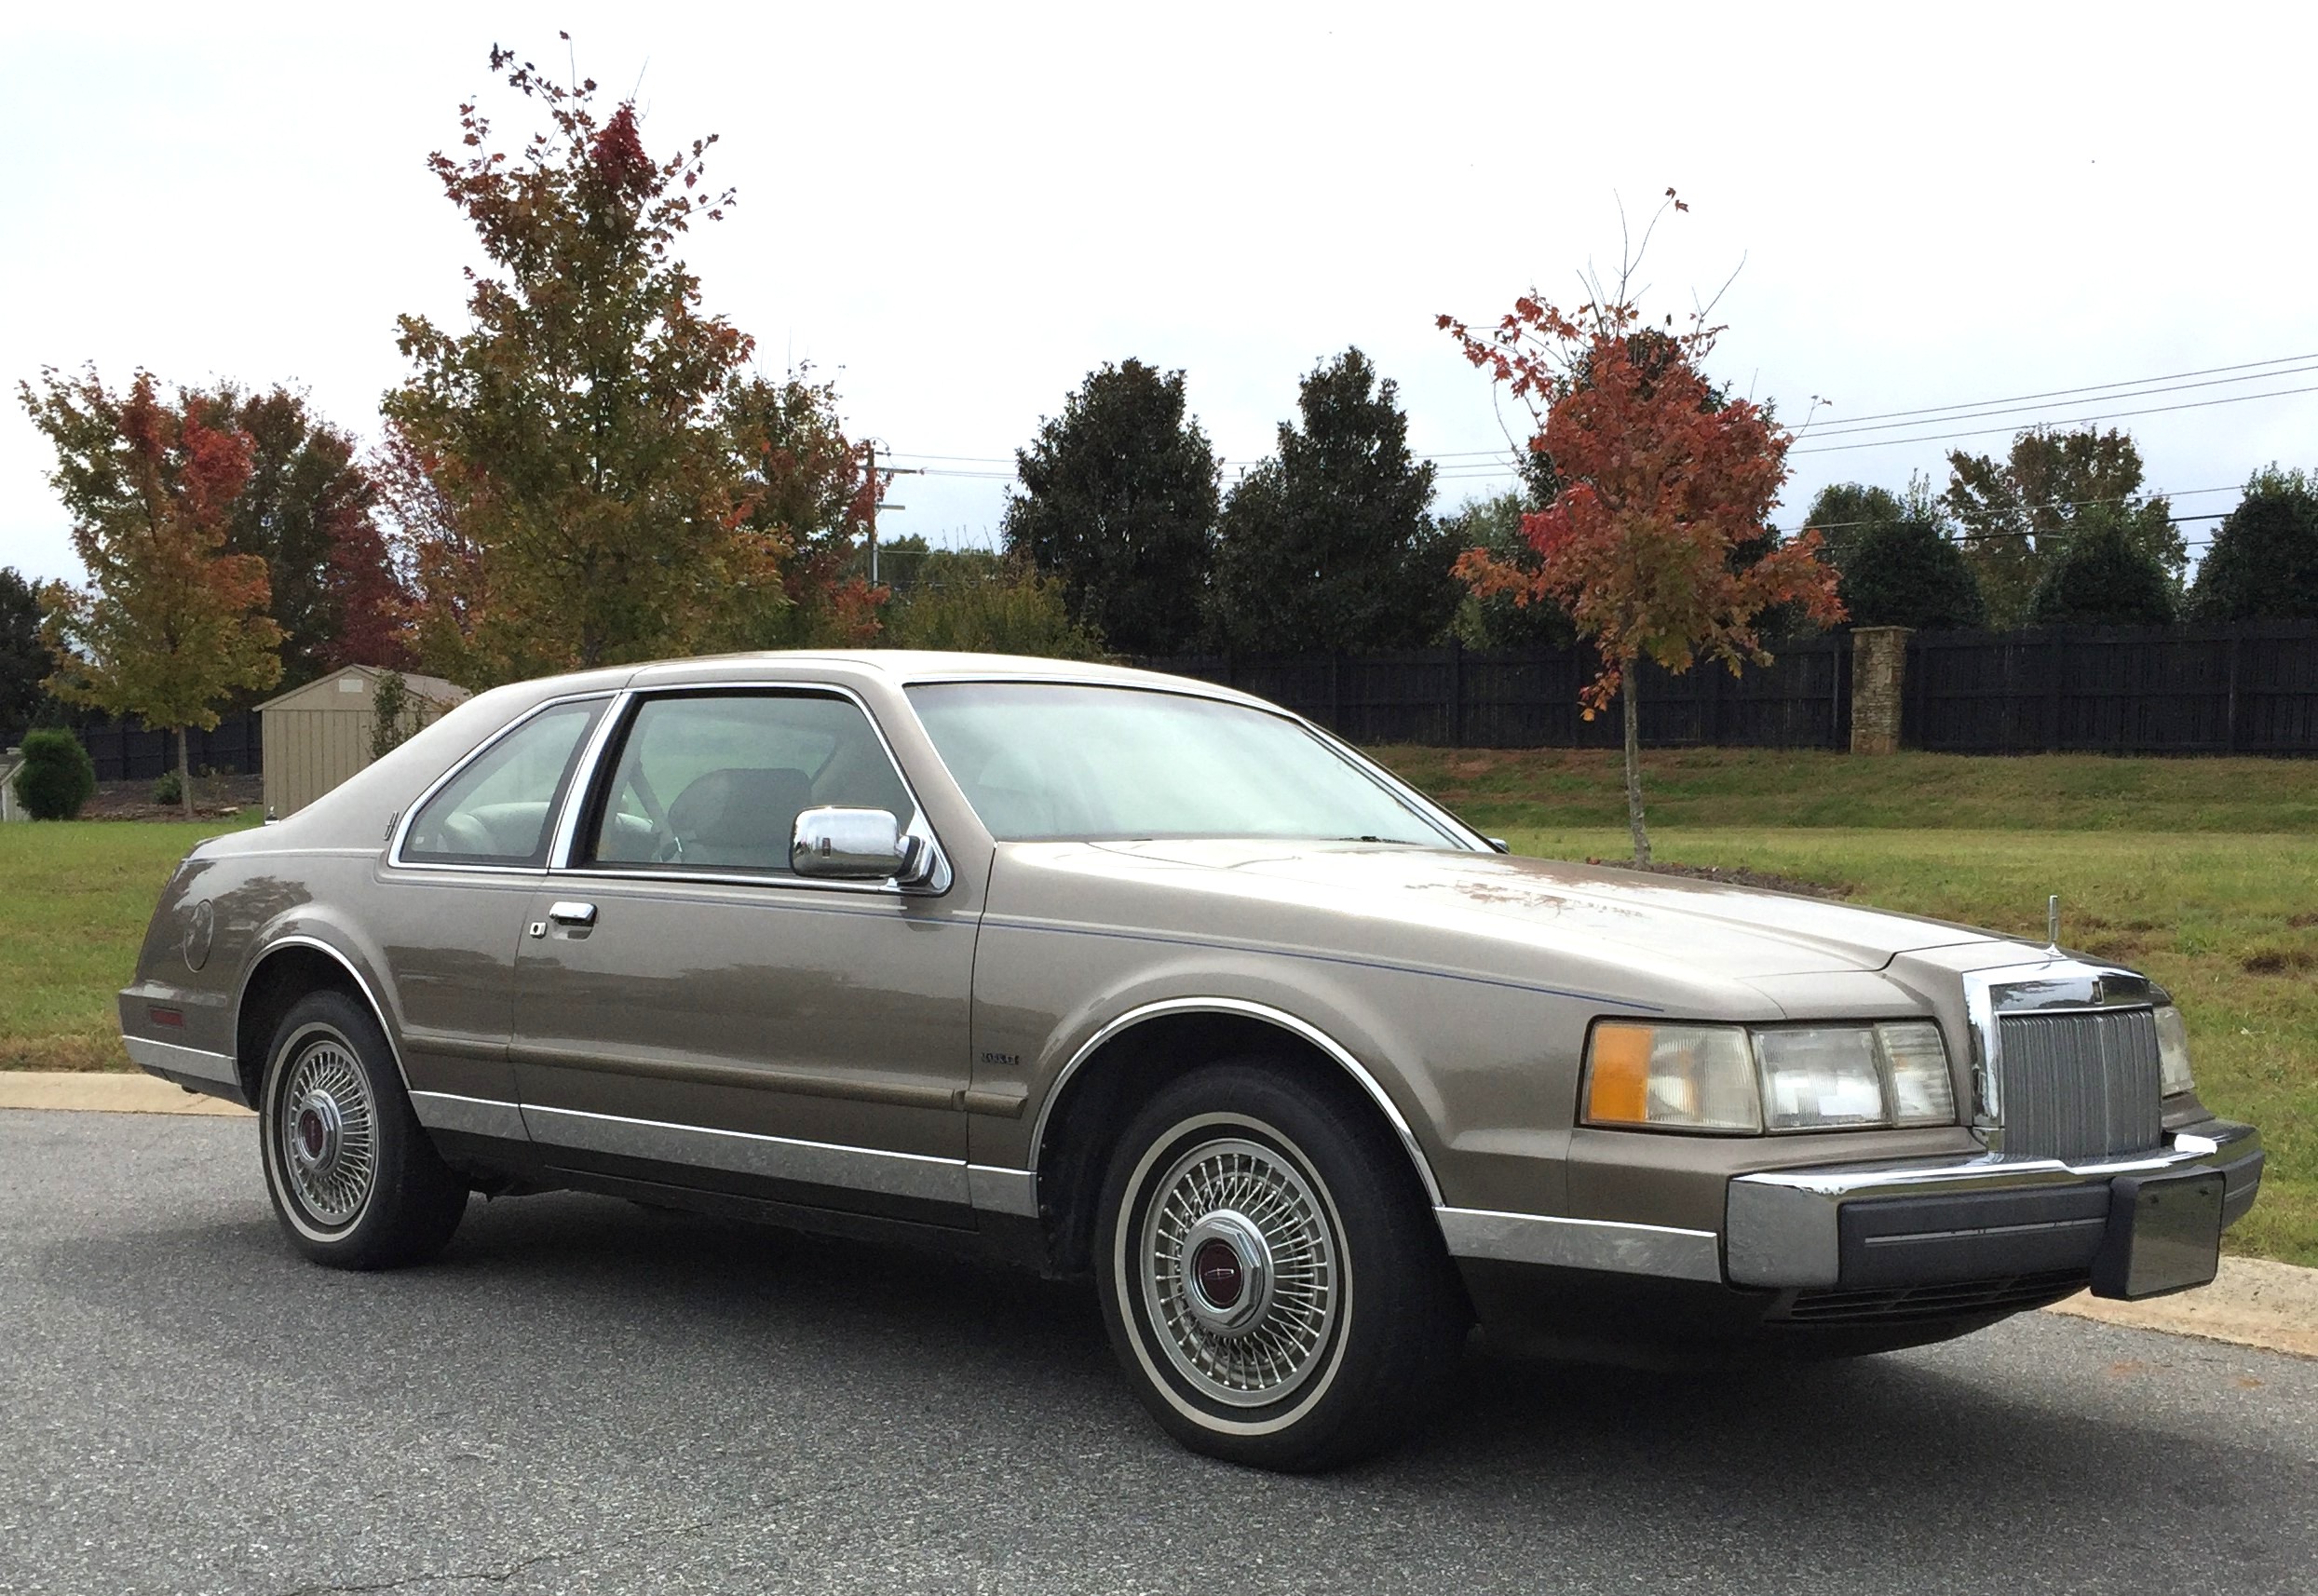
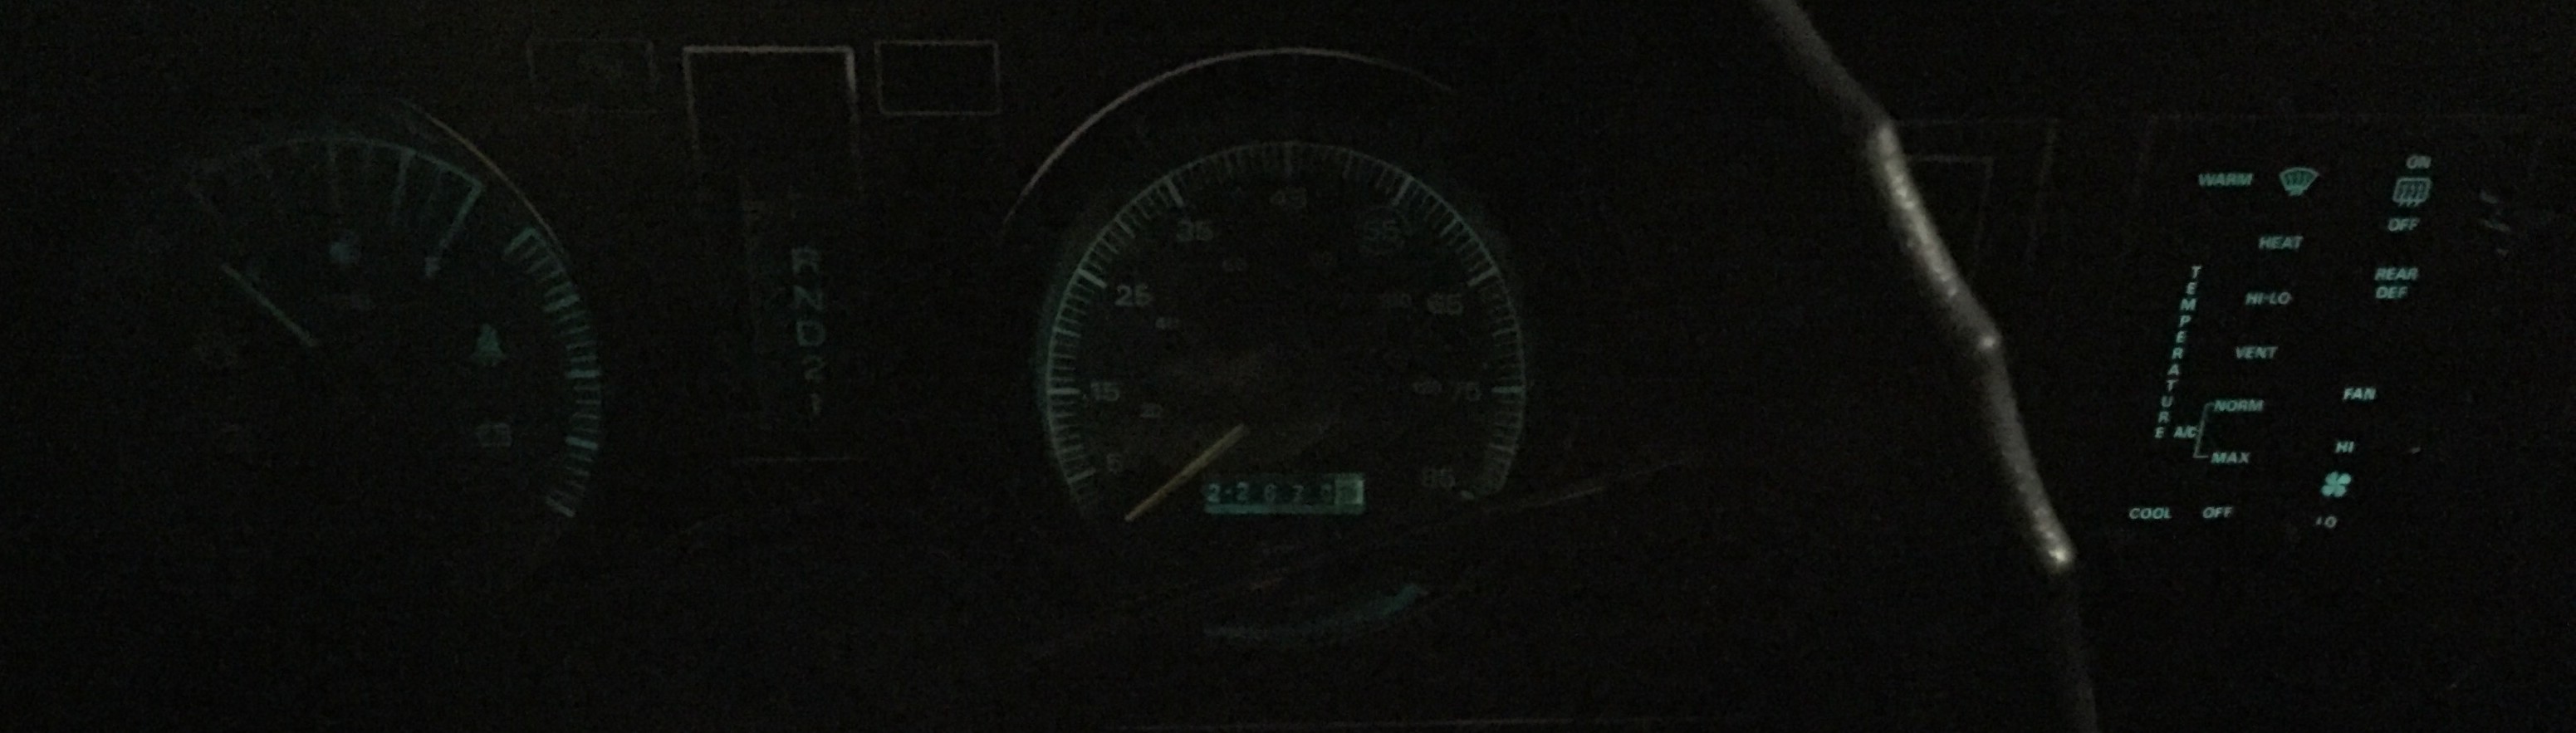
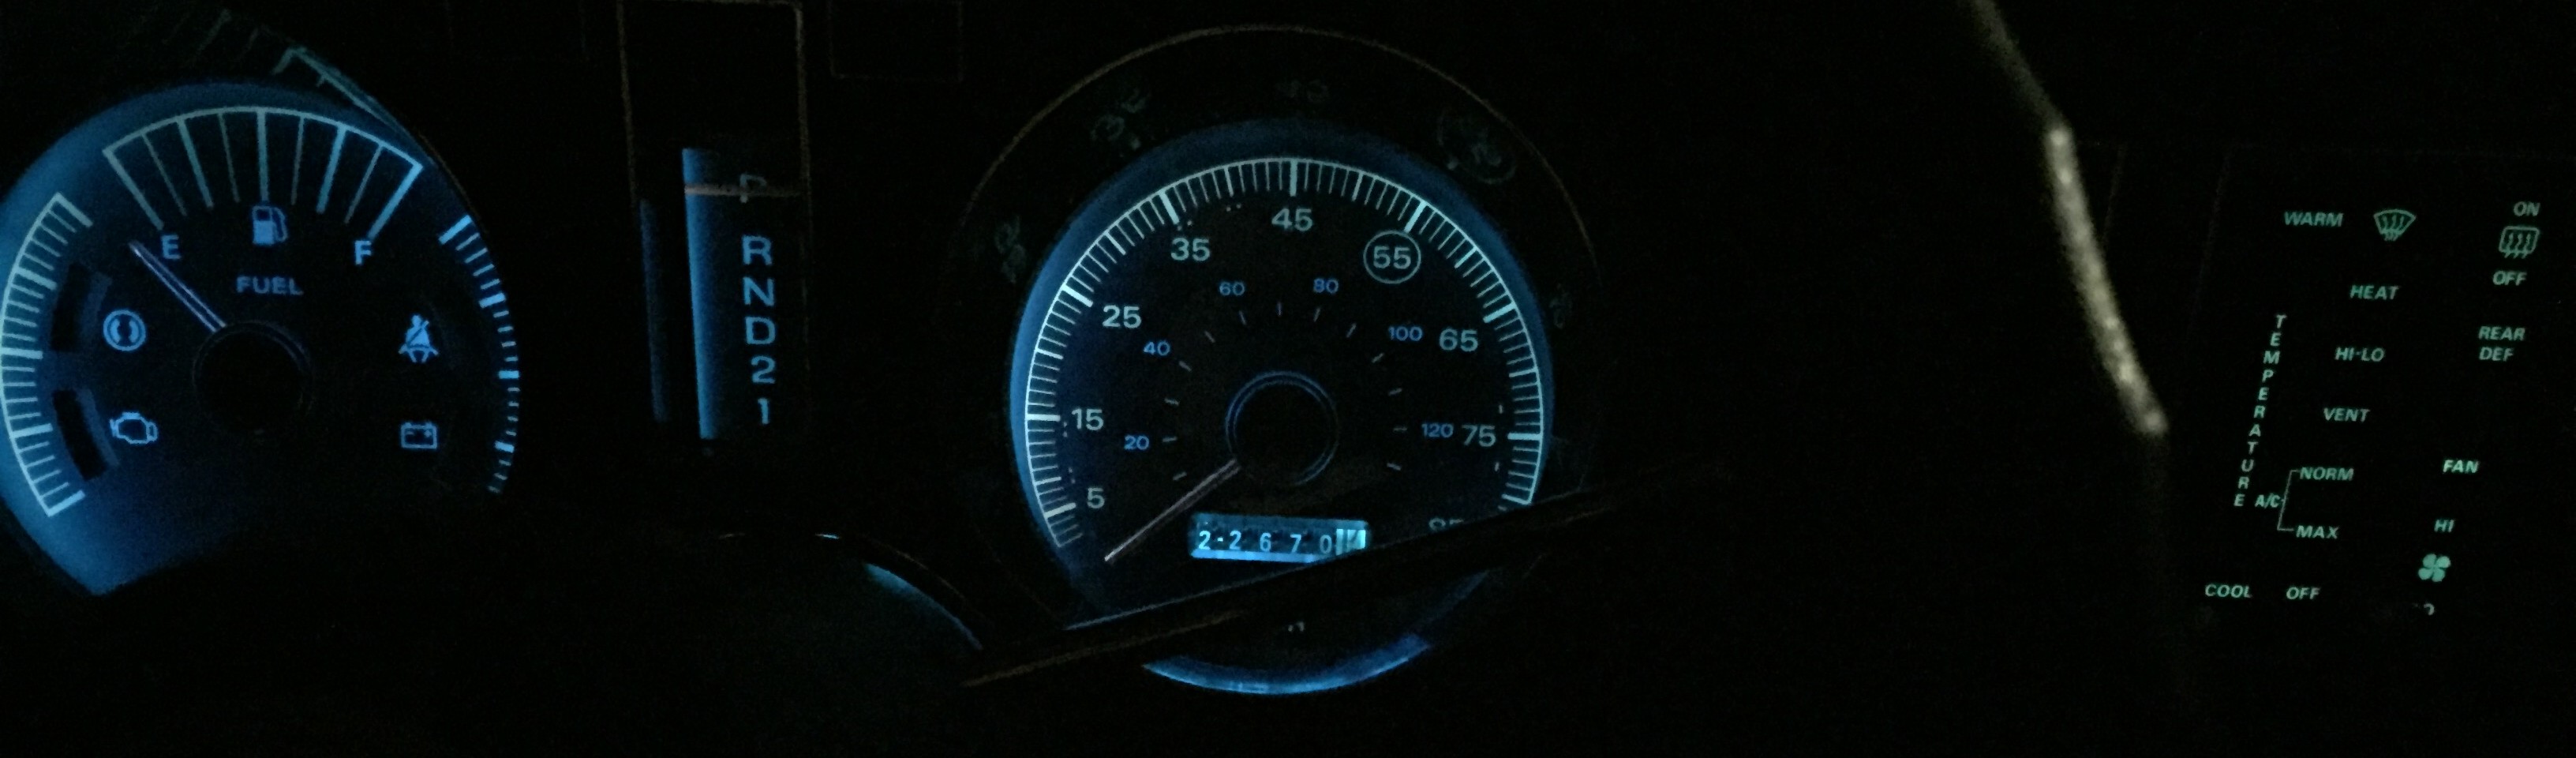
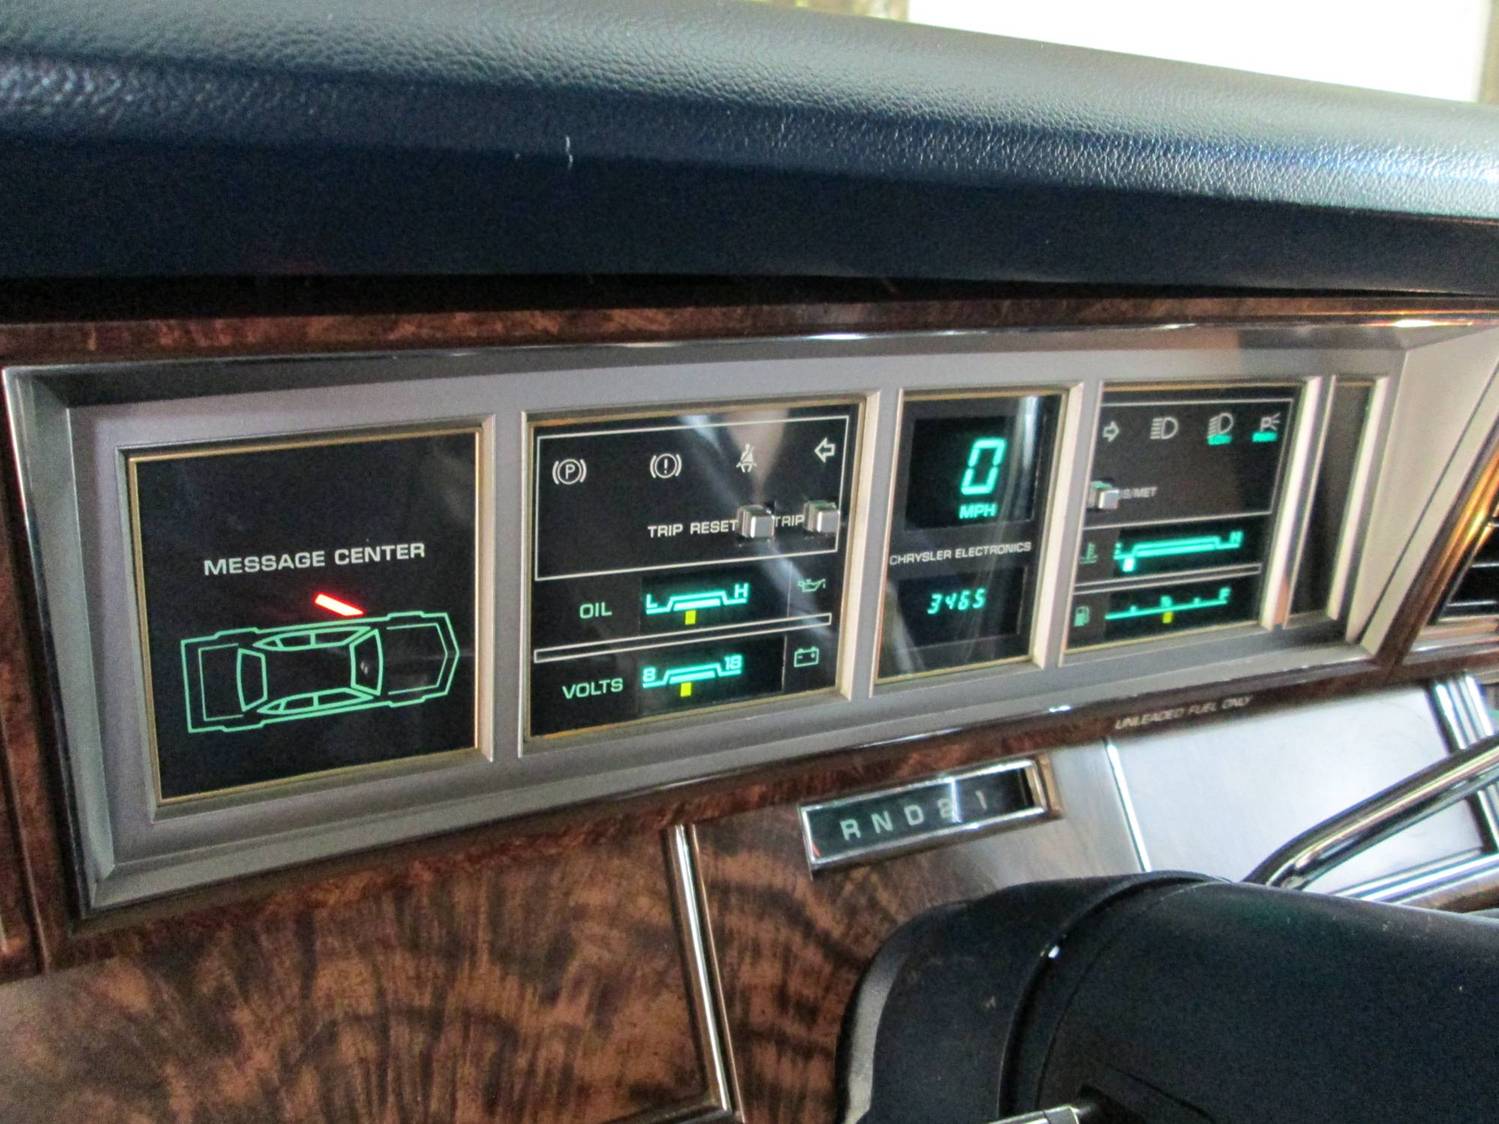
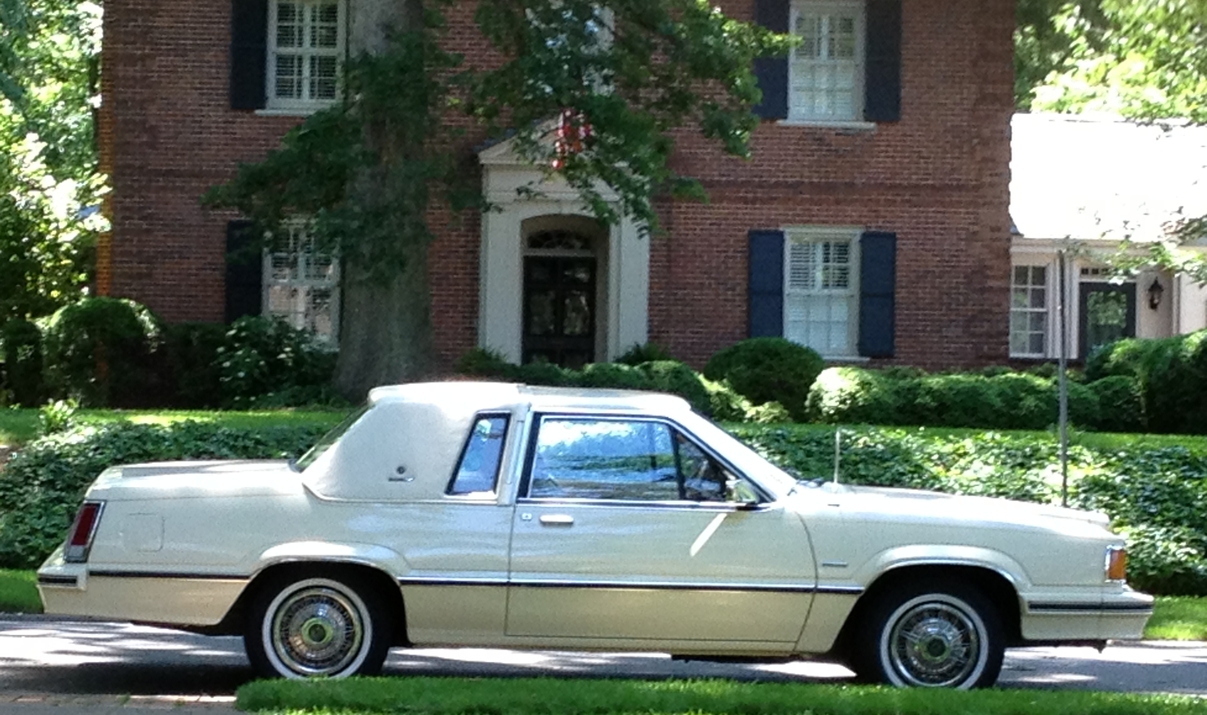
1986 Lincoln Mark VII Bill Blass Edition April 14, 2021 - After front right caliper seized… new front brake pads, rotors, calipers, hoses and bearings (both sides) October 17, 2019 - Replaced fuel pump and re-gapped spark plugs. Engine is so smooth now. July 22, 2019 - New spark plugs and wires, new MSD distributor, fuel induction flush (lines, injectors, throttle plates), new transmission filter and gasket, transmission flush, new fuel filter, change differential fluid June 11, 2019 - Remove brake accumulator ball and replace o-ring May 9, 2019 - Replace A/C pressure switch and punctured tired April 29, 2019 - Cruise control testing & steering wheel switch contact cleaning April 11, 2019 - Replace dryer with hose; replace compressor seals; recharge a/c; replace throttle spacer gaskets; replace intake gasket; oil change January 16, 2019 - New tires October 2018 - I keep saying I won't buy more cars, but I did. I added this car to my collection at the end of October. Love the digital dash and trip computer. The car is comfy, elegant, sporty and powerful. It's essentially a Mustang GT with a bigger back seat and more luxury.
|
Chrysler Cordoba - 1975-1979
1983-1986
Chrysler LeBaron - 1982-1988 second generation
1968-1971
Lincoln Versailles - 1979 Commercial
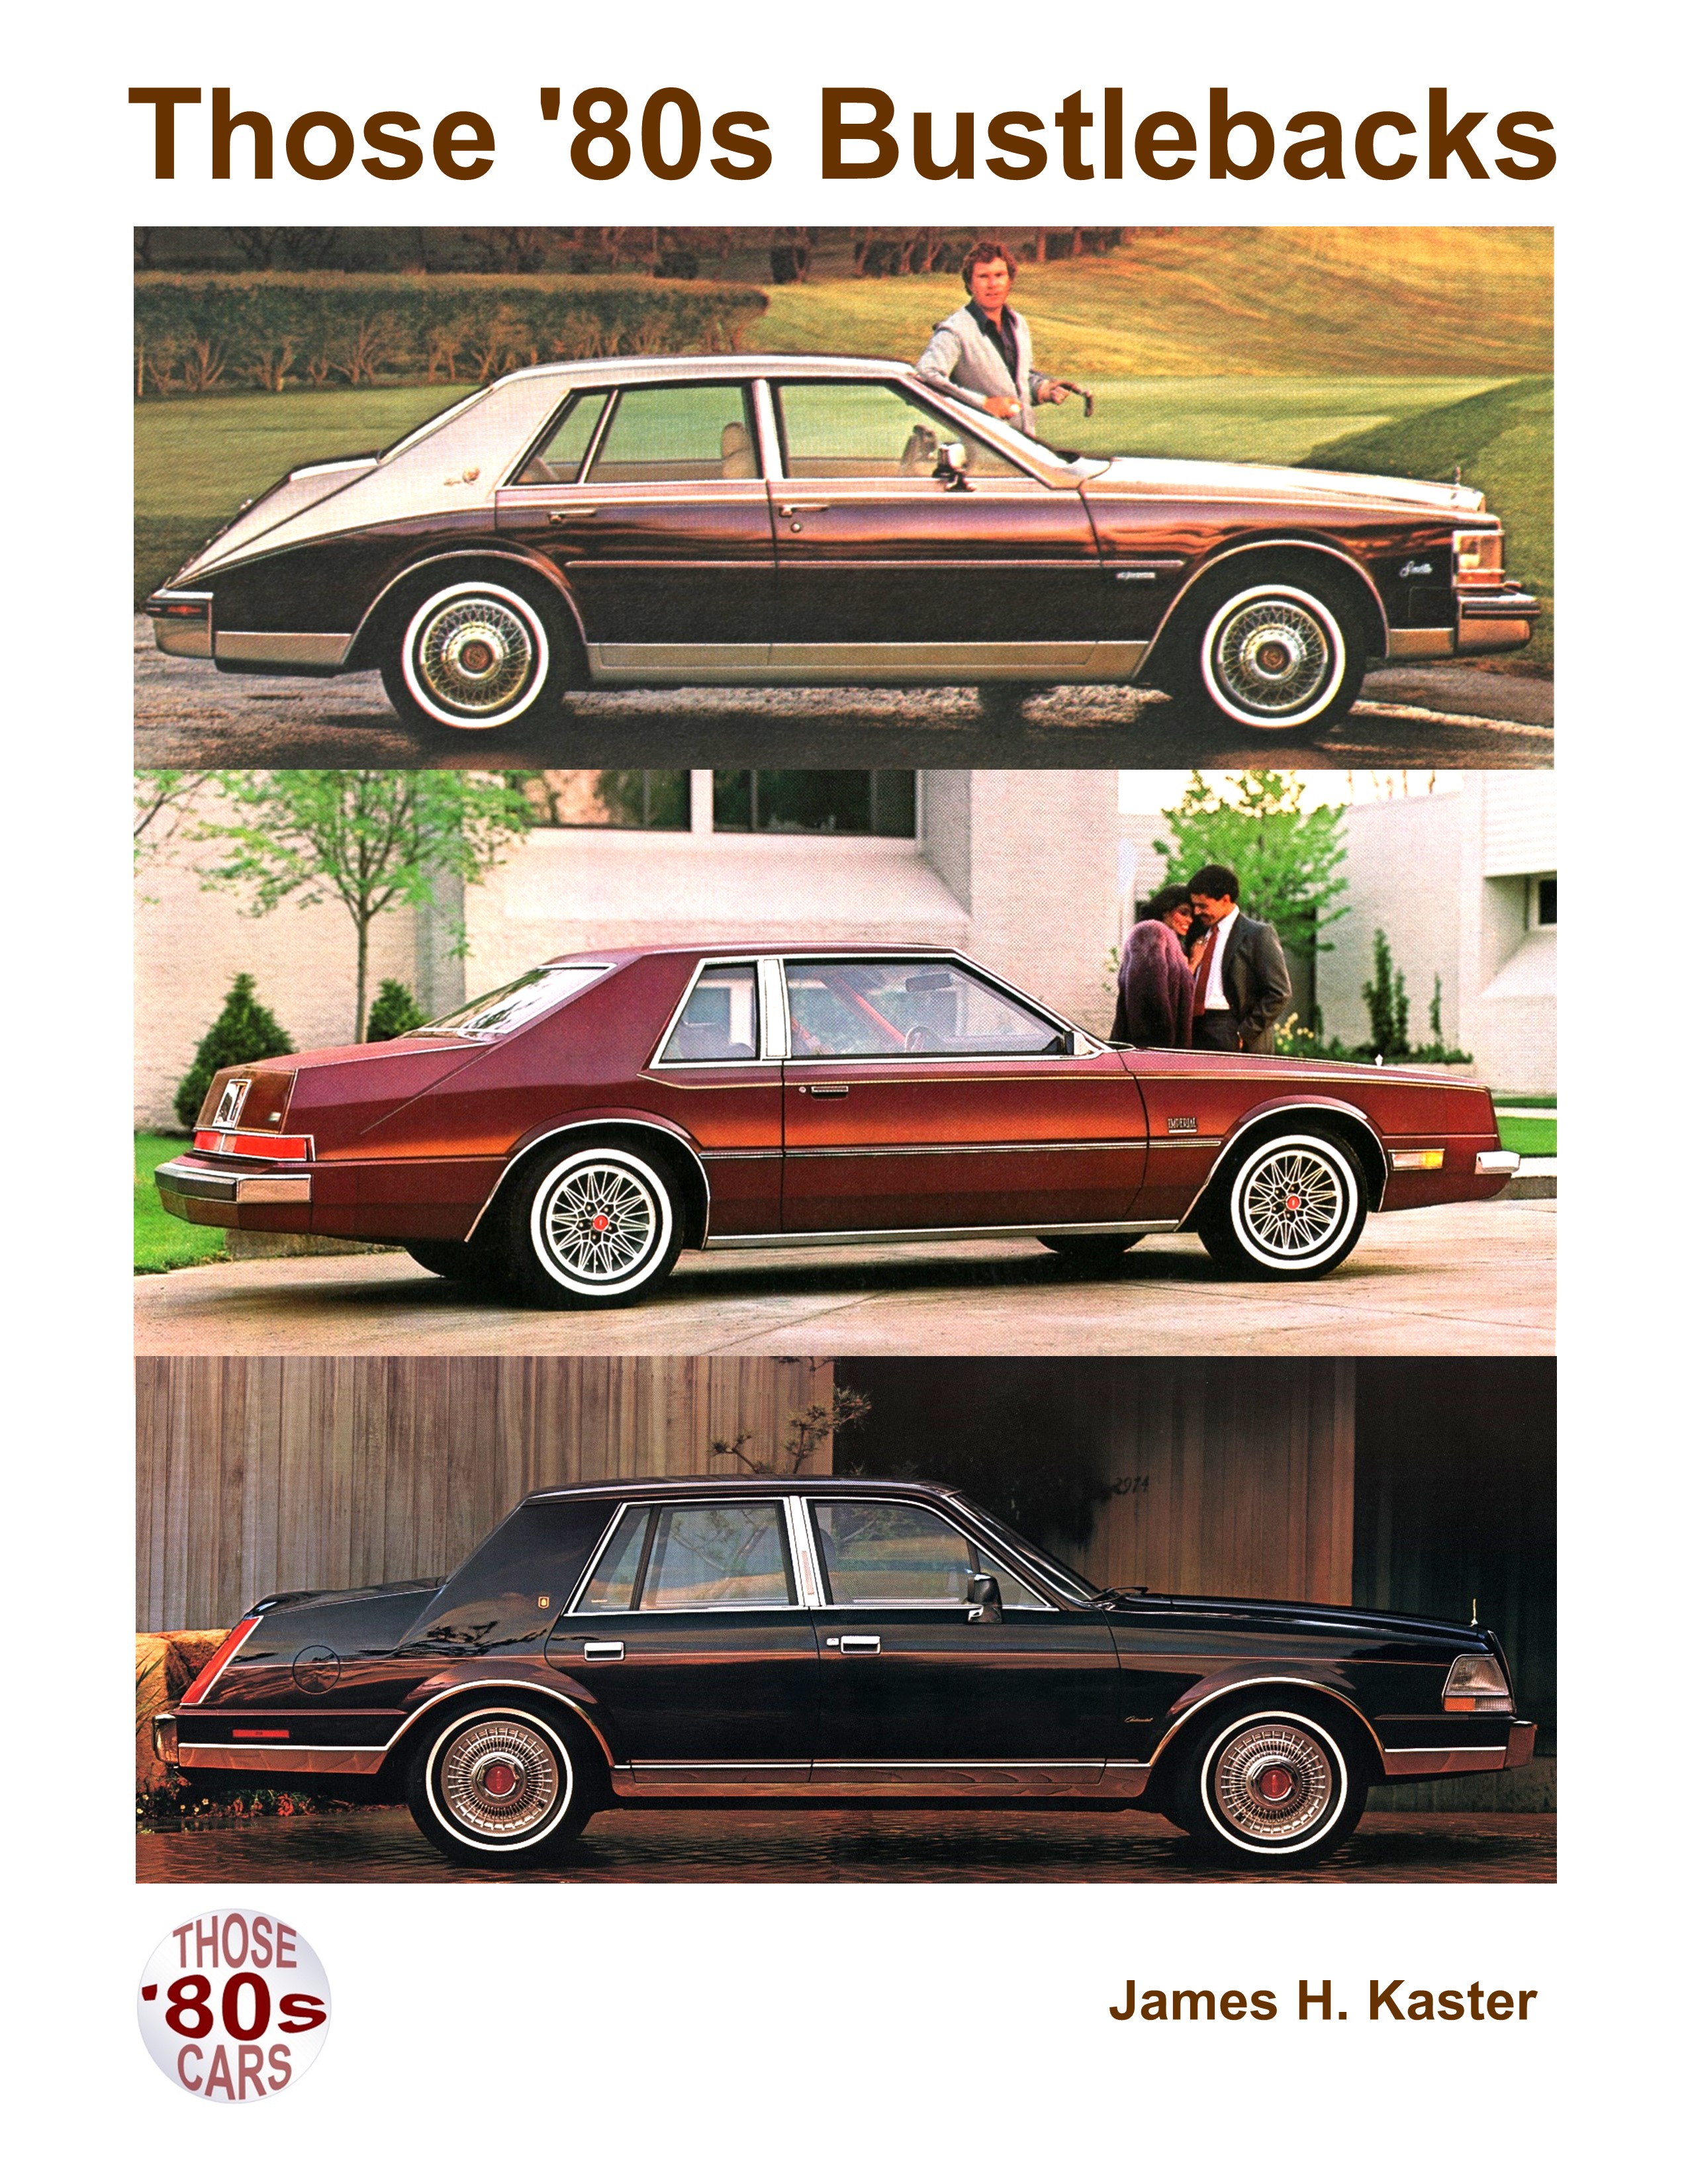
Lincoln Versailles - 1977-1980
Mercury Cougar XR-7 - 1980-1982 5th generation
|
|
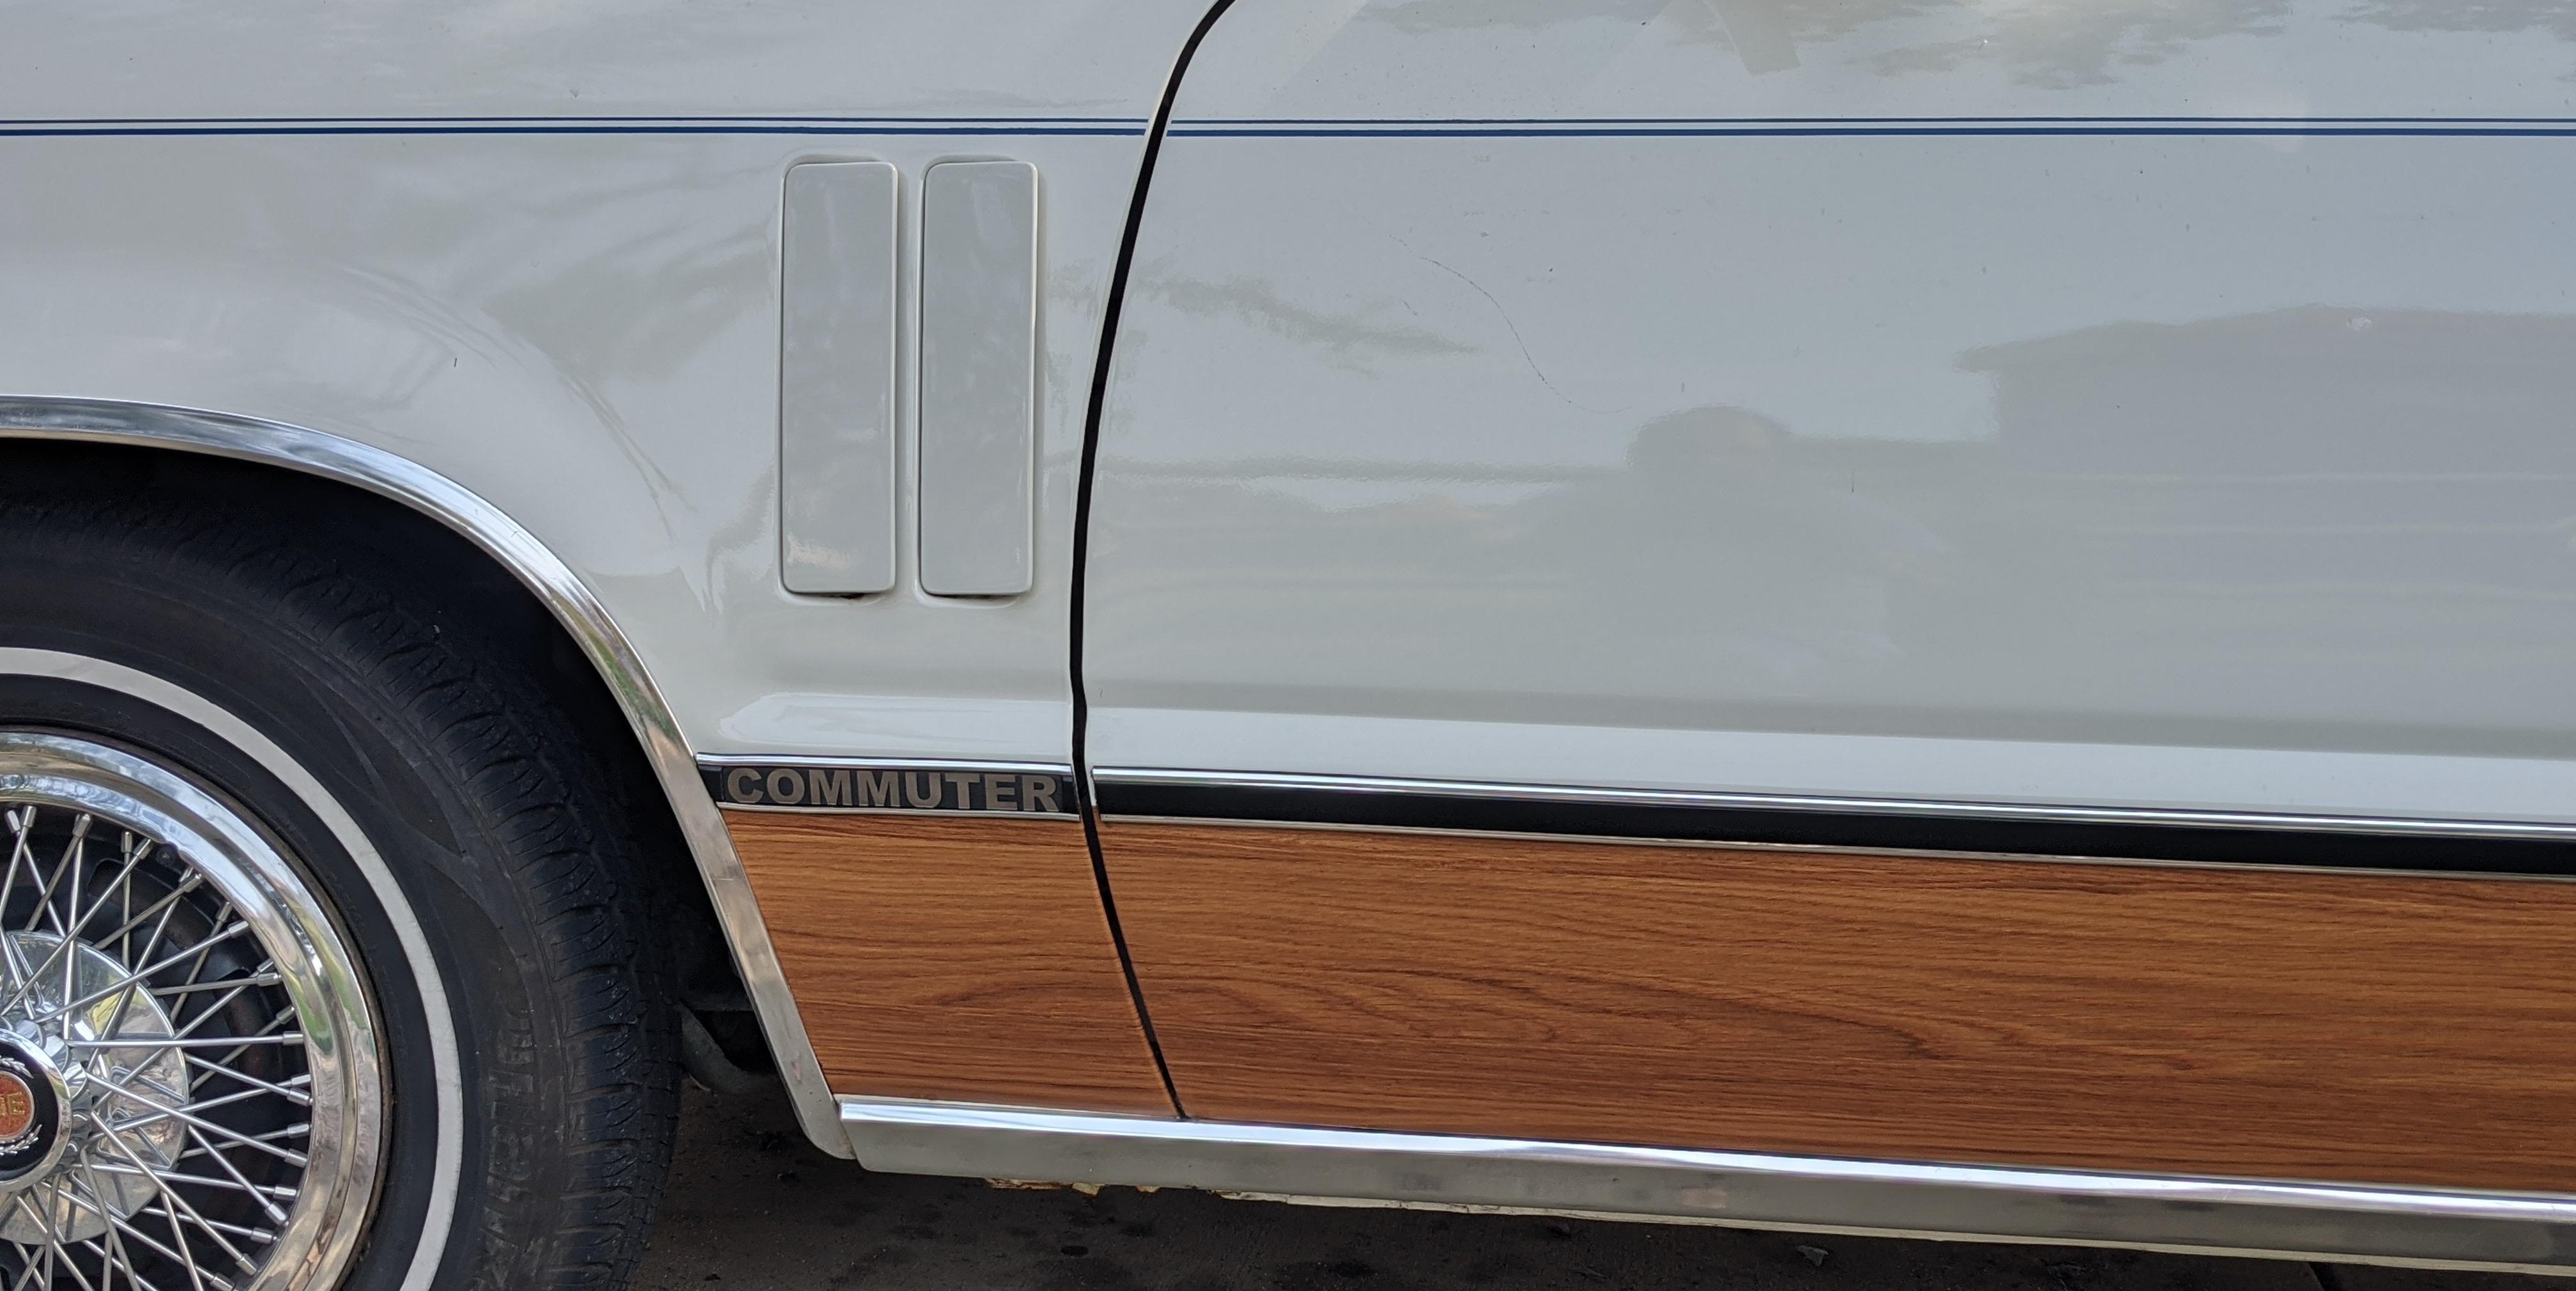
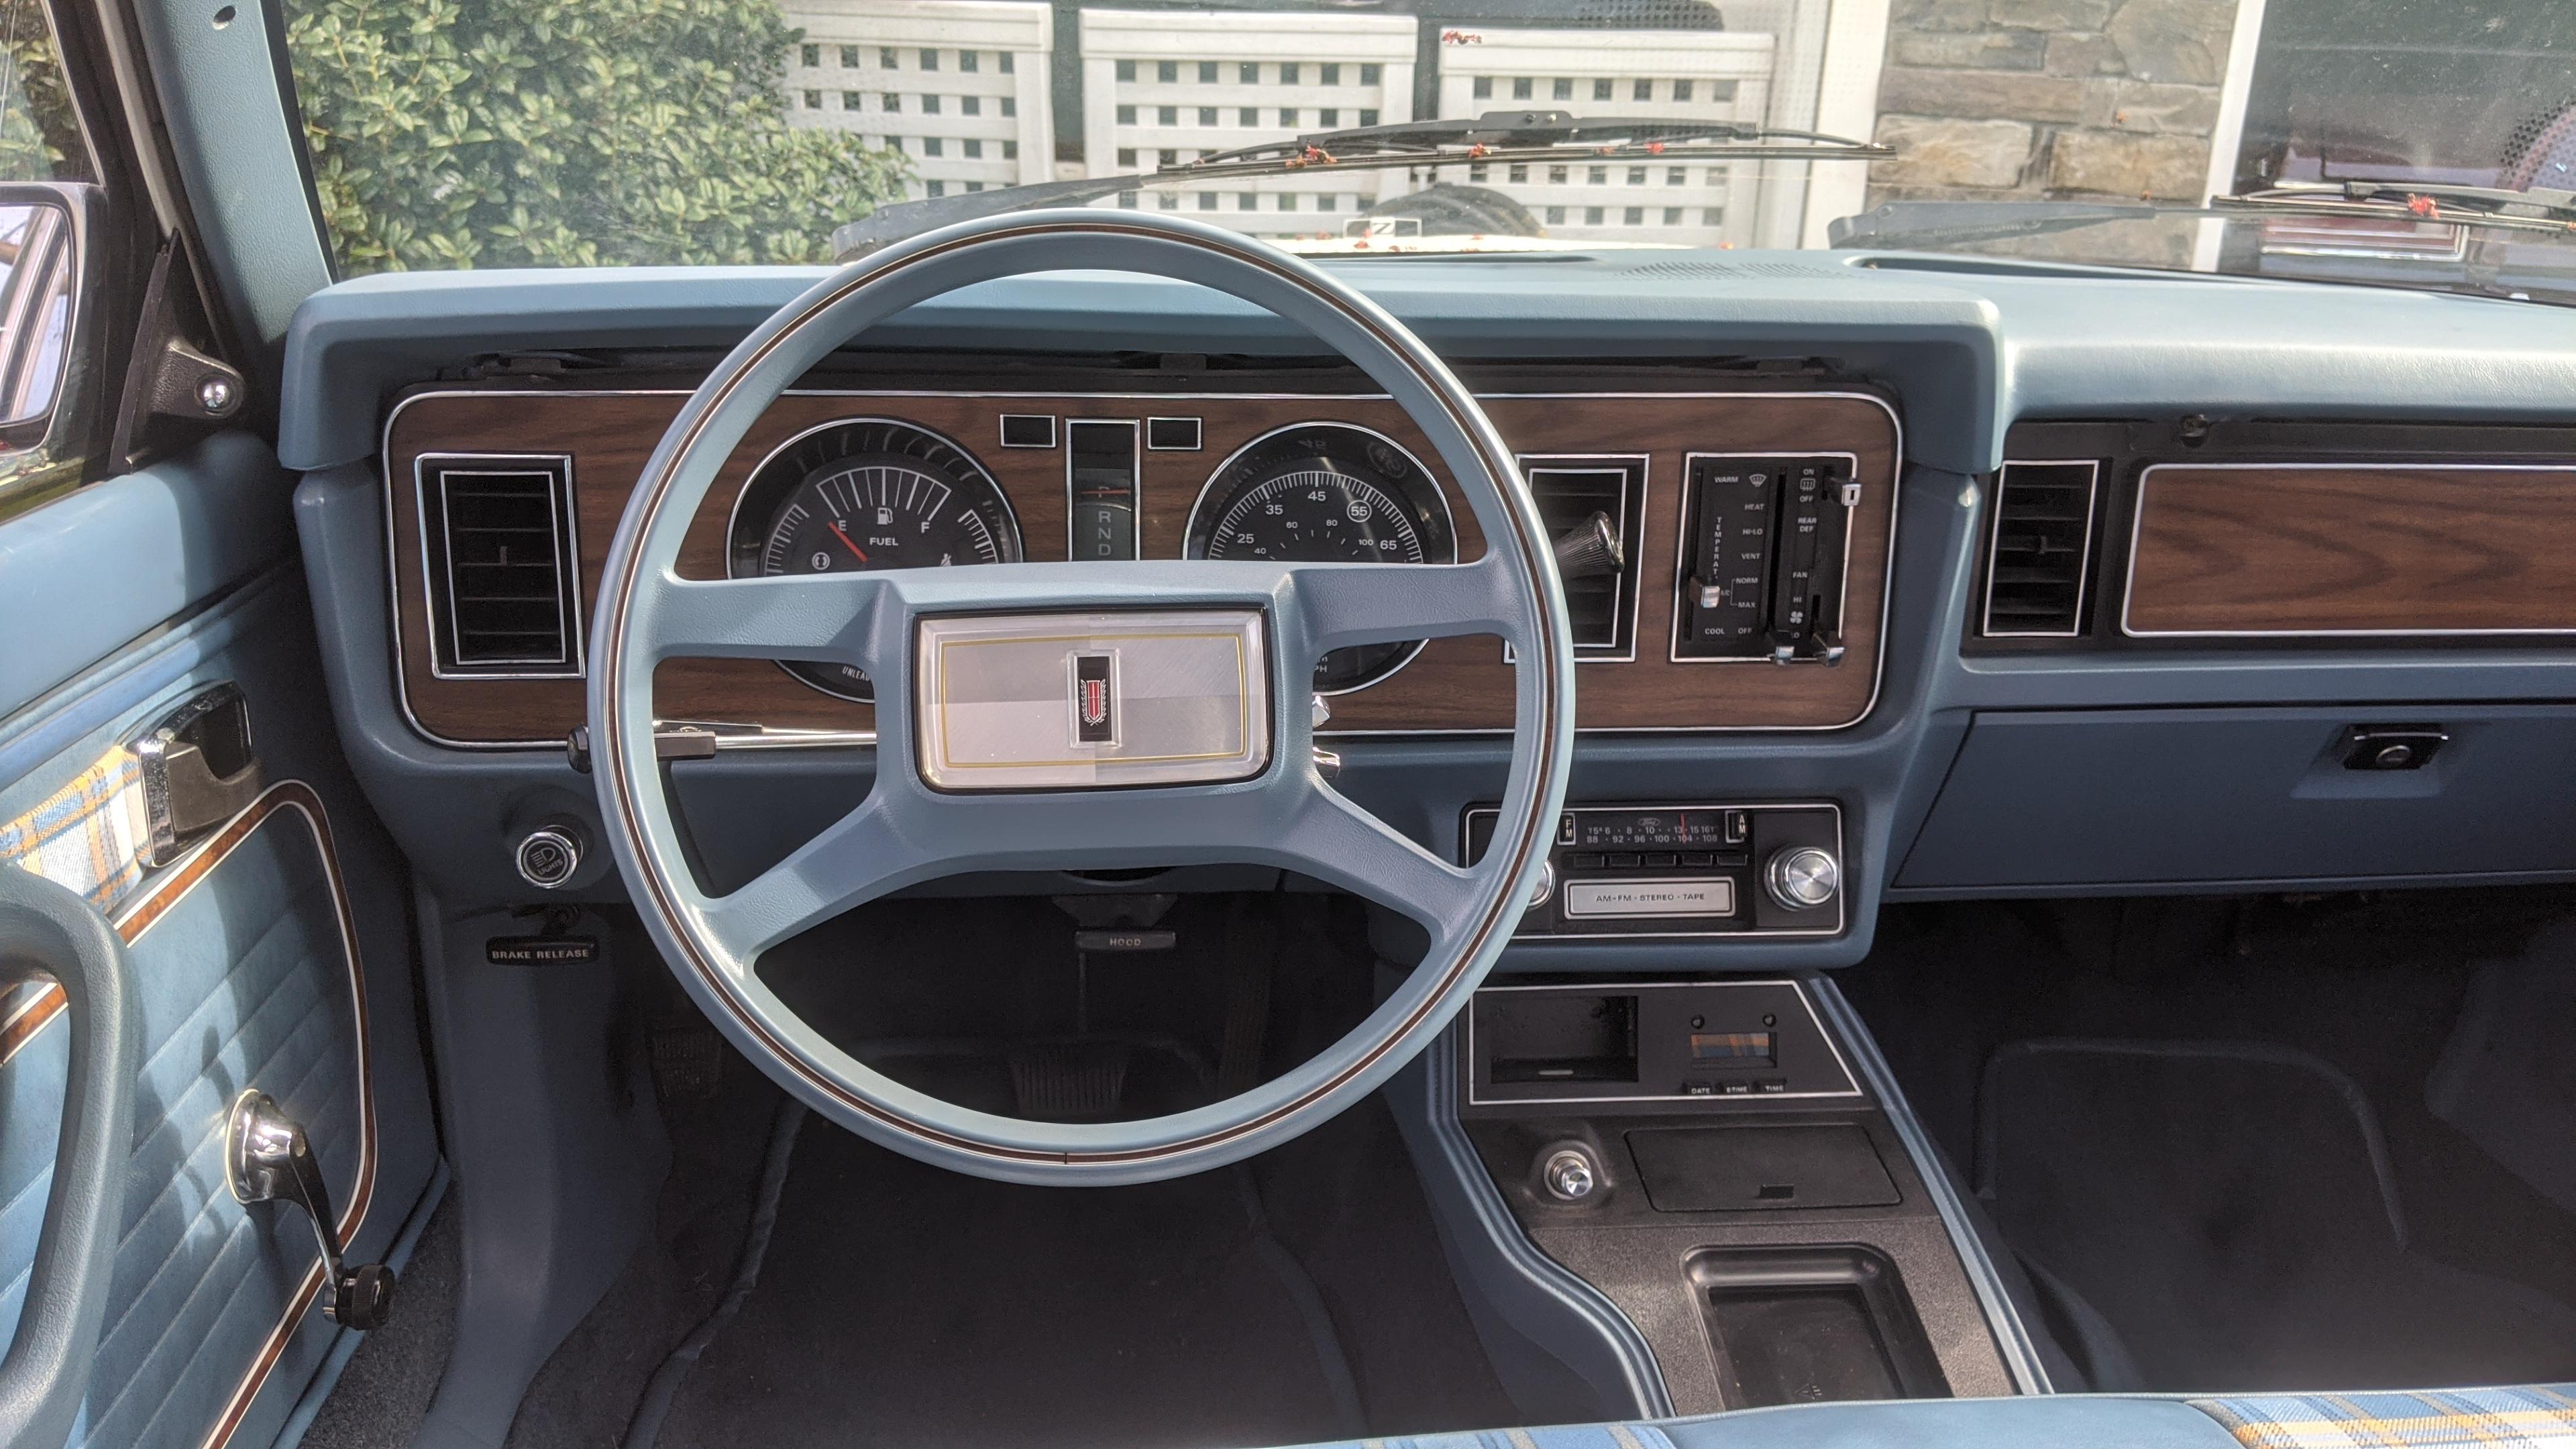
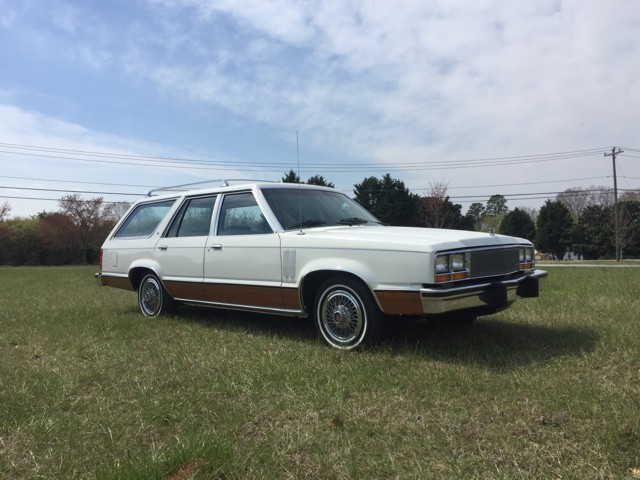
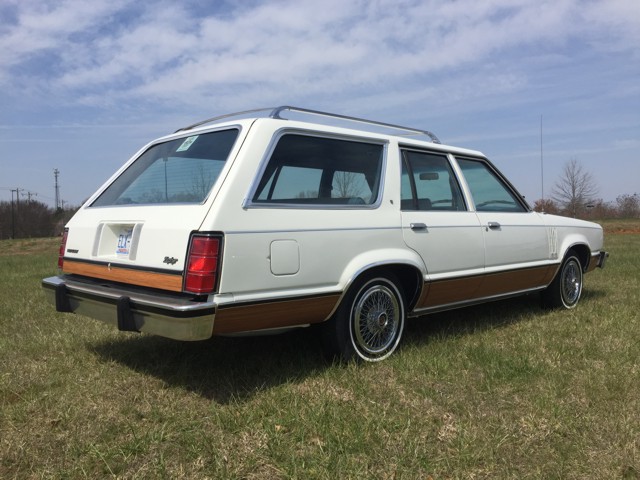
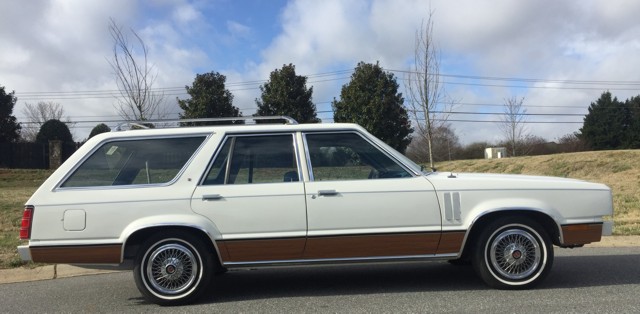
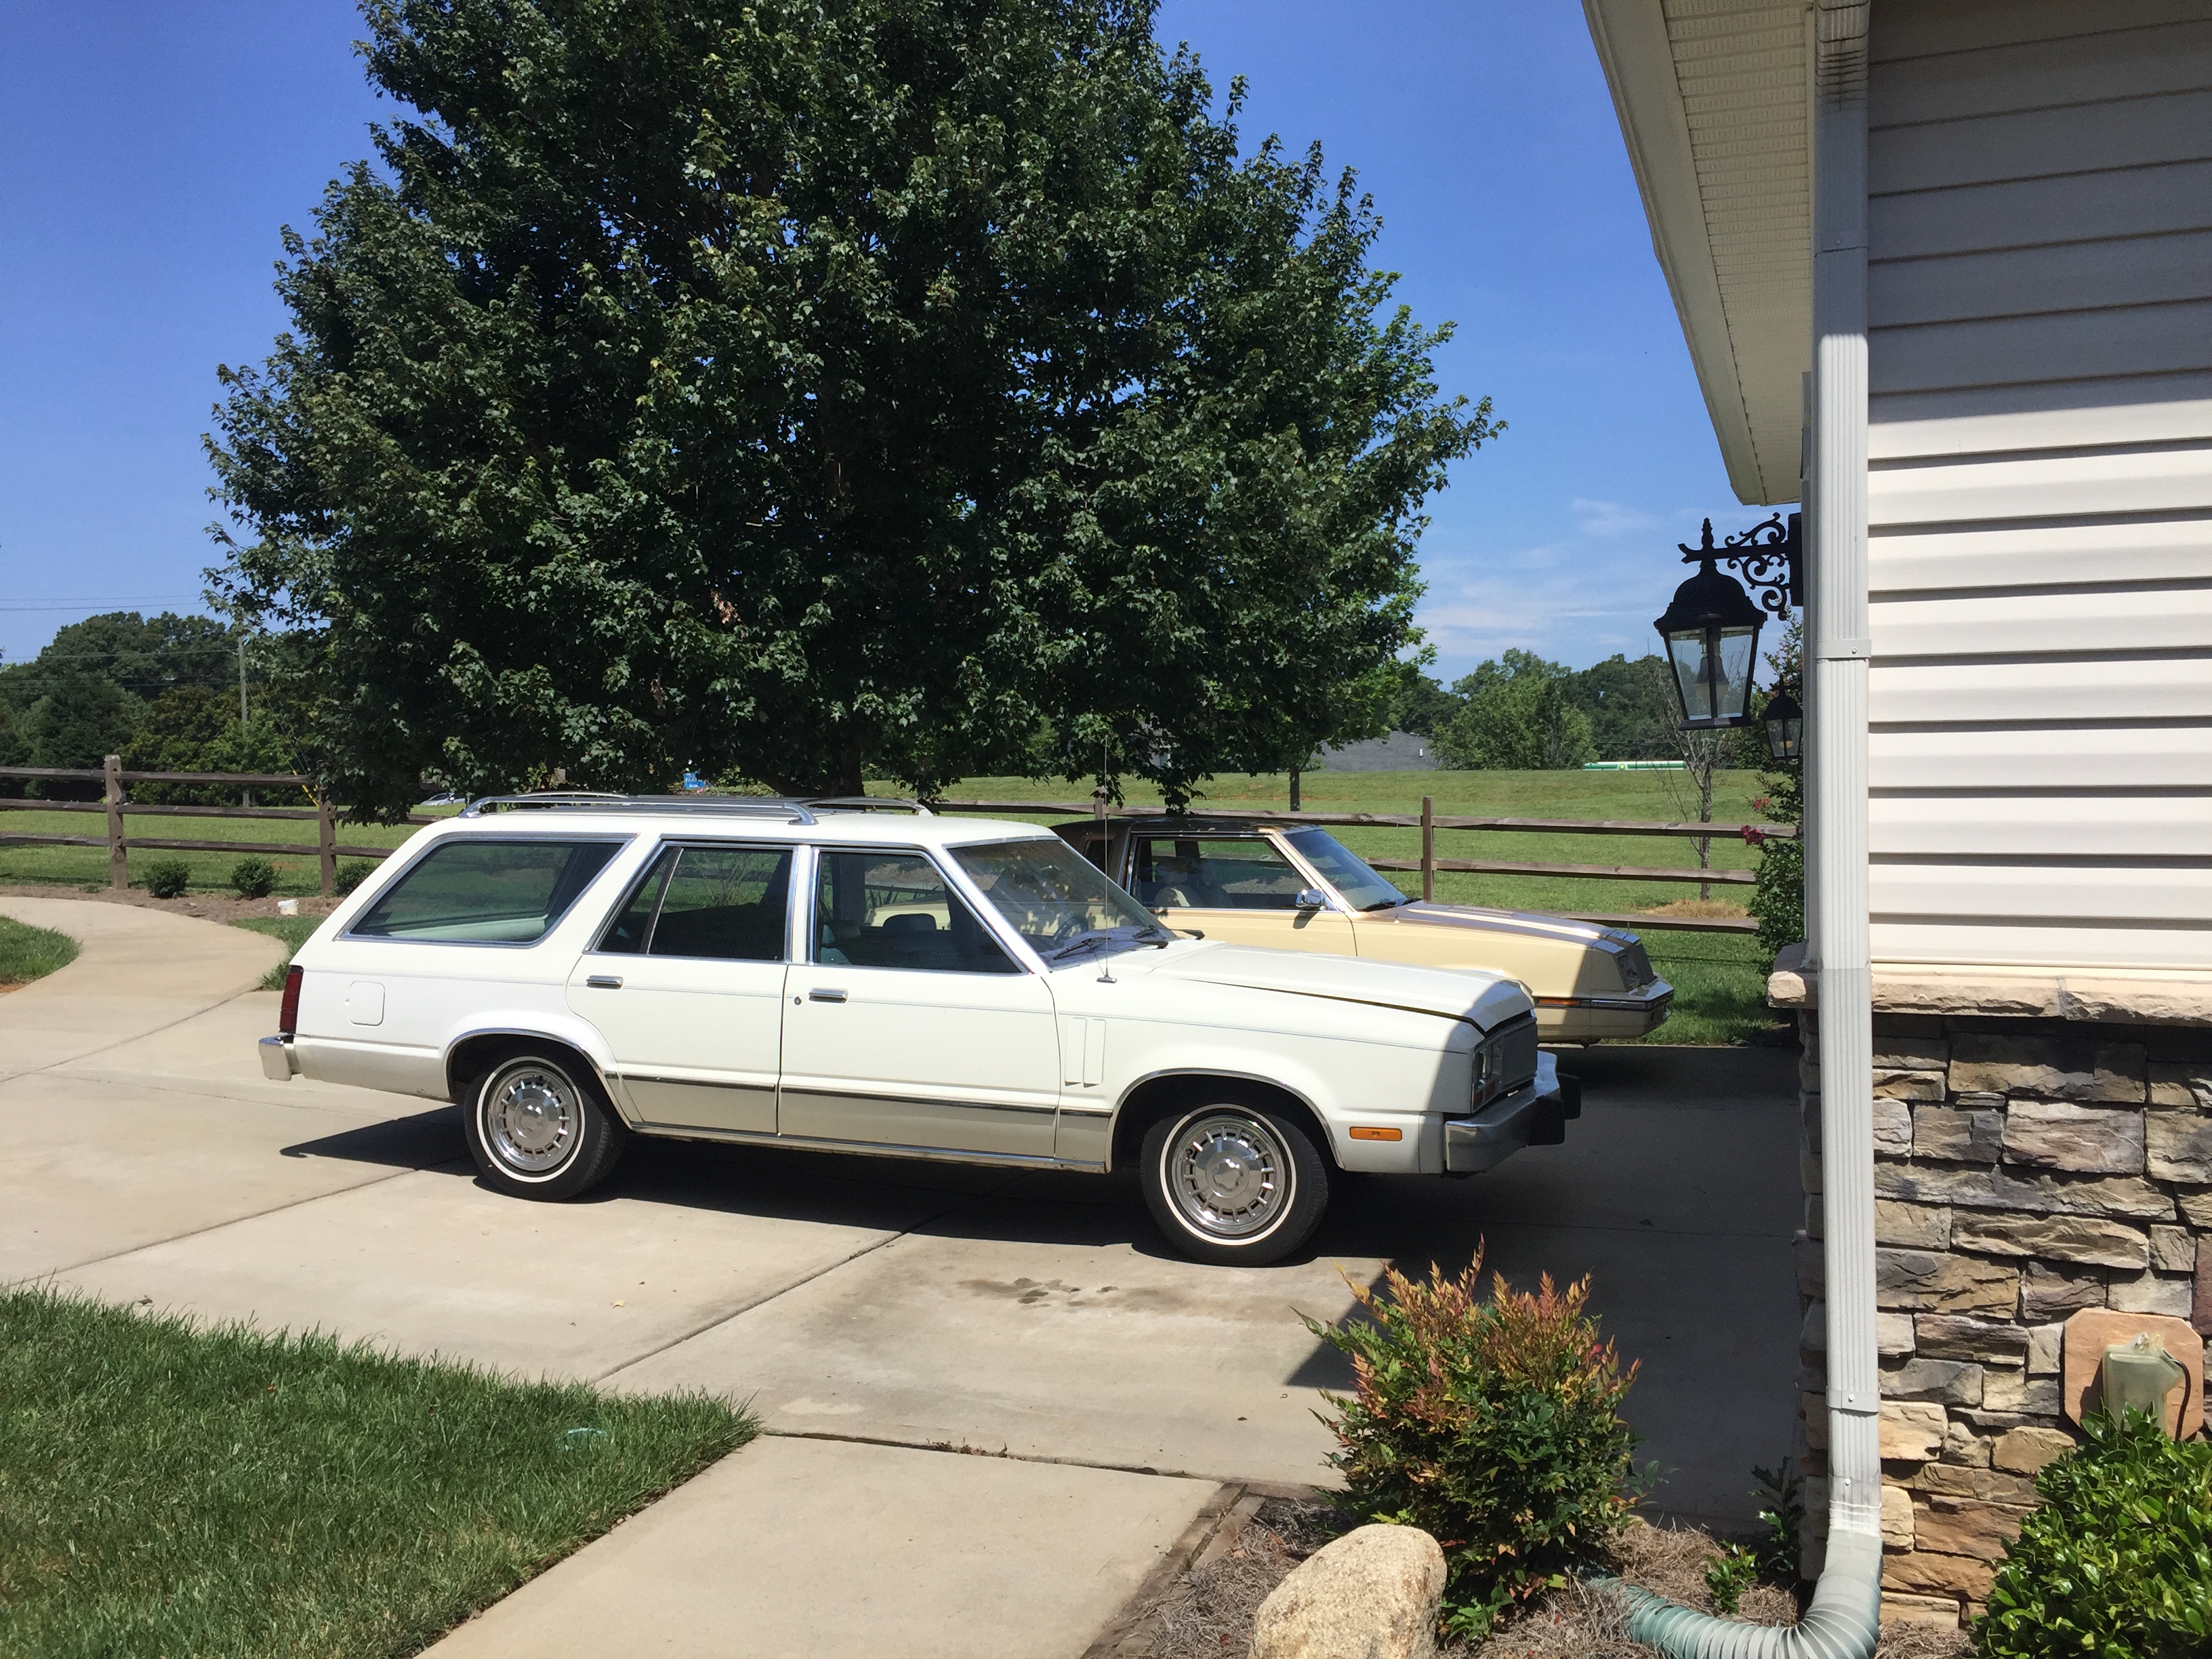
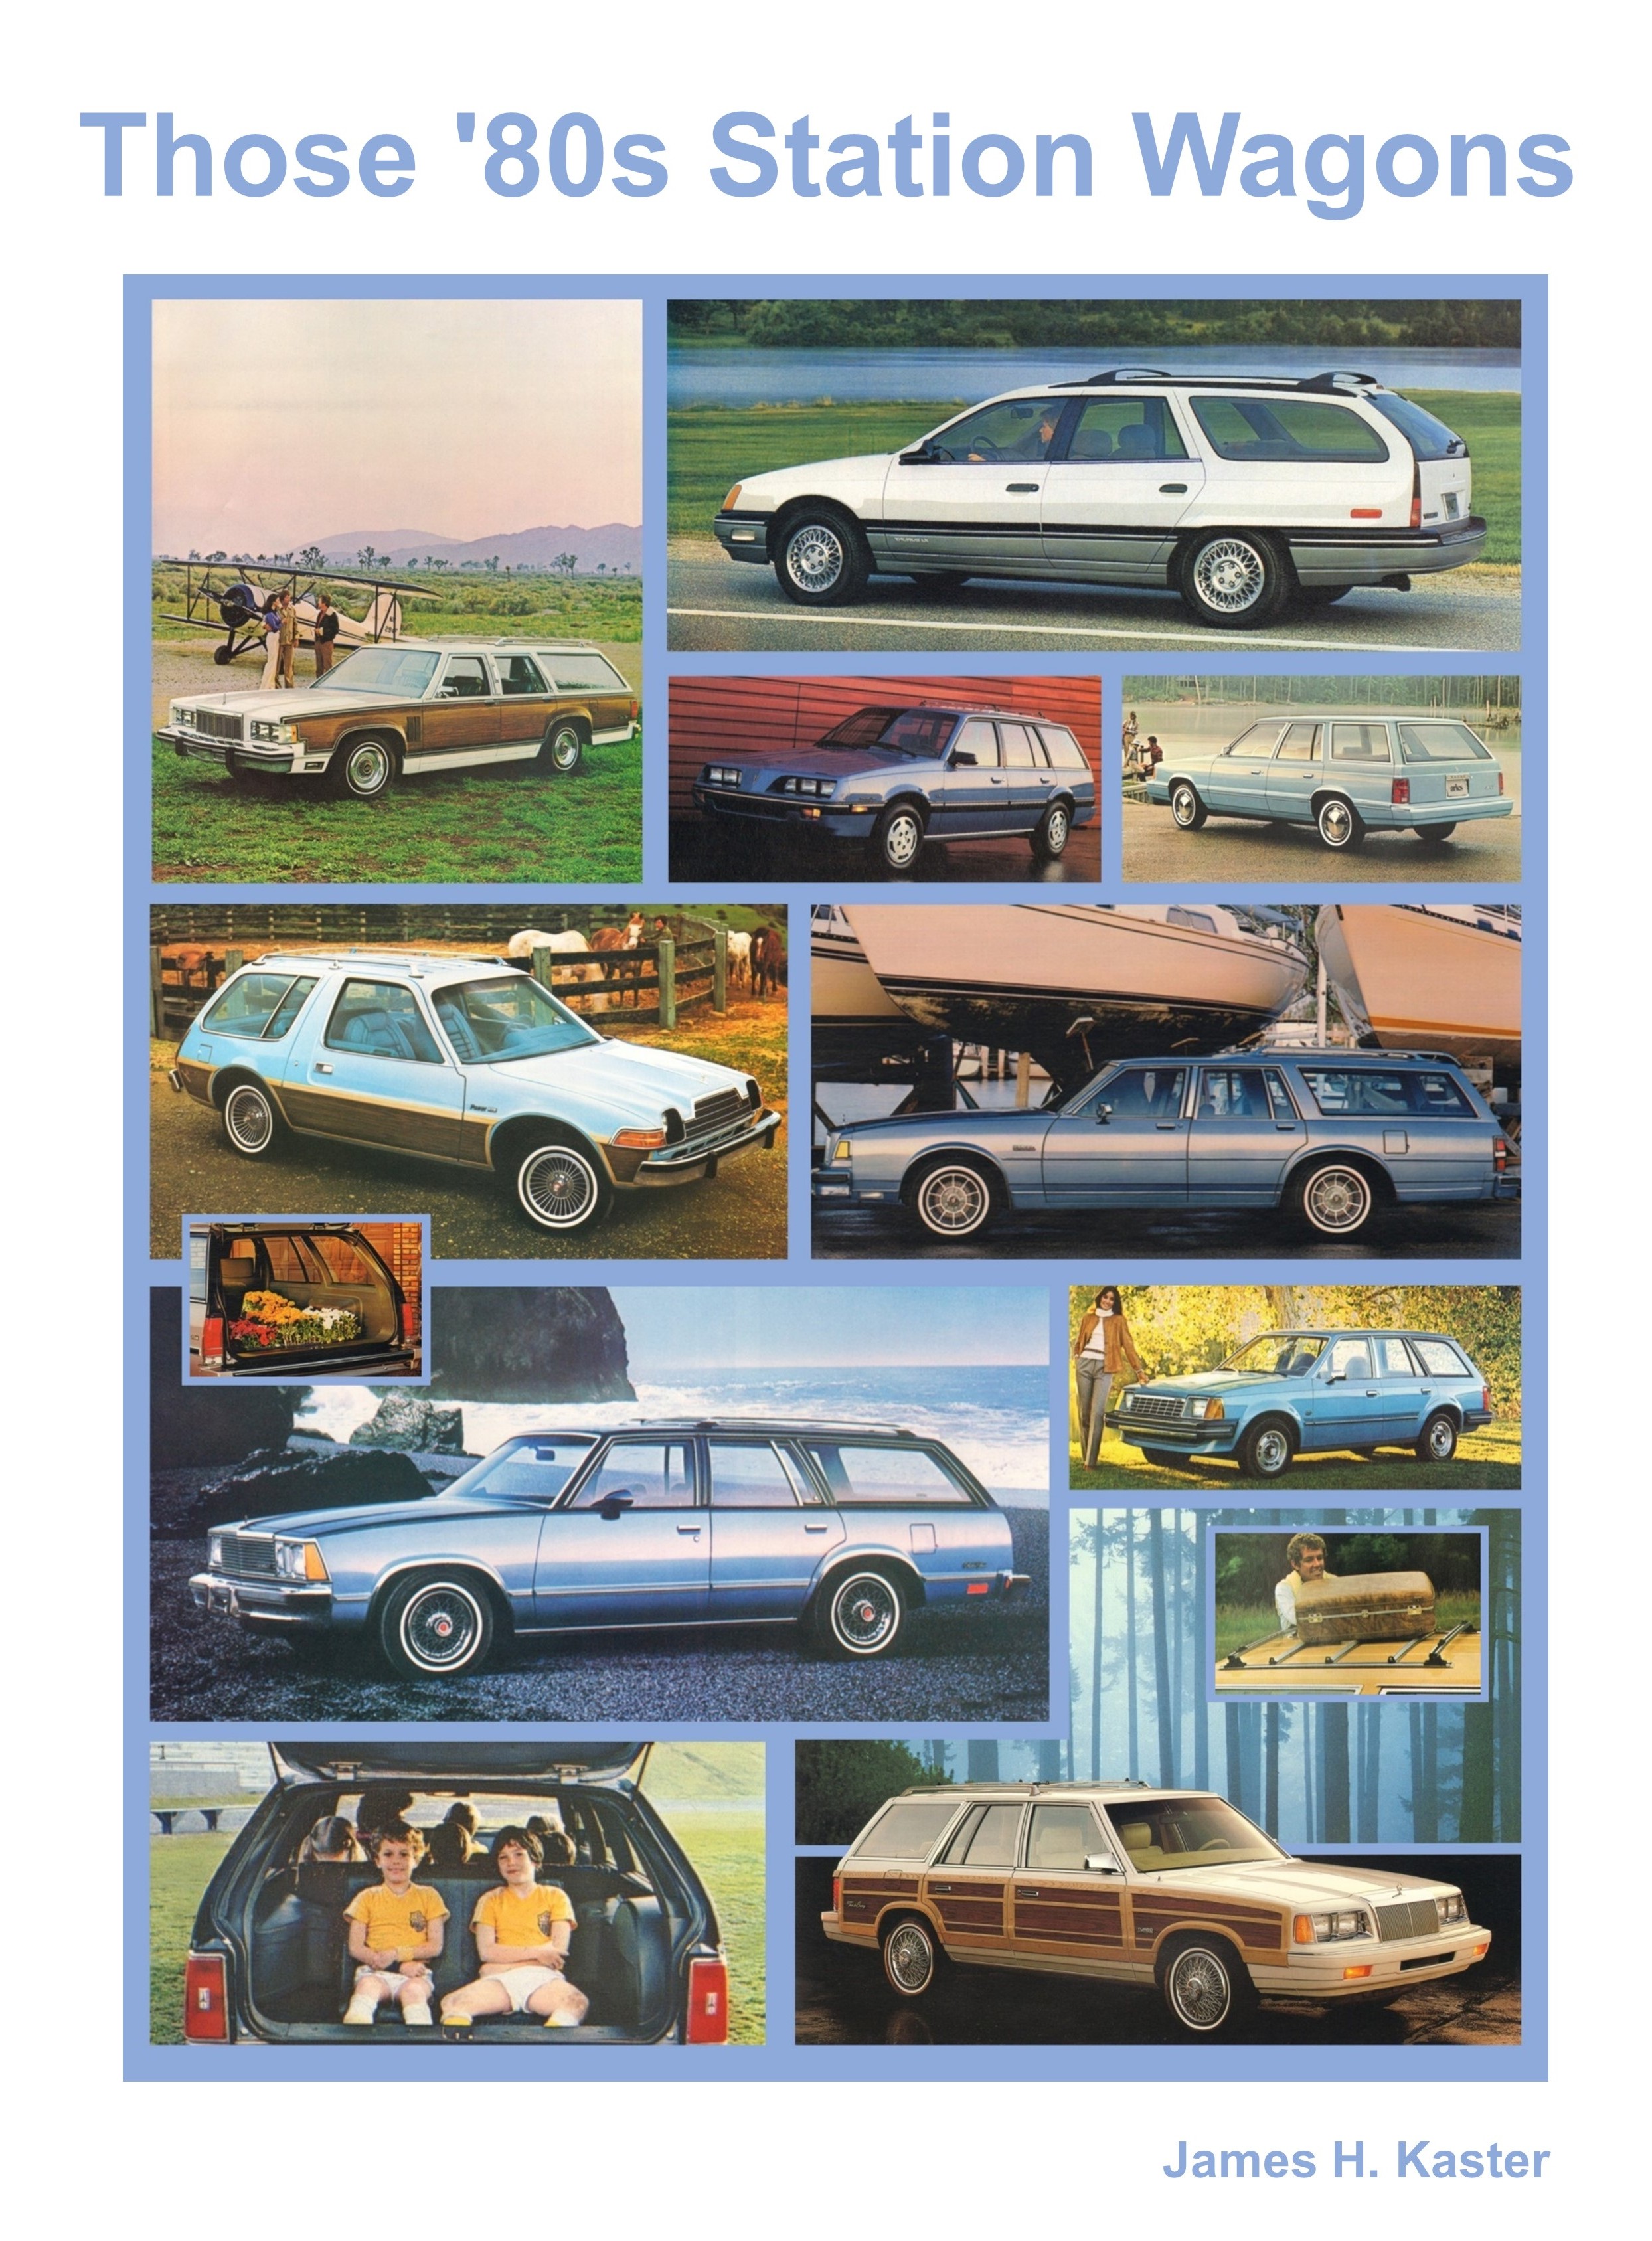
1981 Mercury Zephyr Wagon October 2020 - Added custom Commuter badges
March 15, 2020 - Swapped in a new luxury steering wheel, replaced the slightly cracked dash pad and replaced the hatch's luggage straps with thicker metal and created a break in them so the carpet can be easily folded up to get to the spare tire.
December 12, 2019 - Engine rebuild completed; new harmonic balancer, spark plugs, thermostat & oil pump; paint engine blue October 21, 2019 - Put car in shop for an engine rebuild. August 25, 2019 - New oil sending unit.. February 20, 2019 - New catalytic converter and muffler. March 2018 - I completed bumper restorations and thus the exterior is done. The car is now completely restored and CUTE!
February 2018 - During the month, I applied 3M DI-NOC (wood grain vinyl wrap) to the sides and back of the Zephyr wagon and added the body side molding. The bumpers have been removed for polishing.
January 28, 2018 - I replaced the hatch glass this weekend. In this pic, you can see the glass in its spot and waiting for the trim to be installed. You can also see how wonderful the paint job is; smooth, clean and shiny white paint. Now that the project is back on track, the next step is installing the wood-tone vinyl DINOC.
January 13, 2018 - Unfortunately, while installing the trim on the car after being painted, the left quarter/hatch window shattered. So, I'm tracking down a replacement. Otherwise, the rest of the trim and the interior door panels are all reinstalled except the wheel lip moldings and front side marker lamps. I need those off until after I install the wood-tone DI-NOC trim. This is the target look for the car.
January 8, 2018 - The wagon spent December in a body shop. I picked up the car from the shop and she shines like a brand new car.
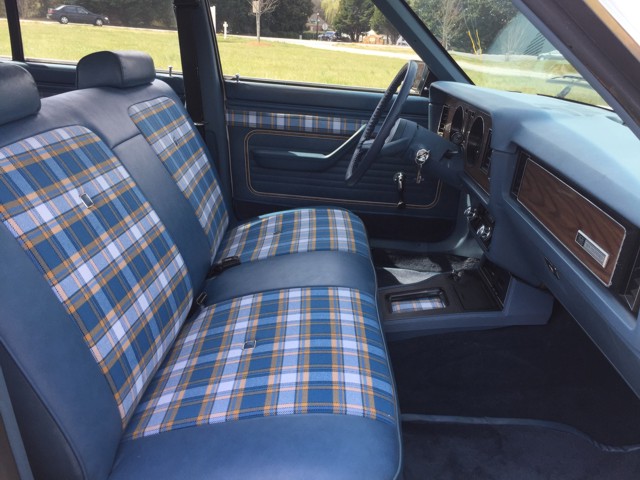
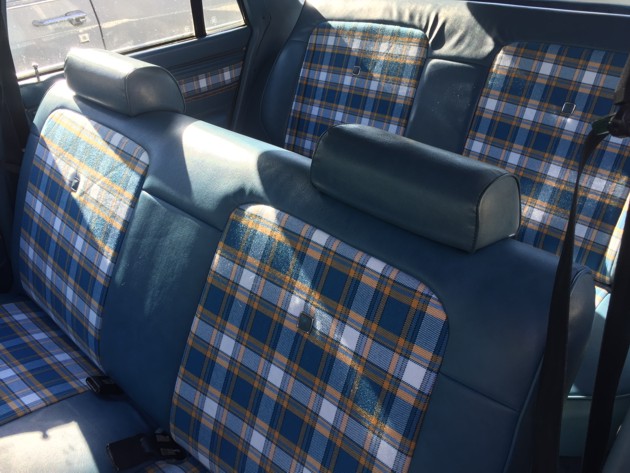
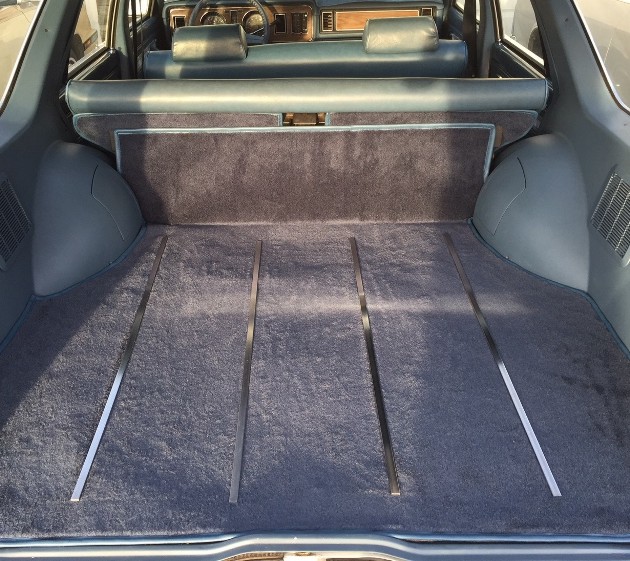
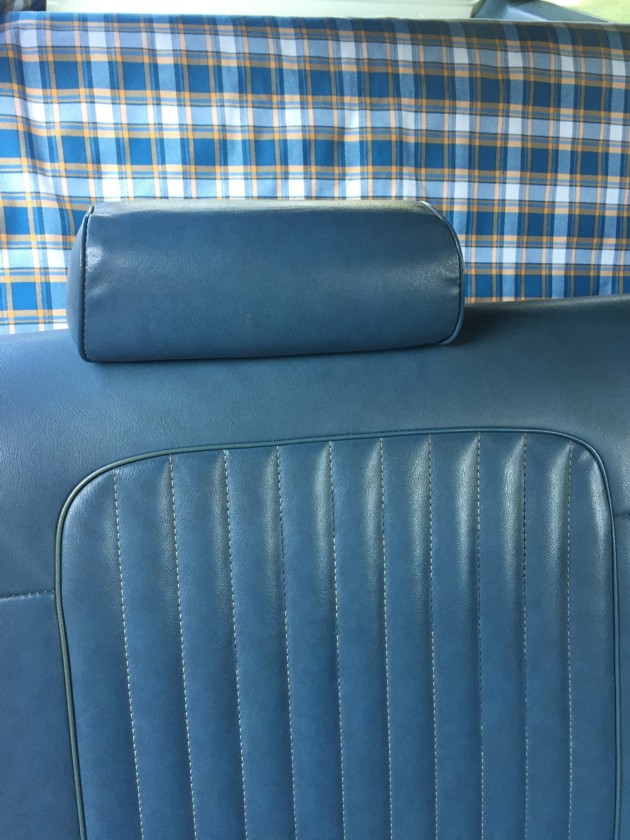
November 22, 2017 - New interior upholstery with plaid inserts is complete and hatch has been re-carpeted and I added load floor strips for a little extra bling.
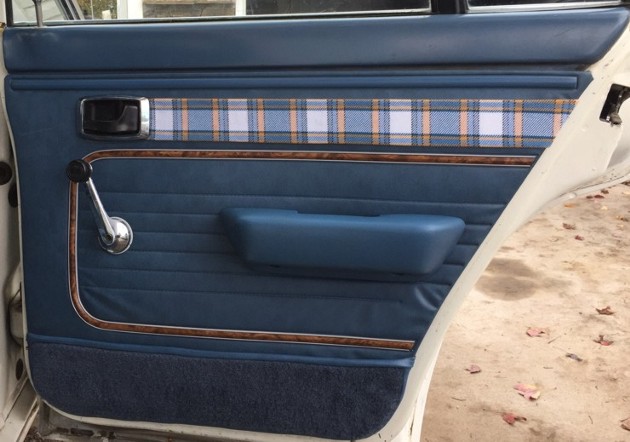
October 29, 2017 - Today, it has been a long and busy day concentrating on the door panels. I purchased my first sewing machine this week and used it to sew a vinyl edge around the carpet that I’ve added to the lower door panels as protective kick panels. They also double as map pockets. I also added a plaid scarf to upper door panels, extending from the door handle to the door edge. This matches the seat insert plaid upholstery that she'll get this week. Sewing seats is beyond my skills and she goes to the upholstery shop tomorrow.
Here you can see the plaid cloth draped on the backseat. The plaid will only go in the insert areas of the seat where the vinyl is pleated now.
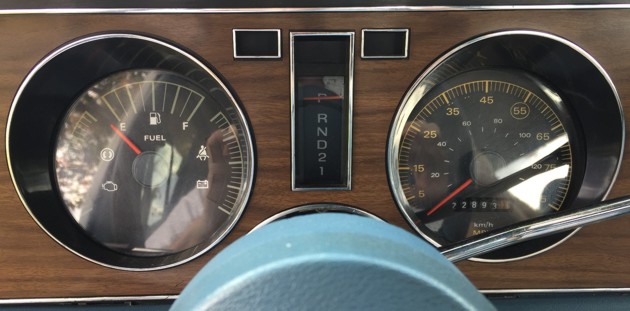
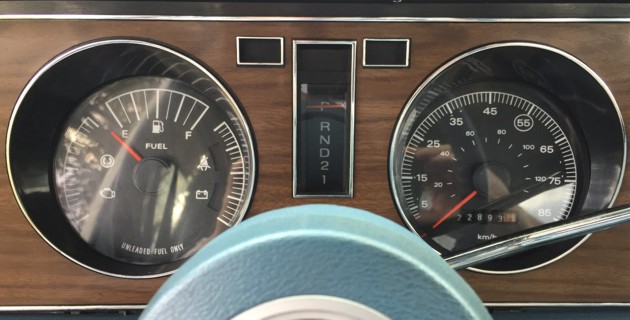
October 28, 2017 - I updated the gauges with new white on black vinyl graphics to overlay the very faded orange on black graphics that were becoming very hard to see.
Before:
After:
October 27, 2017 - The car became impossible to start. Replaced the distributor to fix this issue. Swapping carbs was just a coincidence as the fix. Car goes to the upholsterer on Monday. October 1, 2017 - The car has been hard to keep started for a week. I replaced the ignition starter switch, starter relay, ignition computer and coil. It's looking great under the hood with all the replaced components. But it didn't solve the problem. I reinstalled the original carb and the car is running fine now. I also added a leather wrap in the steering wheel. Looks darn good! September 24, 2017 - Repaired parking brake light switch. Car started then died and will not start again. After a few attempts to start the car, the starter stays engaged even when the ignition is off and the key is removed from the ignition. I disconnected the battery. Ordered the following: new ignition module (EEC), ignition starter switch, starter relay, positive battery cable and coil (not related). September 22, 2017 - Replace A/C compressor and clutch, drier, all belts, negative battery cable, and power steering hose. Recharge A/C. September 8, 2017 - Over the past few days, I installed new carpet in the passenger cabin area. I had to cut 11 holes and a 12th big hole for the consolette. It looks night-and-day improved; a huge, huge difference. I drilled 4 more holes to secure the mini-console and put the seats back in the car. Then I prepped painted and installed all the remaining interior plastic pieces. One piece, interior d-pillar, very large, has 5 screws and a snap, well.. this pillar didn't have 2 holes drilled in the metal. Whatever punch or assembly process failed to make those 2 holes so I had to drill them. Now all 5 screws and snap hold it in place as it should have when it left the factory. All that remains for the interior is re-upholstering the seats.
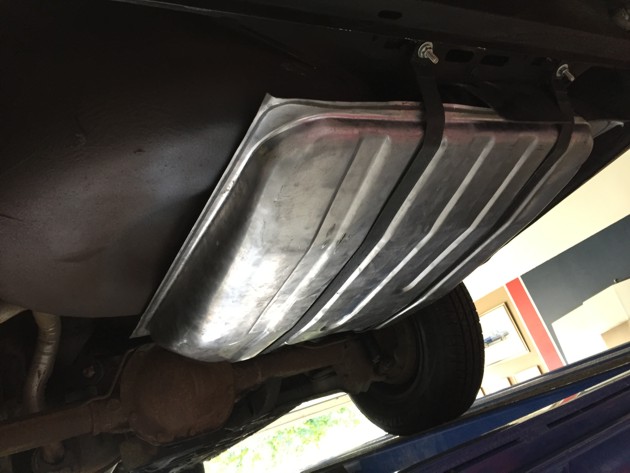
September 4, 2017 - Added hot wire for map lights on the dome/map light combo and new wires for new rear speakers. Painted new speaker grilles, interior rear quarter panels, various upper plastic pieces in the car and the dash pad. Reinstalled headliner. September 3, 2017 - Replaced gas tank and detailed under-carriage area in the tank area.
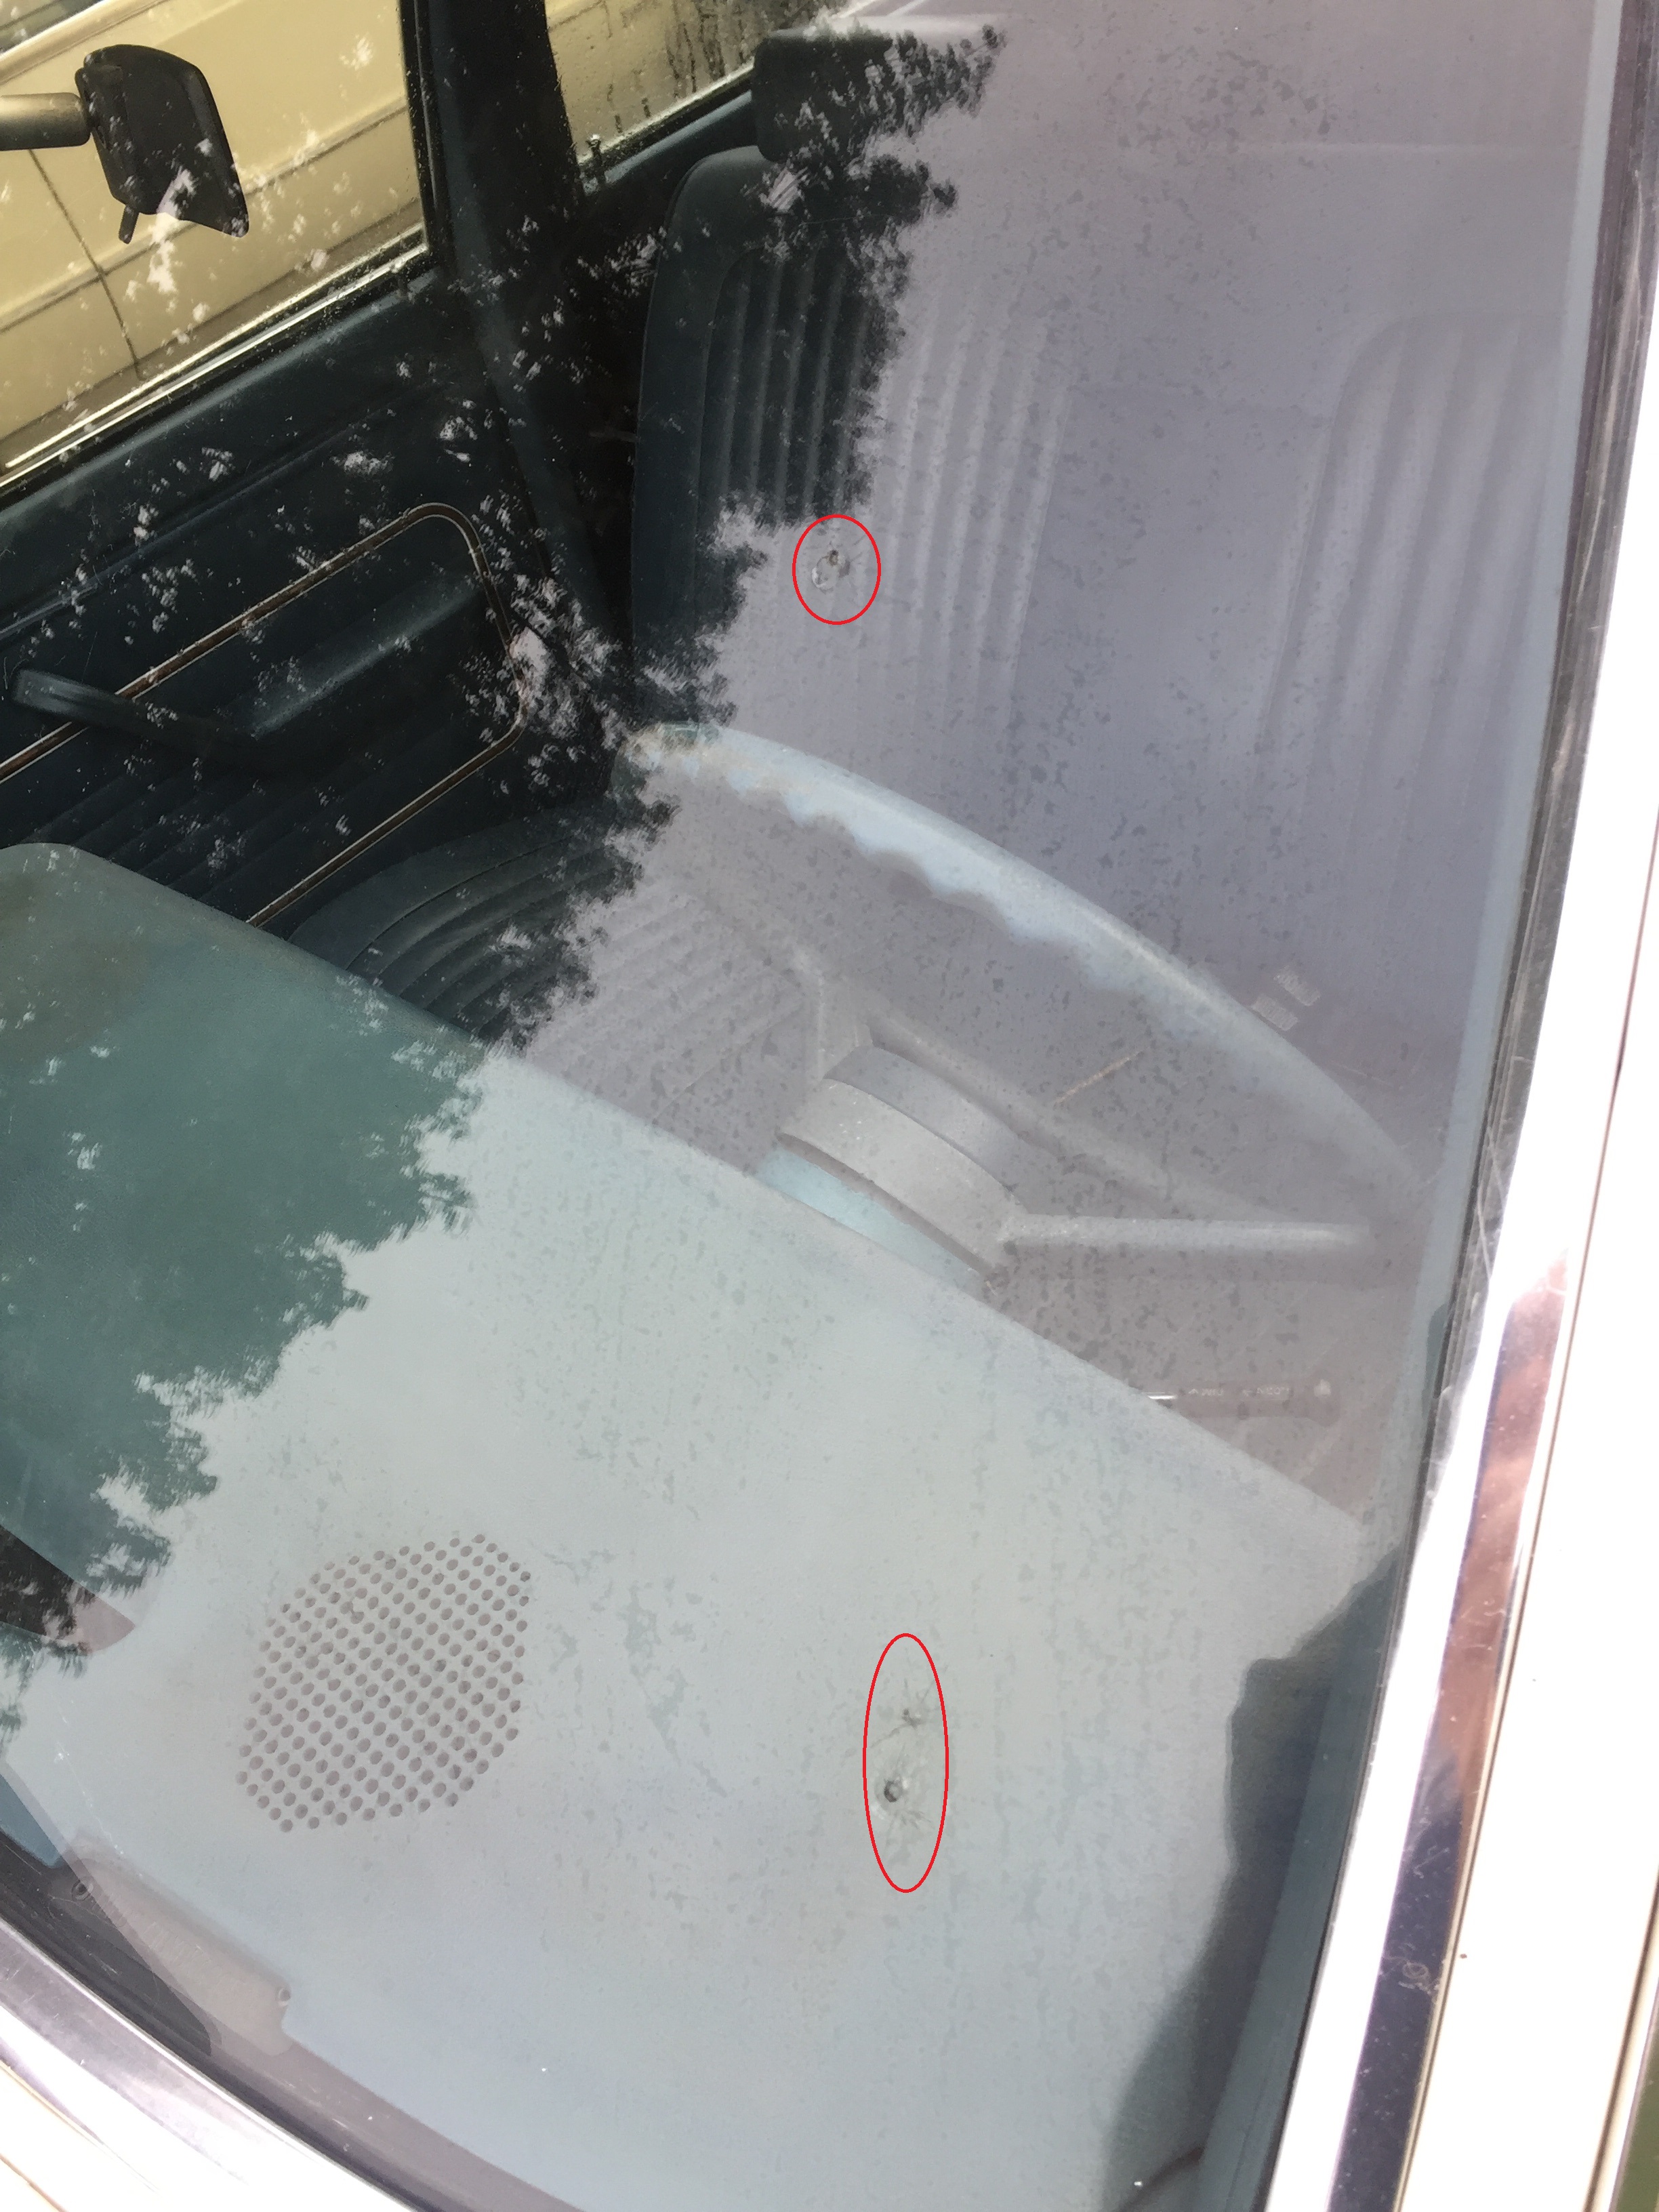
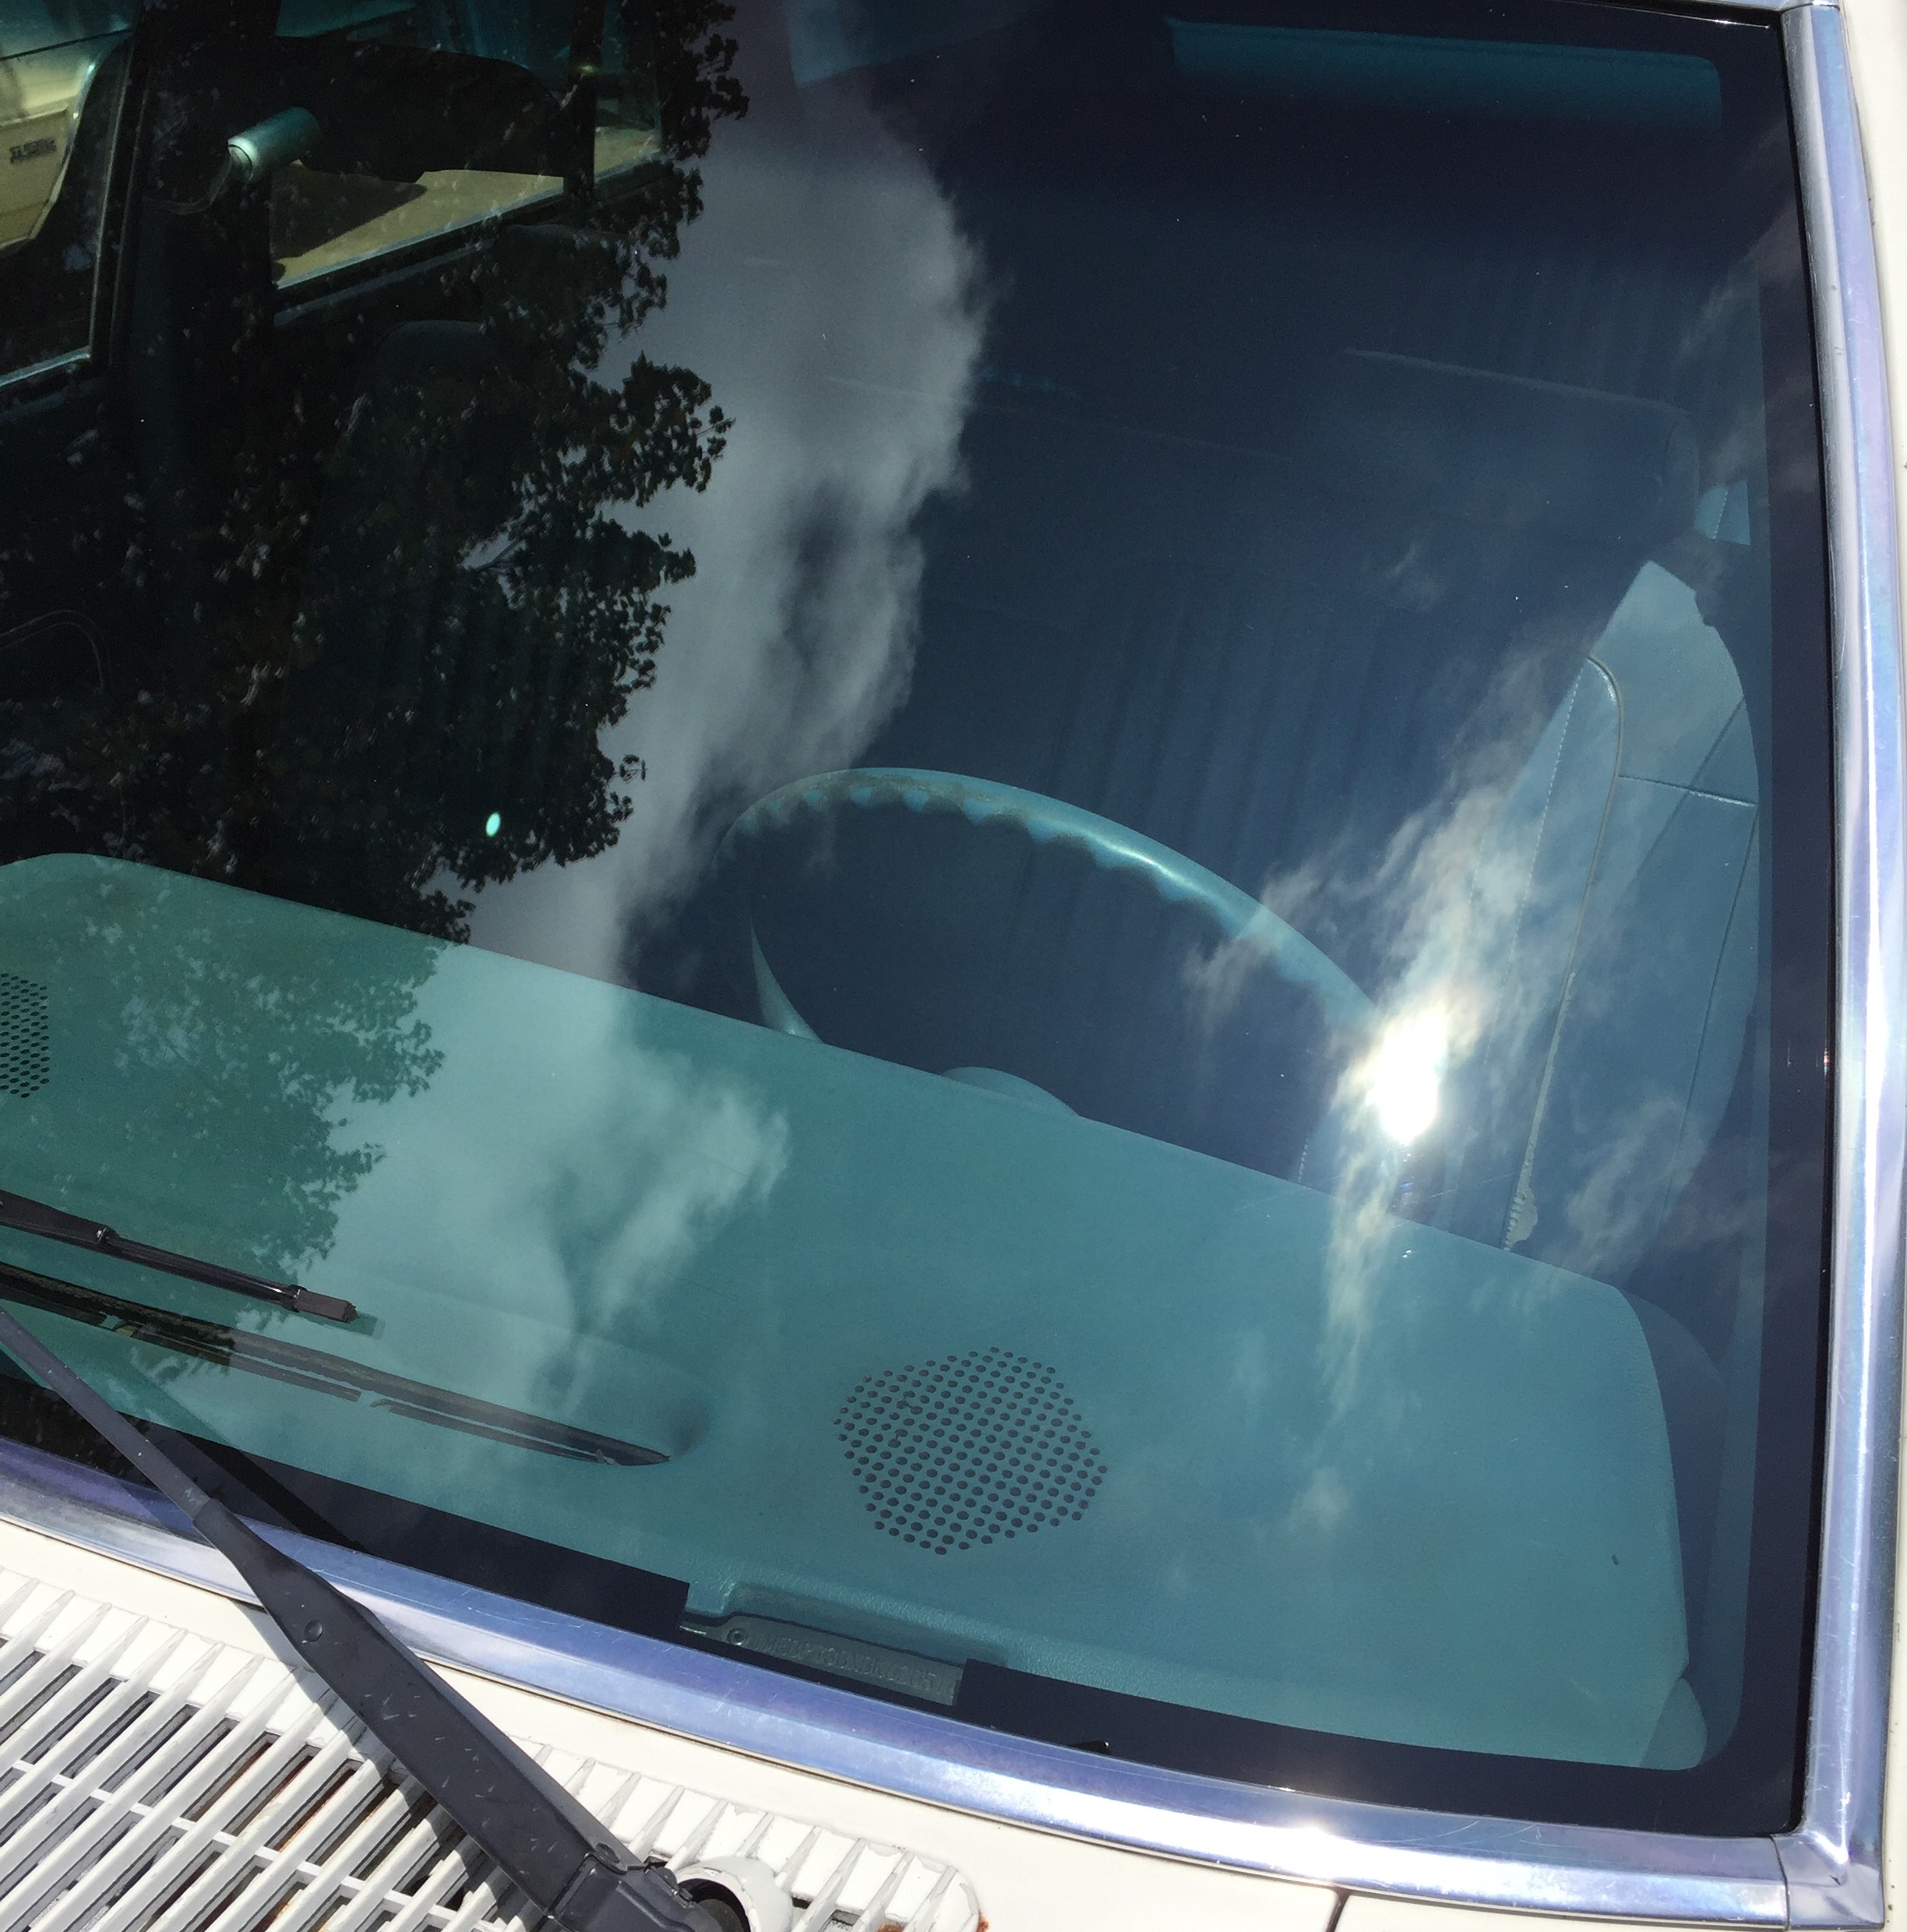
September 2, 2017 - I removed all interior plastics and headliner in prep for painting and cut larger hole in rear quarter panels for new speaker and grill that fit in the hatch of fox Mustangs. Also re-gapped spark plugs using a new tool and adjusted curb idle. Both made a noticeable improvement in smoothness. August 25, 2017 - Replaced timing chain and sprockets; new water pump, thermostat and fan clutch, new air pump August 16, 2017 - Replaced carb and EGR valve. Last major mechanical work will be replacing timing chain. August 15, 2017 - Replaced windshield; original windshield had 3 large stars, supposedly repaired.
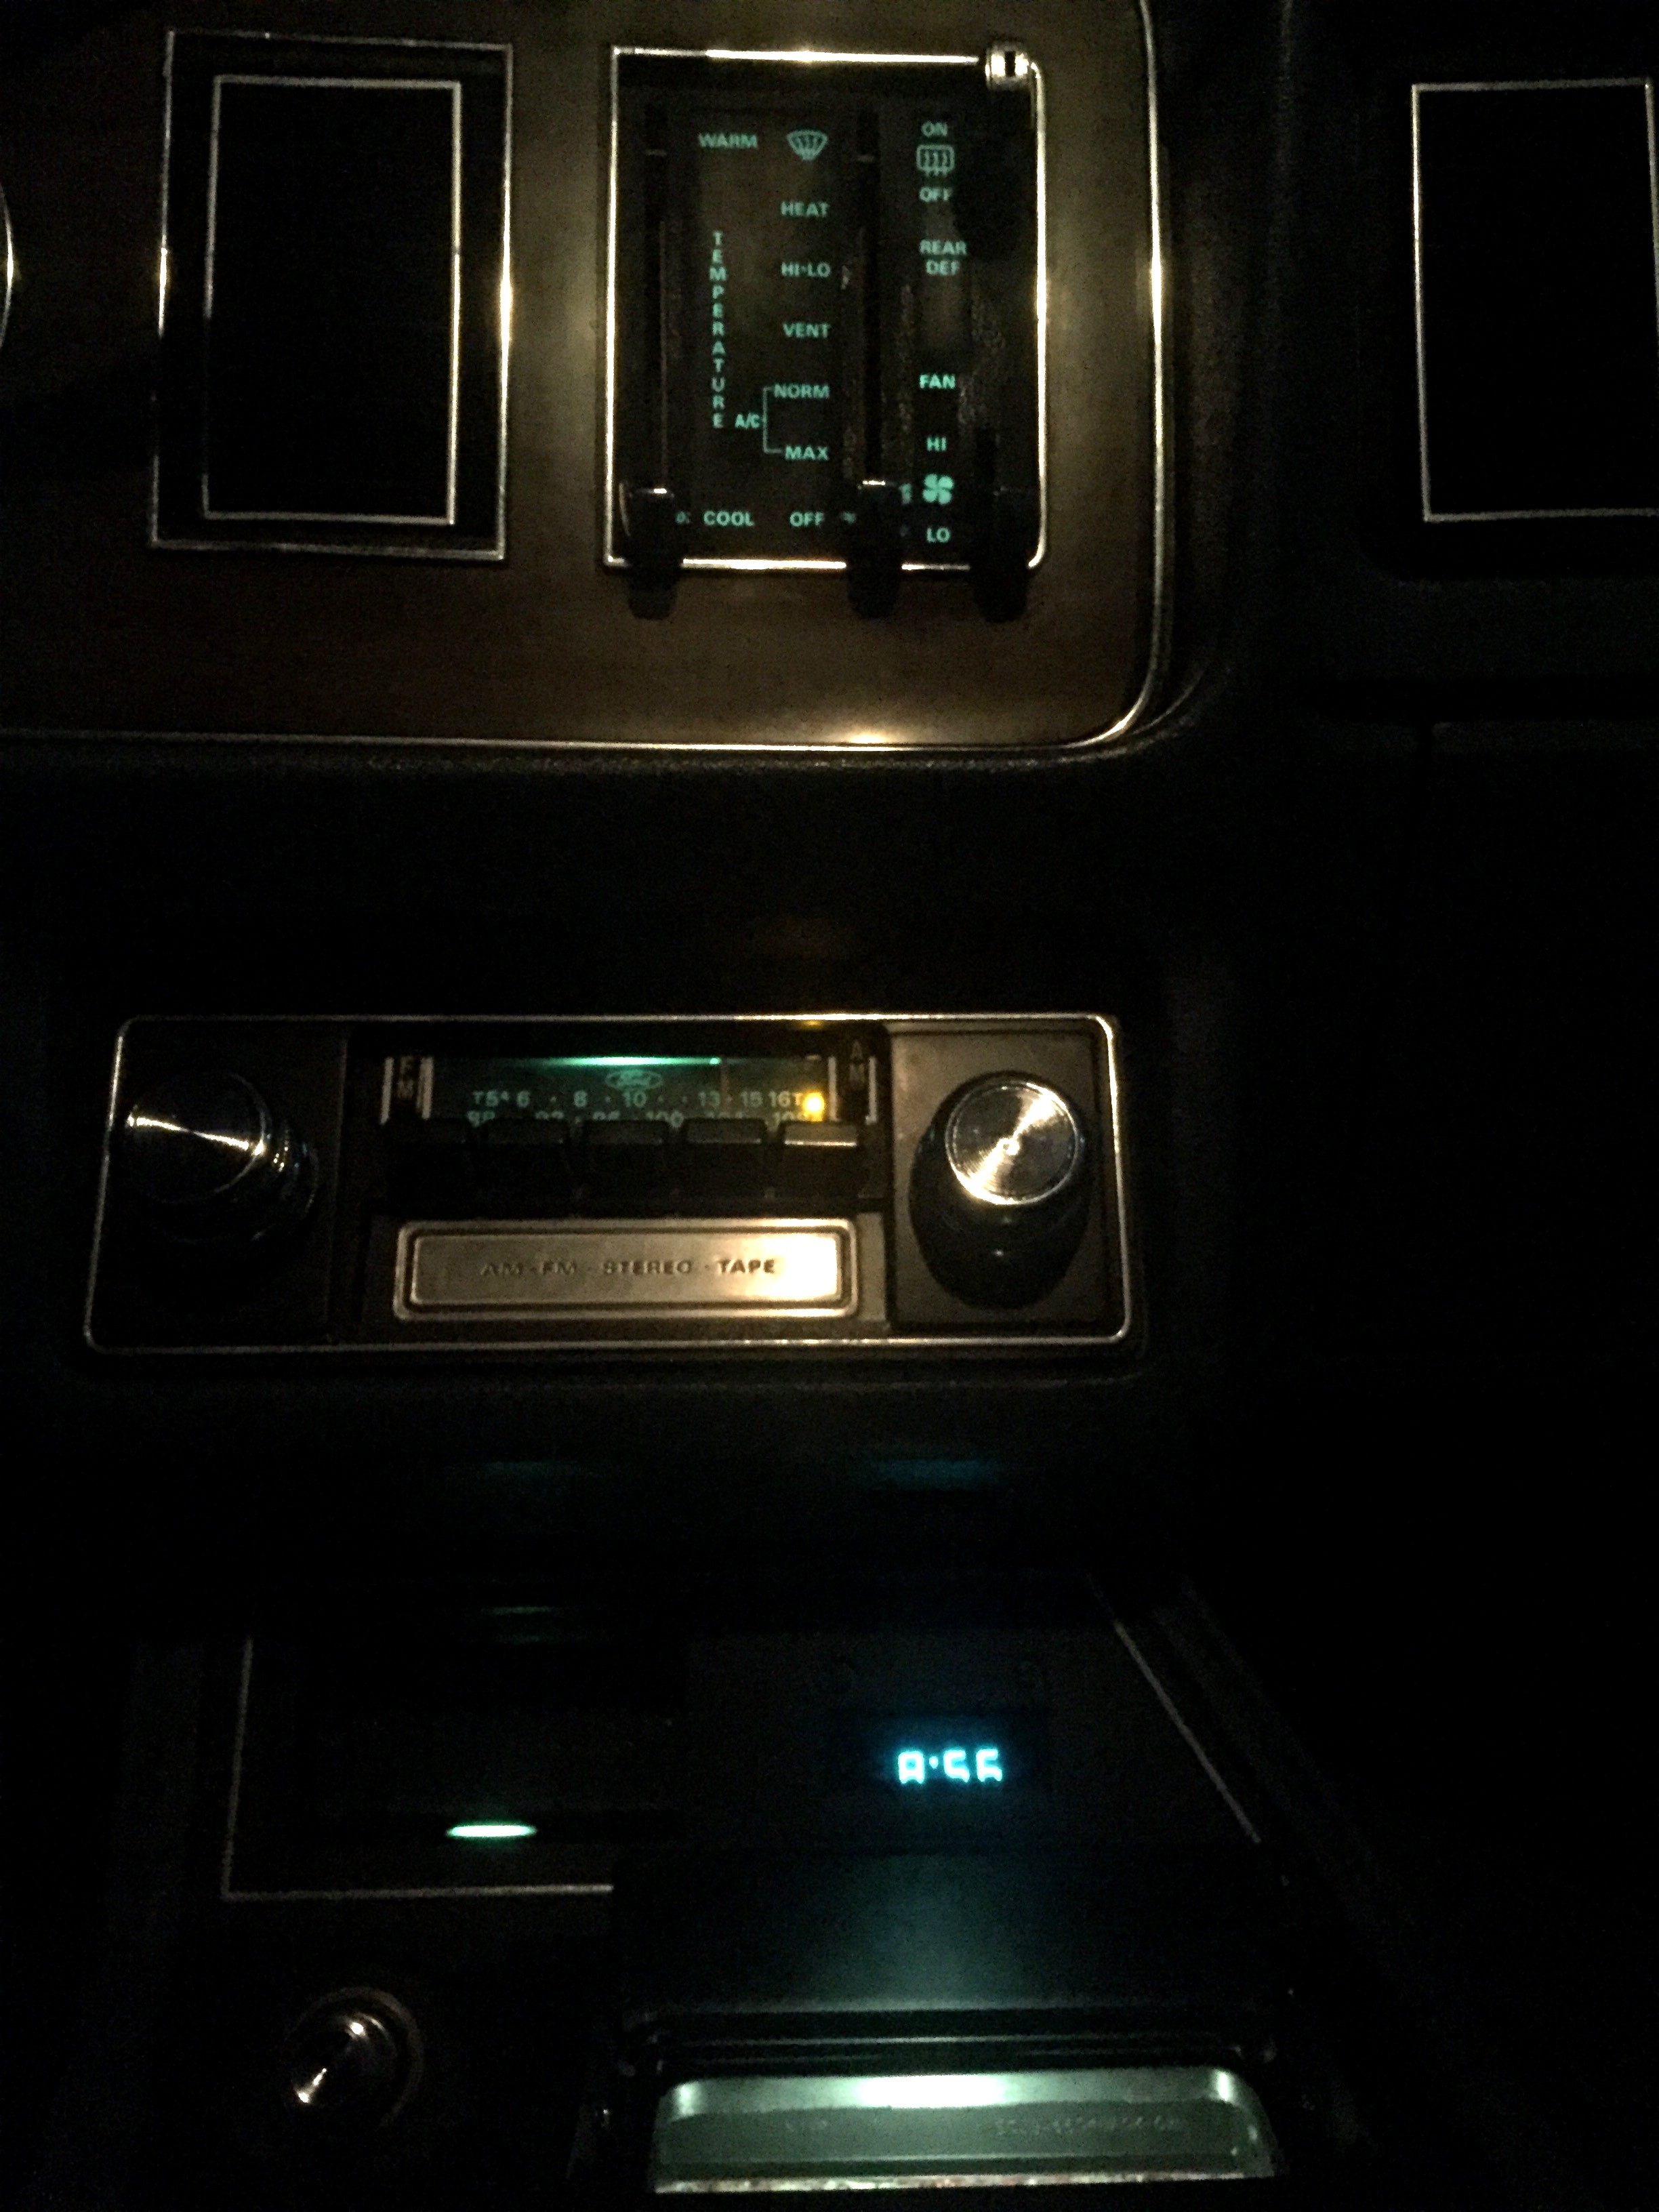
August 10, 2017 - Replaced the flasher relay with a louder one. August 6, 2017 - Today I replaced the parking/turn signal socket on the front right side. Related, but not related, I need to replace the turn signal relay. It sporadically makes the audible sound and speeds up and slows down. It's always done that. Also, I removed the right rear passenger door panel so I could repair the door lock. The rod was incorrectly routed so it blocked the window and when you lowered the window it was bending the rod. That and the fact the right rear quarter panel is a different white paint tells a story about the car having some damage back there. Oddly though, the back door is the correct paint and doesn't look damaged looking inside the door panel. So, I wonder why the door lock rod was incorrectly routed. Anyway, I can lower the window properly and lock the door now. July 27, 2017 - Tune-up day. I replaced plugs, plug wires, distributor cap, PCV valve and breather element. ** Also replaced rear tail light lenses, missing button for cargo lamp, glove box door rubber bumpers. July 26, 2017 - I keep knocking off items on the to-do list. Last night and this morning I worked on the HVAC temperature cable. When in the coolest position, no air would come out of the dash, After verifying the vacuums under the hood were good, I removed the glove box to get a better view of the HVAC box and its lines. There were two problems. The temp cable became unclipped from its anchor so the outer cable was moving when only the inner cable should be. This likely happened because of the 2nd problem of the inner cable no longer properly clipped on the blend door arm for full ranger of motion. I adjusted that inner cable clip and fastened the outer cable clip and all is good again.** Also replaced the 2 liftgate struts. July 23, 2017 - I replaced the 2 front speakers with factory NOS units. I secured the stereo in its space. I experimented with replacing the standard dome light with an upgraded unit that has 2 map lights. Unfortunately the map lights require a hot wire so they work at anytime. Without the hot wire, the map lights will only work if the dome light is on. I changed the cool-white LED gauge bulbs, that I just installed on the 7th, with a warm-white LED bulb which better replicates the original incandescent bulbs. Here you can see the difference between cool (left) and warm (right).
This is how the illuminated dash appears now and just a few lines below you can see the original dash and dash with cool-white LED bulbs. The warm-white LED is an exact match for the original and brighter.
July 19, 2017 - I had much work done on the car by my local shop so that it's safe and ready to drive. Now I can get back to my work on the car. Work by the shop included: 5 new tires; replace engine and transmission mounts; flush cooling, steering, brake systems; replace front and rear shocks; replace lower ball joints, outer tie rod ends and control arm bushings; new brake rotors and pads; clean and adjust rear brakes; and four wheel alignment. July 9, 2017 - In the car, I tested 3 Ford radios that I have. It turns out 2 need some work. But the one I really wanted in the car works great... it's an AM/FM 8-track that was available on the Zephyr as an option. Because the dash was cut to place a newer DIN stereo, I'll have to figure out how to securely mount the factory correct 2-stem radio. I have some thoughts. I've ordered a face place, which is only cosmetic and not a structural support for the radio. July 8, 2017 - I adjusted the carb a bit more. Car starts easily whether the engine is cold or hot. I reviewed the underhood vacuum lines and found 2 were incorrect and I rerouted them to their proper spots. I removed the 90s Ford DIN radio and studied the wiring. July 7, 2017 - Today was safety day for the car. I focused on safety items: brakes and lights. But before doing that, I adjusted the curb idle downward because it was way too high.
July 6, 2017 - The car arrived today after its cross-country haul.
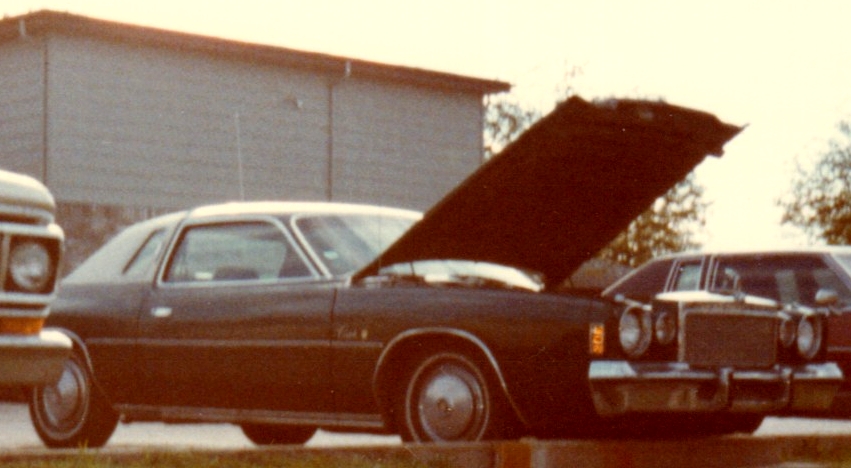
June 9, 2017 - I'm adding another car to my collection. I've been anxious to add a wagon with my other 80s cars. This one is very base. In fact the only options I believe are the 3.3L (200 cu in) inline 6-cylinder engine with automatic transmission, power steering, rear defroster, luggage rack and bench seat. It doesn't have the correct wheel covers. I'll remedy that. I'll also restore it with some personalization like plaid cloth inserts. It'll still look factory correct but just a bit nicer. The exterior moldings, pinstripes, sound insulation package and front bumper guards are standard. I'll have to install a stereo. I have plenty in my collection that are period correct.
After car was delivered... untouched and hood popped.
I replaced the 90s DIN stereo with a period-correct, 2-stem, AM/FM 8-track unit. Here's how it looks, all dressed-up with new mini-console from a bucket seat model. Because the wiring harnesses aren't there for the diagnostic module, I created a lit bin in that space.
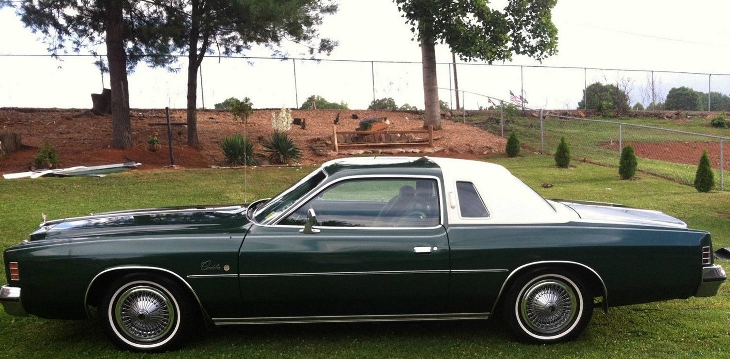
1975 Chrysler Cordoba
Purchased this on eBay from an NC town 2 hours away from me. It is almost identical to my high school car with the same paint, top and interior. Options are almost identical as well. My high school car had a 400, though, and this has a 360. This car has 8-track, rear defroster, wire wheel covers and passenger door rear view mirror that I did not have.
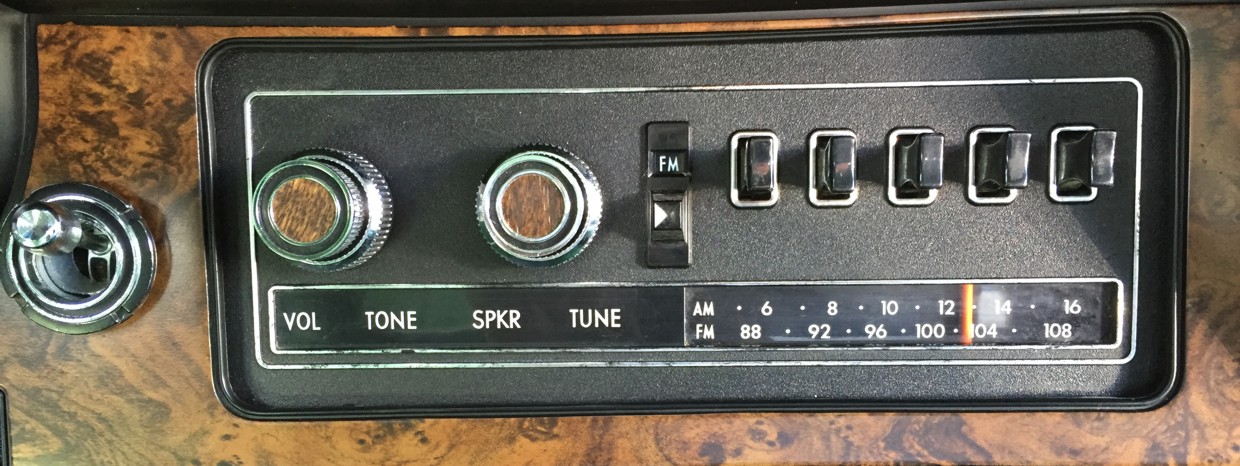
July 2, 2019 - Replace front and rear u-joints June 19, 2019 - Replace all radiator hoses; replace belts; convert a/c to R134; oil change; replace shift selector seal; replace rear shaft housing gasket; replace transmission filter and fluid; replace speed sensor seal; replace speedometer cable; replace power steering pump; steering flush February 12, 2017 - Replaced the expansion valve and drier/receiver. I'll be filling the A/C with refrigerant and testing the compressor later. Also, I spliced a severed wire on the parking brake switch that kept the warning lamp from illuminating. January 2017 - Replaced the original leaky heater core and I replaced the evaporator while I had that climate box out of the car. It's a big project to remove it from behind the dash, so I only want to go in there once. It's nice to have heat in the car for the first time since I bought it. I replaced the temperature control cable as it was broken when I bought the car. I also replaced the buzzer for headlamps on, key in ignition and seatbelt. April 12, 2015 - I fixed the passenger door power window motor. Those same 3 little plastic bushings in the motor's gear housing needed to be replaced. April 4, 2015 - I replaced the 8-track stereo with an AM-FM mono radio. The 8-track was added at some point in the distant past because it's a period Mopar unity. But it was a stereo unit and the car was originally sold with AM/FM monaural with one speaker in front and one in back. The stereo unit was not hooked up properly, so you had to adjust fade and balance just right to get any sound at all. So, I put in this 76 mono unit which is perfectly wired for the car's setup. Now I get full fade front to back and sound no matter how I adjust it. It is a 76 unit which has a slightly different appearance than the 75 unit. I had to replace the light bulb too while I had everything apart. The sound is great and just like I remembered from my high school car. The holy grail of any of these radios for Chrysler models is that the knobs need to have the wood grain look. The 8-track player had one black and one wood grain. Fortunately (and finally) a pair came up for auction on eBay and they are NOS. They look great. December 4, 2014 - Replaced all 4 shocks; rebuilt rear differential October 29, 2014 - Replaced motor and transmission mounts October 25, 2014 - Replaced carb with OEM rebuilt unit July 8, 2014 - Oil change (Mopar filter); new rotors, pads, master cylinder, rear center brake line, wheel seals; flush brake fluid; balance and rotate tires; wheel alignment July 4, 2014 - Car has been in shop for days having the brakes overhauled. Still had original rotors, pads, brake lines and master cylinder. Lines and master cylinder were rusted and leaking. June 28, 2014 - Added battery quick disconnect, replaced wire wheels with standard hubcaps and coins just like my high school car, repaired wiper by reconnecting arm to motor and securing the connection, replaced driver's door power window motor gear bushings, replaced belts with Mopar branded units; cleaned spark plugs and re-gapped them. June 27, 2014 - Took delivery of the car June 17, 2014 - Won eBay auction
My high school car (only pic I can find)
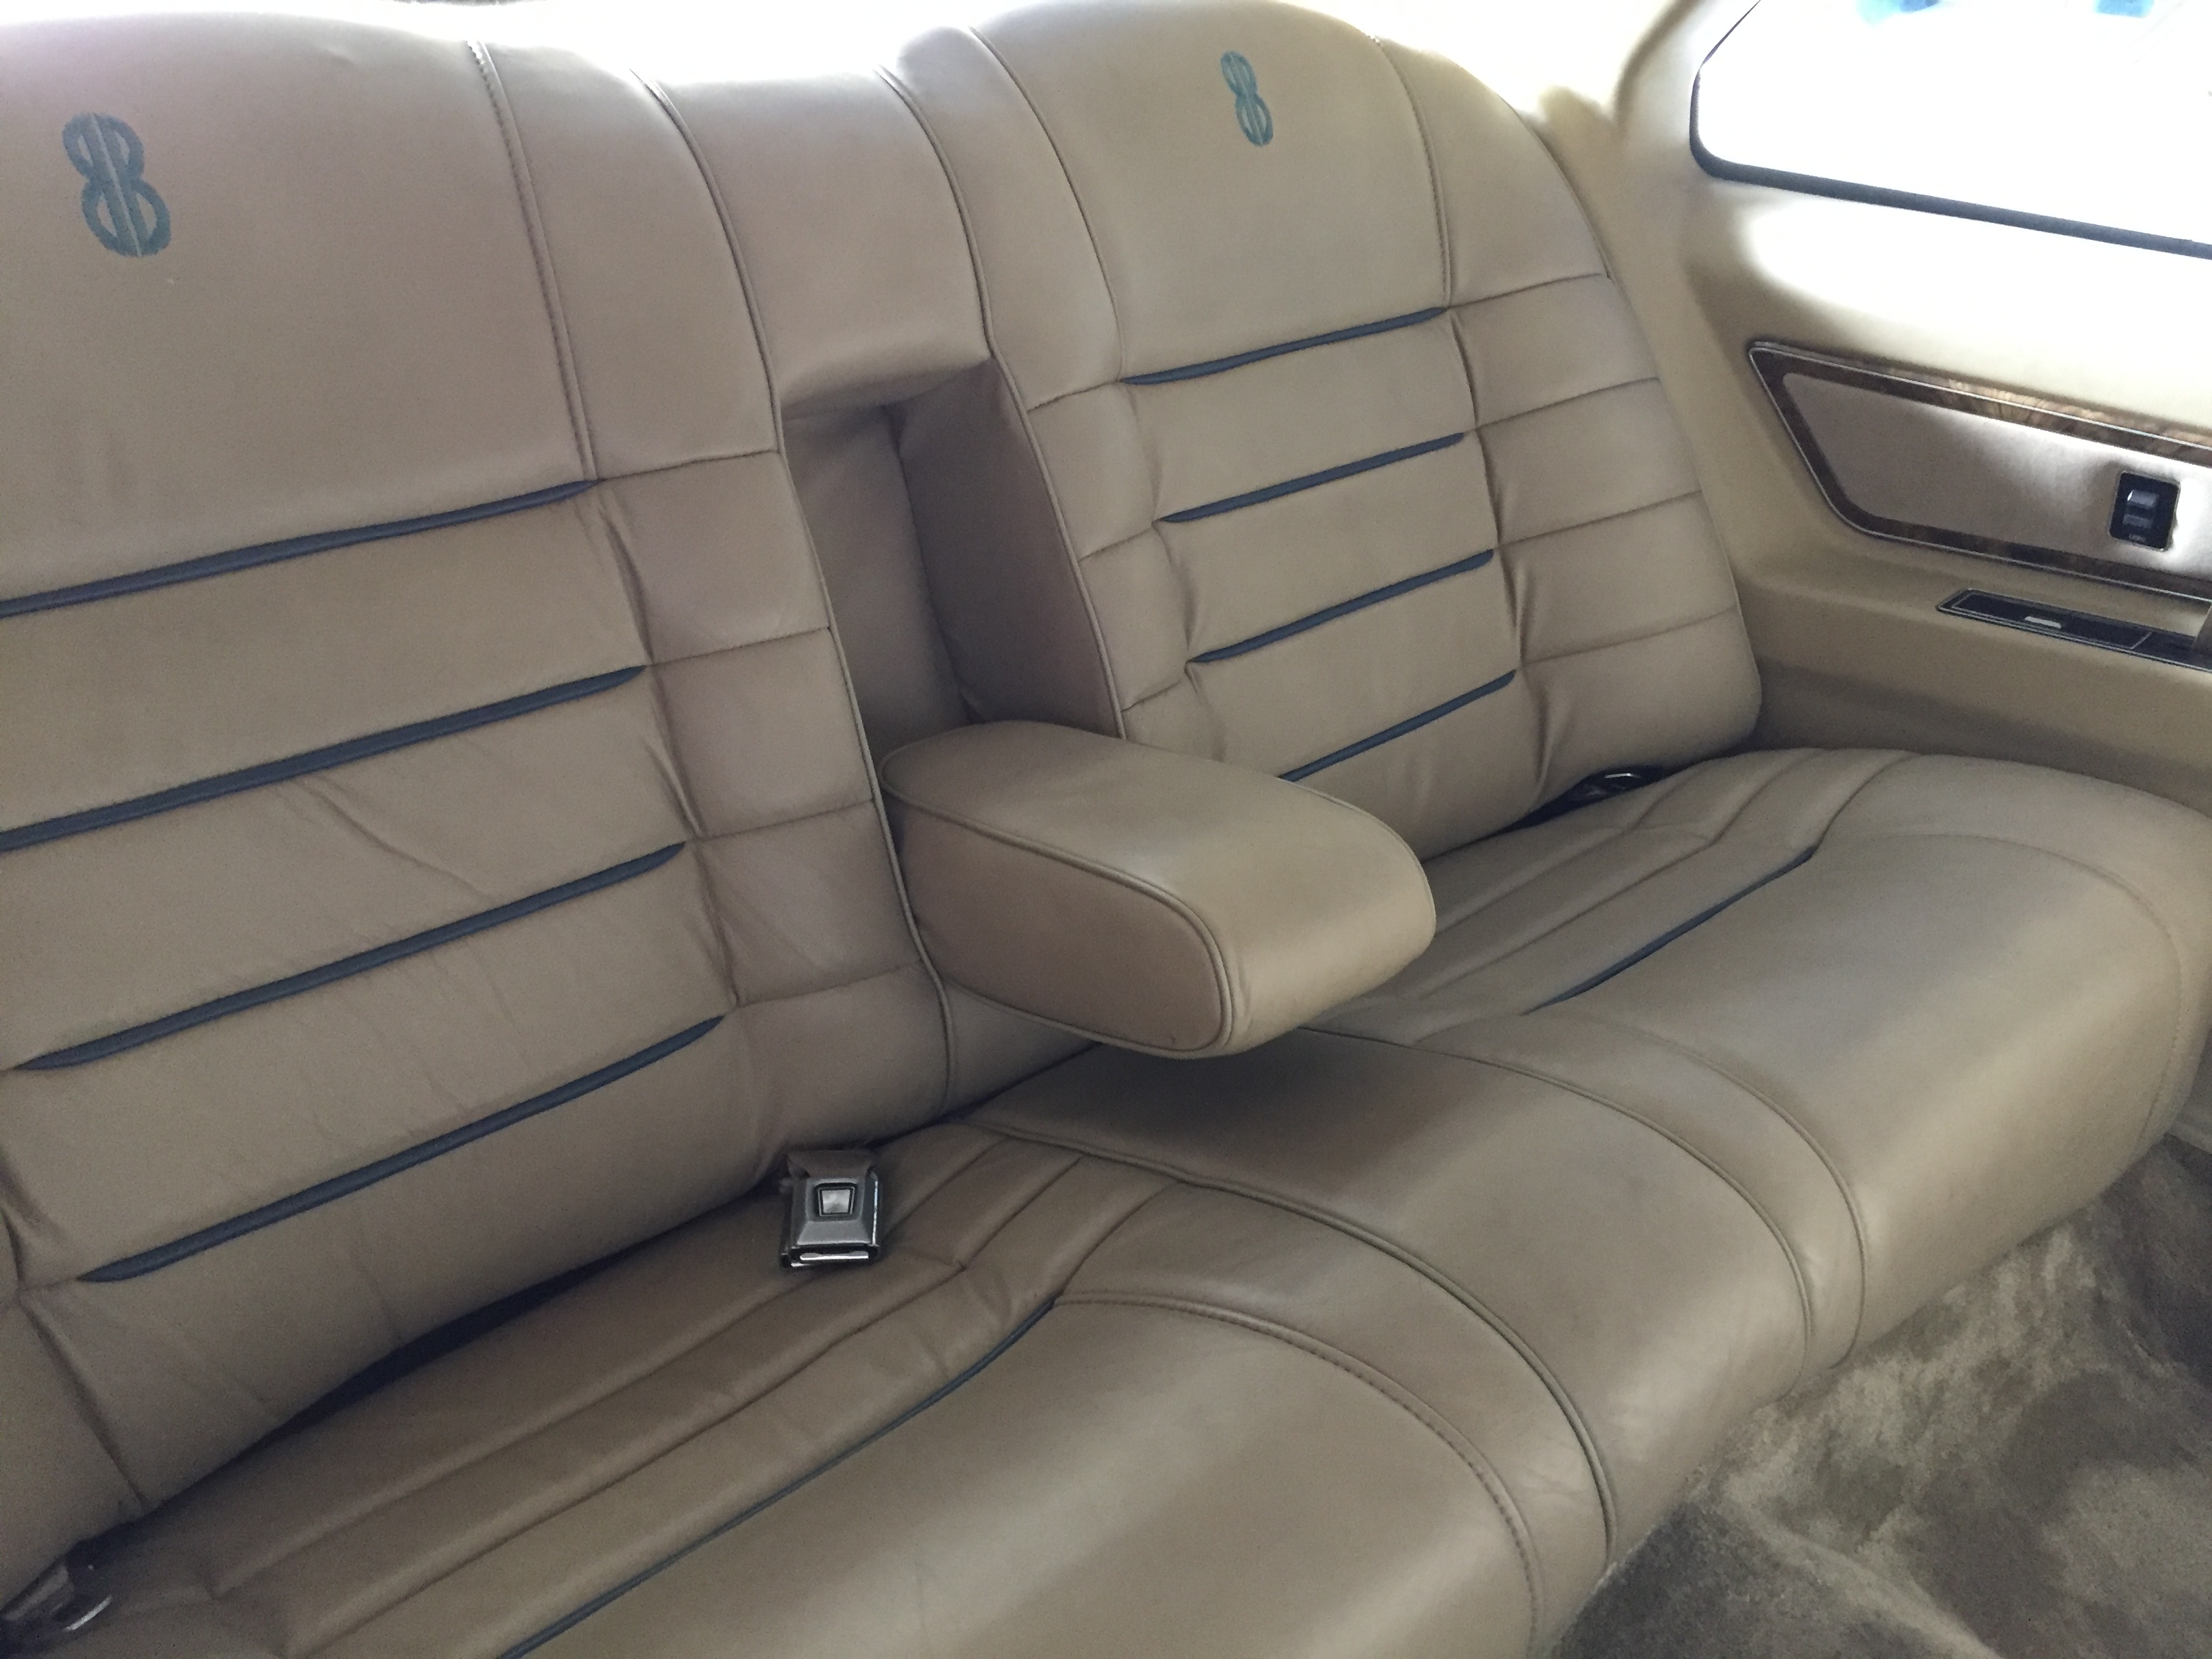
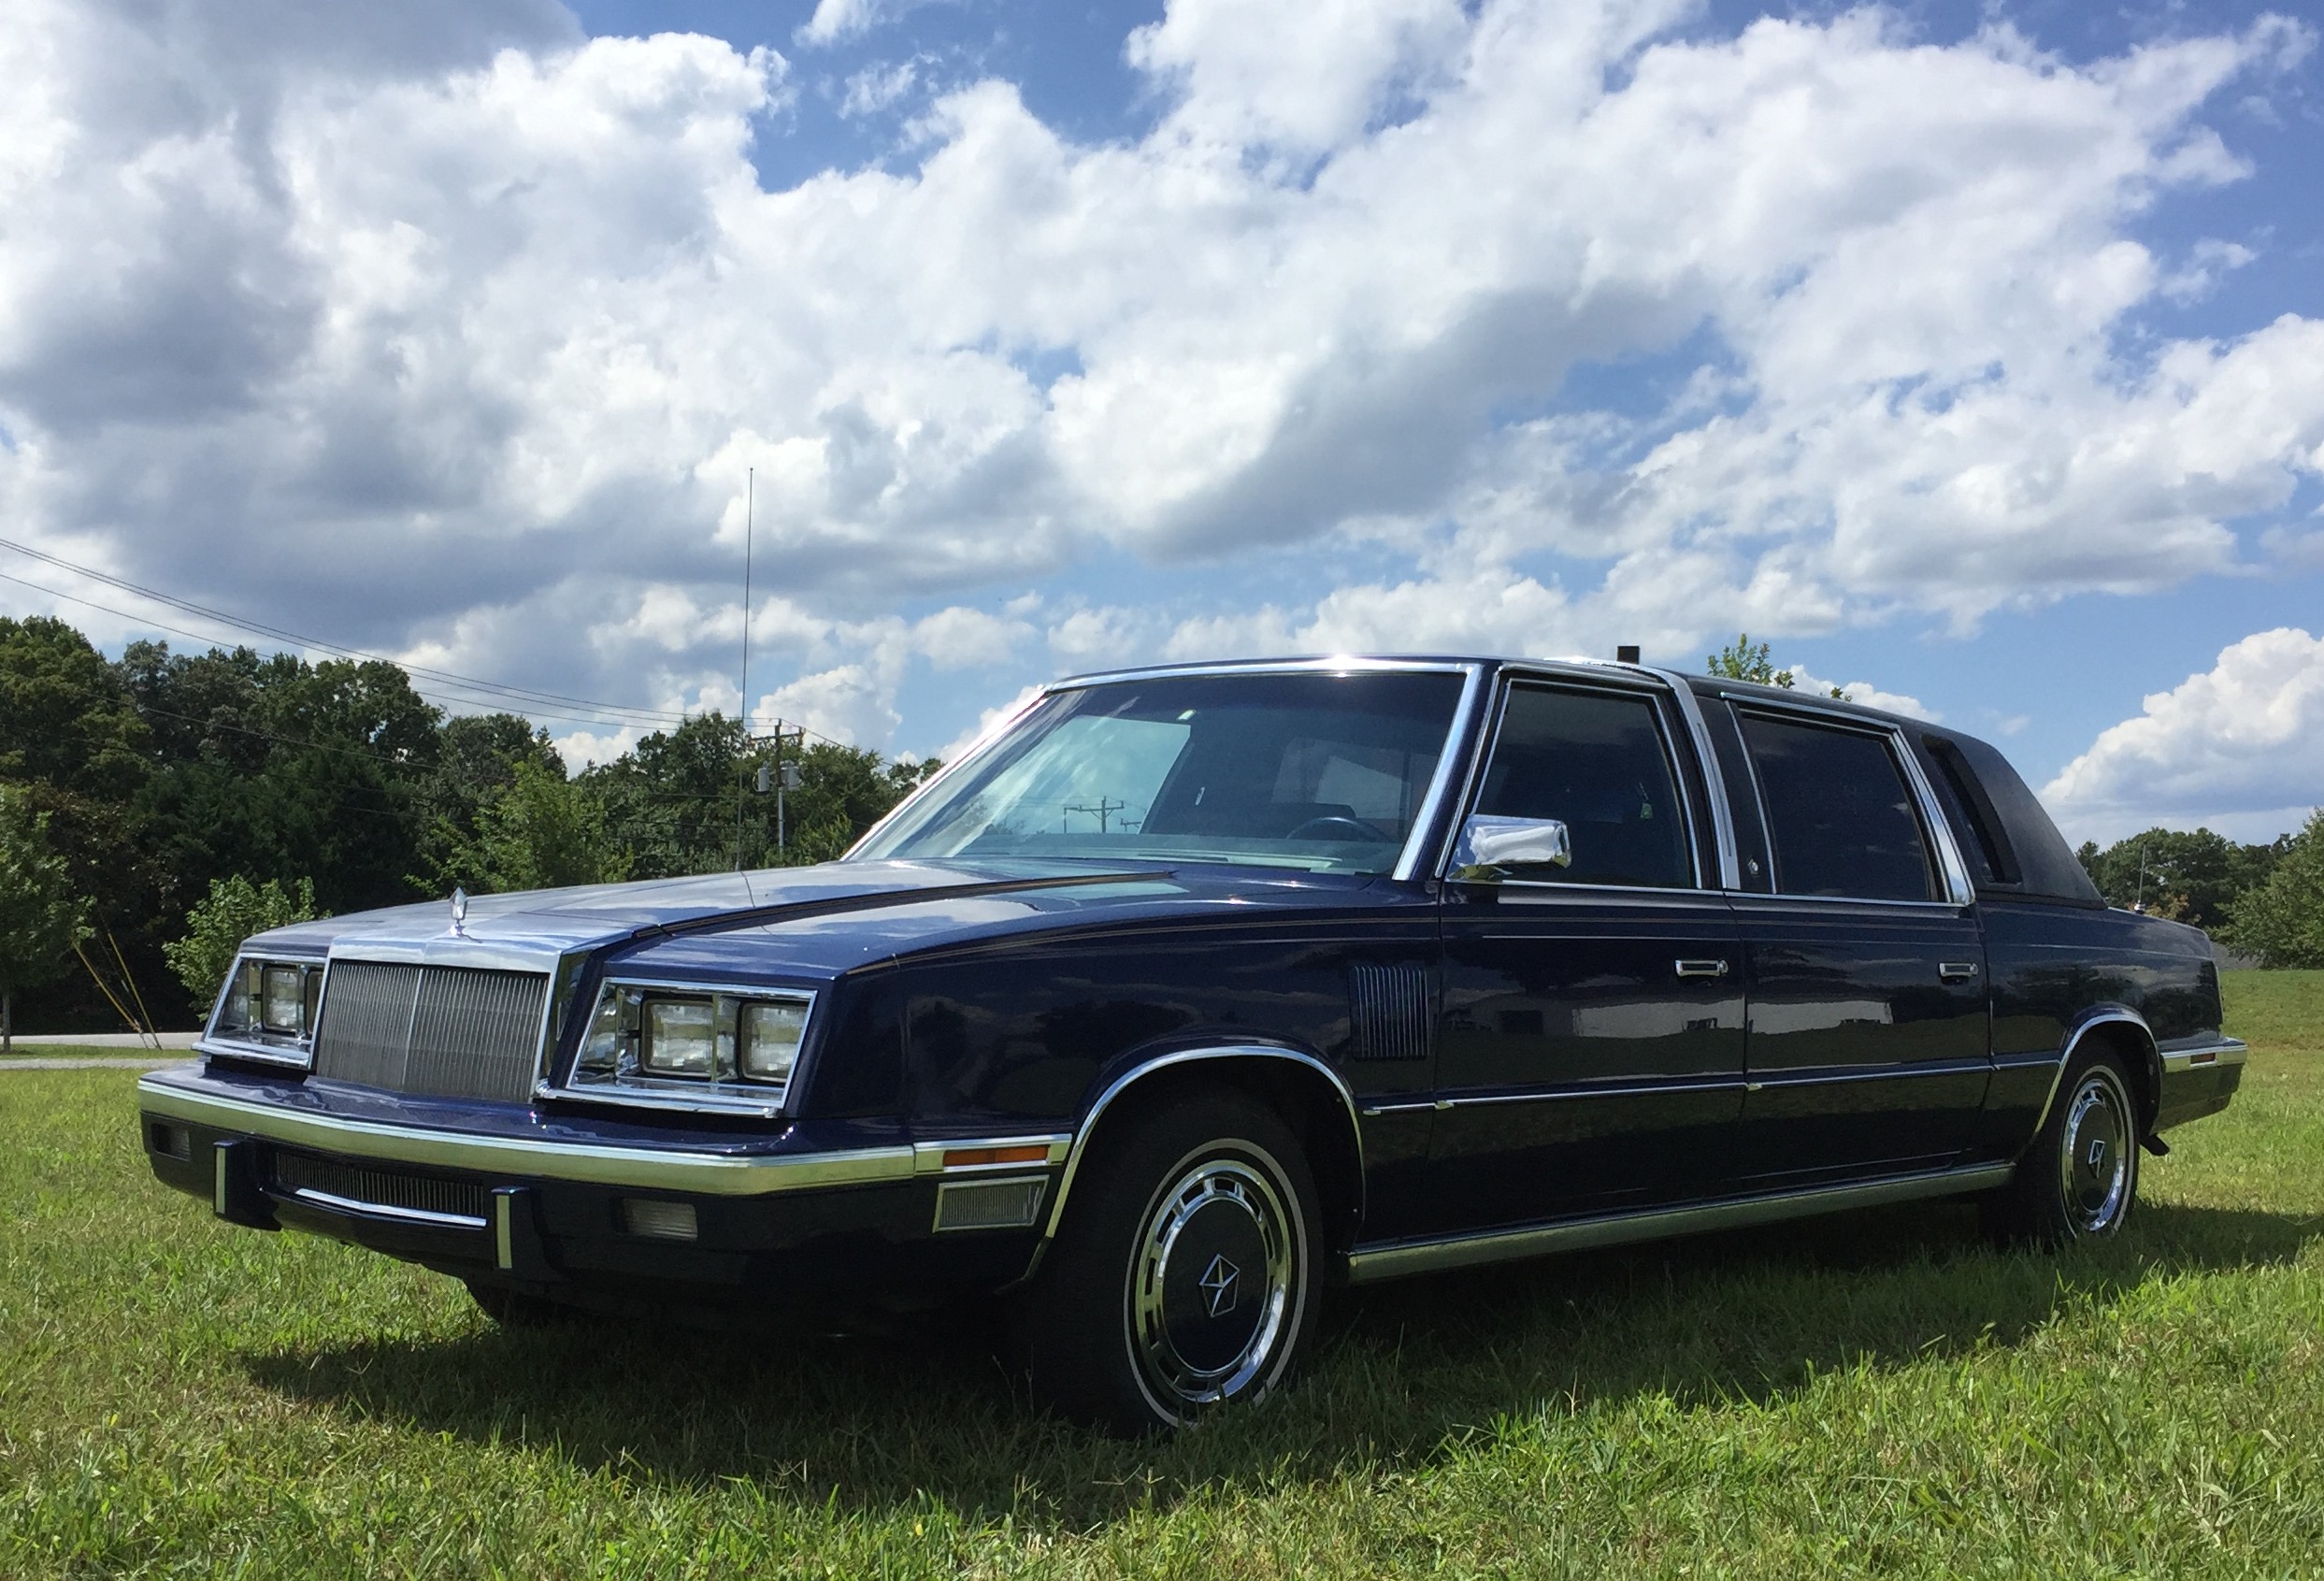
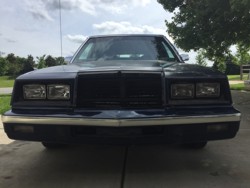
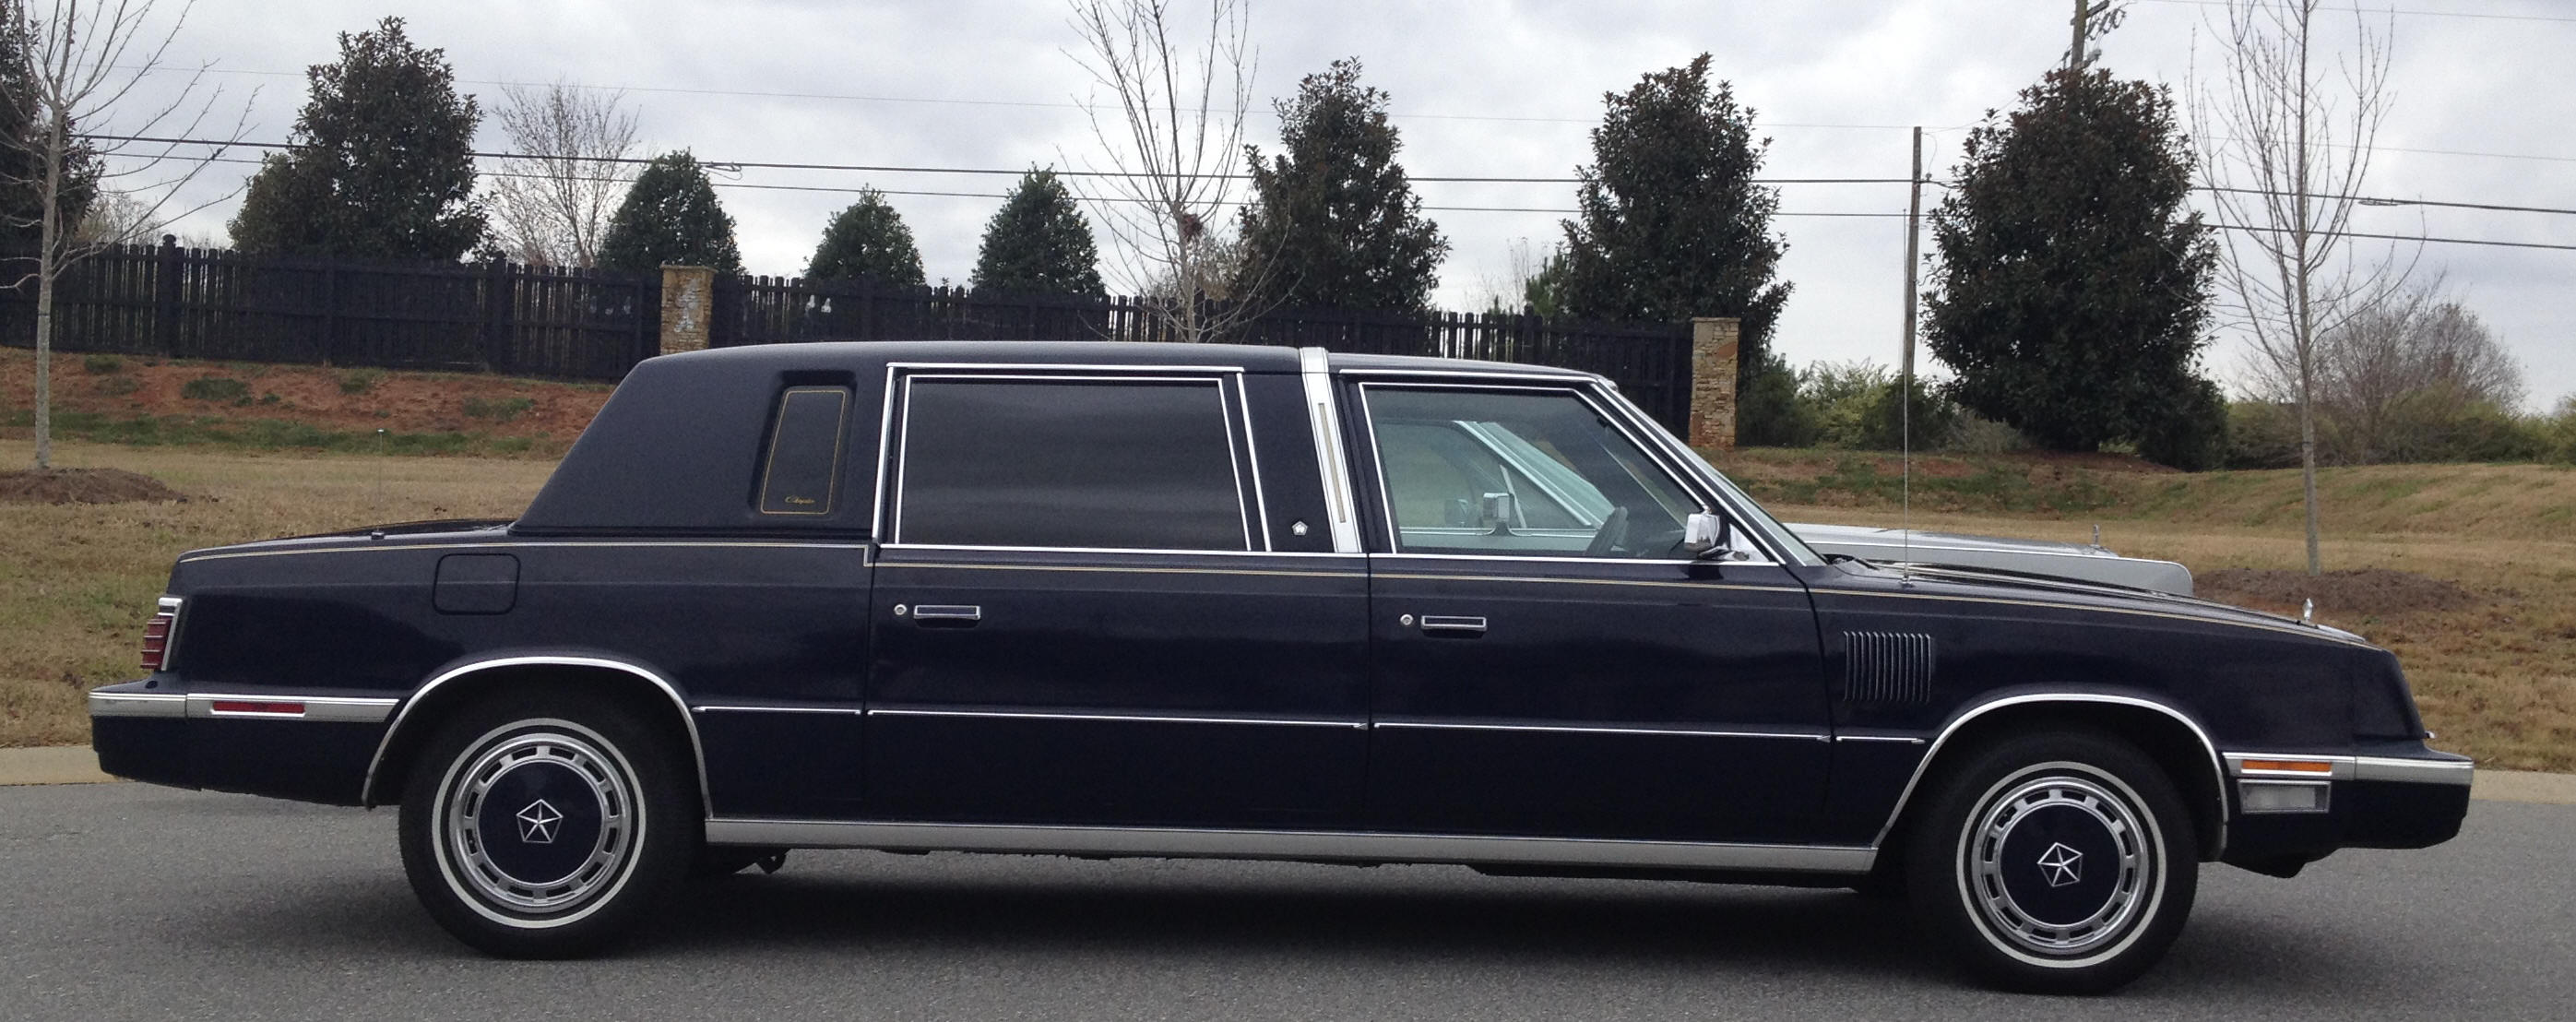
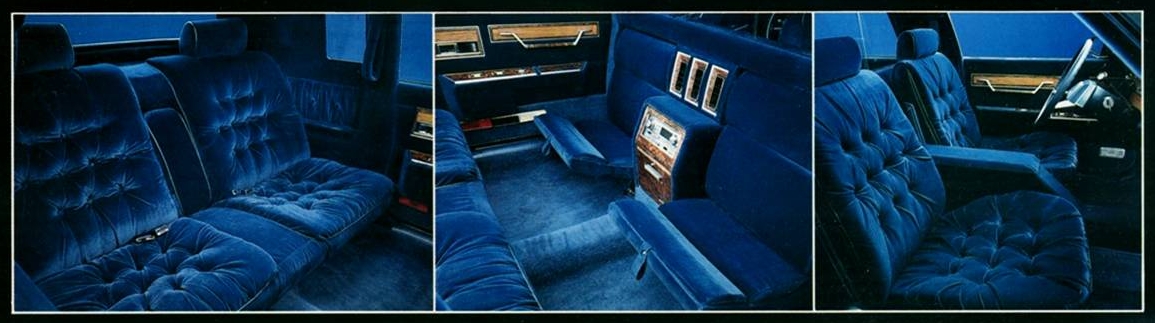
1984 Chrysler Limousine - 1 of 594
Low-mileage limousine previously used by a family (not livery) and stored. Interior is near perfect. The only interior work required is replacing the after-market radios with original units.
June 21, 2019 - Oil change; replace internal bushing and output shaft seal on right side extension housing; brake system flush; replace fuel hoses; power steering system flush July 29, 2017 - OK, so it took 2 months for the new paint job. I picked up the car yesterday and spent all day today installing the grille, all the lights and trim on the car. May 13, 2017 - Began removing trim from the car, prepping for the upcoming paint job.
May 12, 2017 - A/C had a leaking gasket; had it replaced and system refilled. Drained and refilled transission fluid, dropped pan replaced filter and gasket. August 19, 2016 - Replaced A/C compressor, expansion valve and accumulator/drier. July 4, 2014 - Replaced rear door sill plates which were cracked and falling apart. May 25, 2014 - Converted A/C to R134a, full charge and adjusted up-idle speed. March 29, 2014 - New battery, replace right axle drive shaft seal; replace gas lines at tank. March 22, 2014 - Driver door power window motor need to be tightened; bushings were fine. Replaced driver door illuminated key hole bulb. Verified rear doors do not have wiring for key holes, though they have the same bezels with light rings as the front doors. February 16, 2014 - Car was stalling. Removed the fuel filter and it was totally clogged. Placed a clear plastic unit to monitor and I can see lots of debris accumulating. Gas tank may need to be replaced. December 27, 2013 - Over the past 2 weeks I installed two other rear units. The one provided by the previous owner was for an 85 model. I installed it and unless you really know your Chrysler radios, you would not know this was an 85 radio. They later found the original radio and shipped it. I installed that today. November 22, 2013 - Had car checked out by mechanic; only needing right side axle to be replaced. I also reinstalled the original back seat stereo unit. Both original stereos seem to sound much better than the after-market units that I removed. November 17, 2013 - I reinstalled original dash stereo; ordered wiring harness for rear unit November 16, 2013 - Vehicle arrives from transport
|
|
|
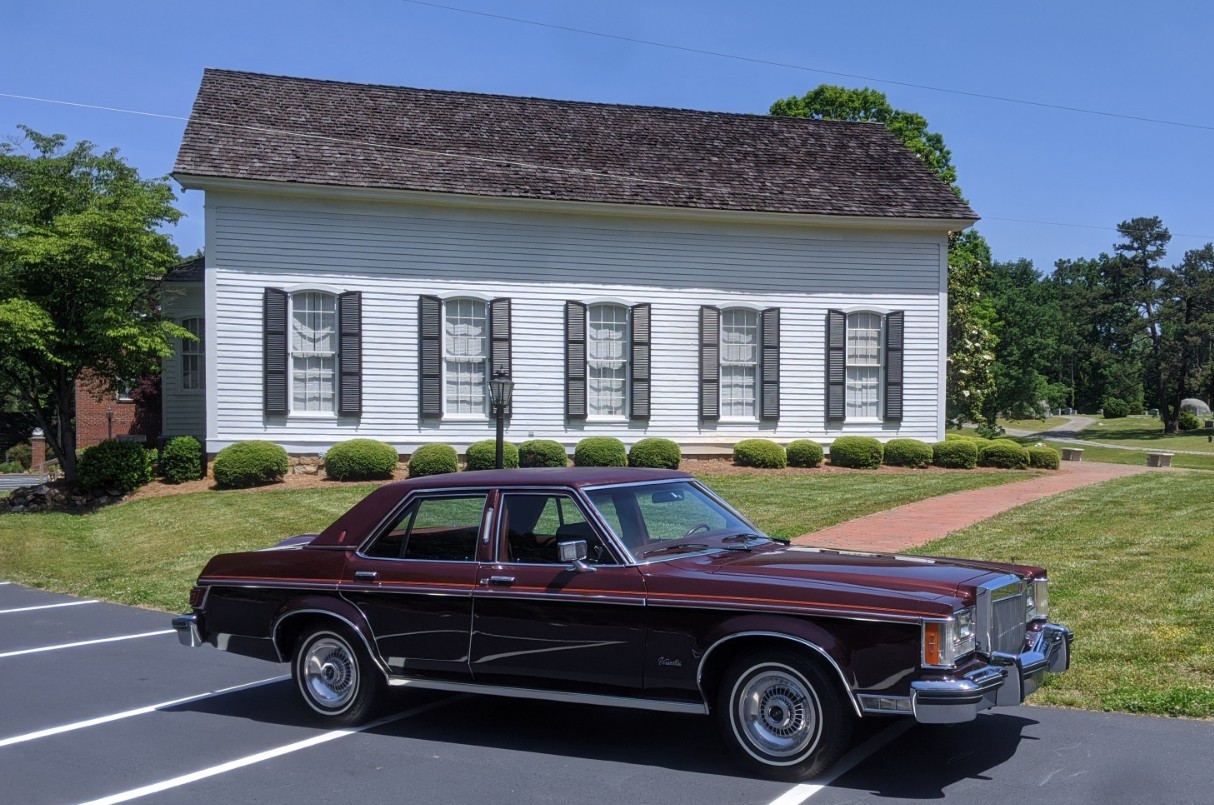
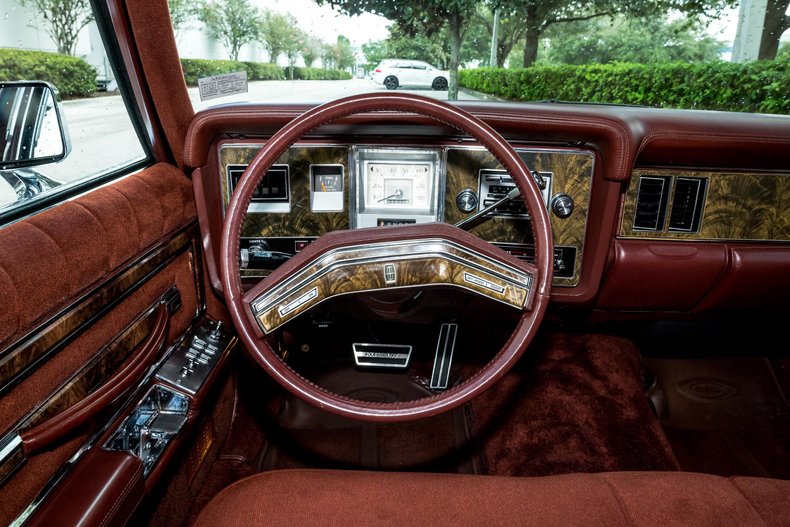
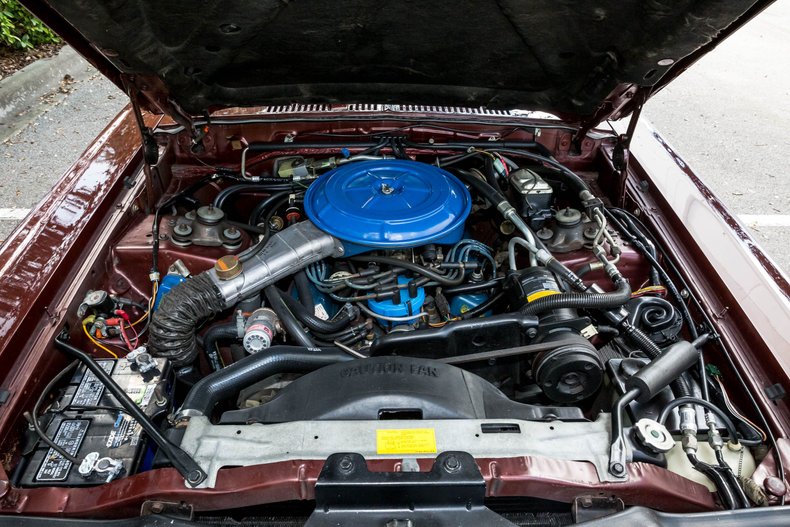
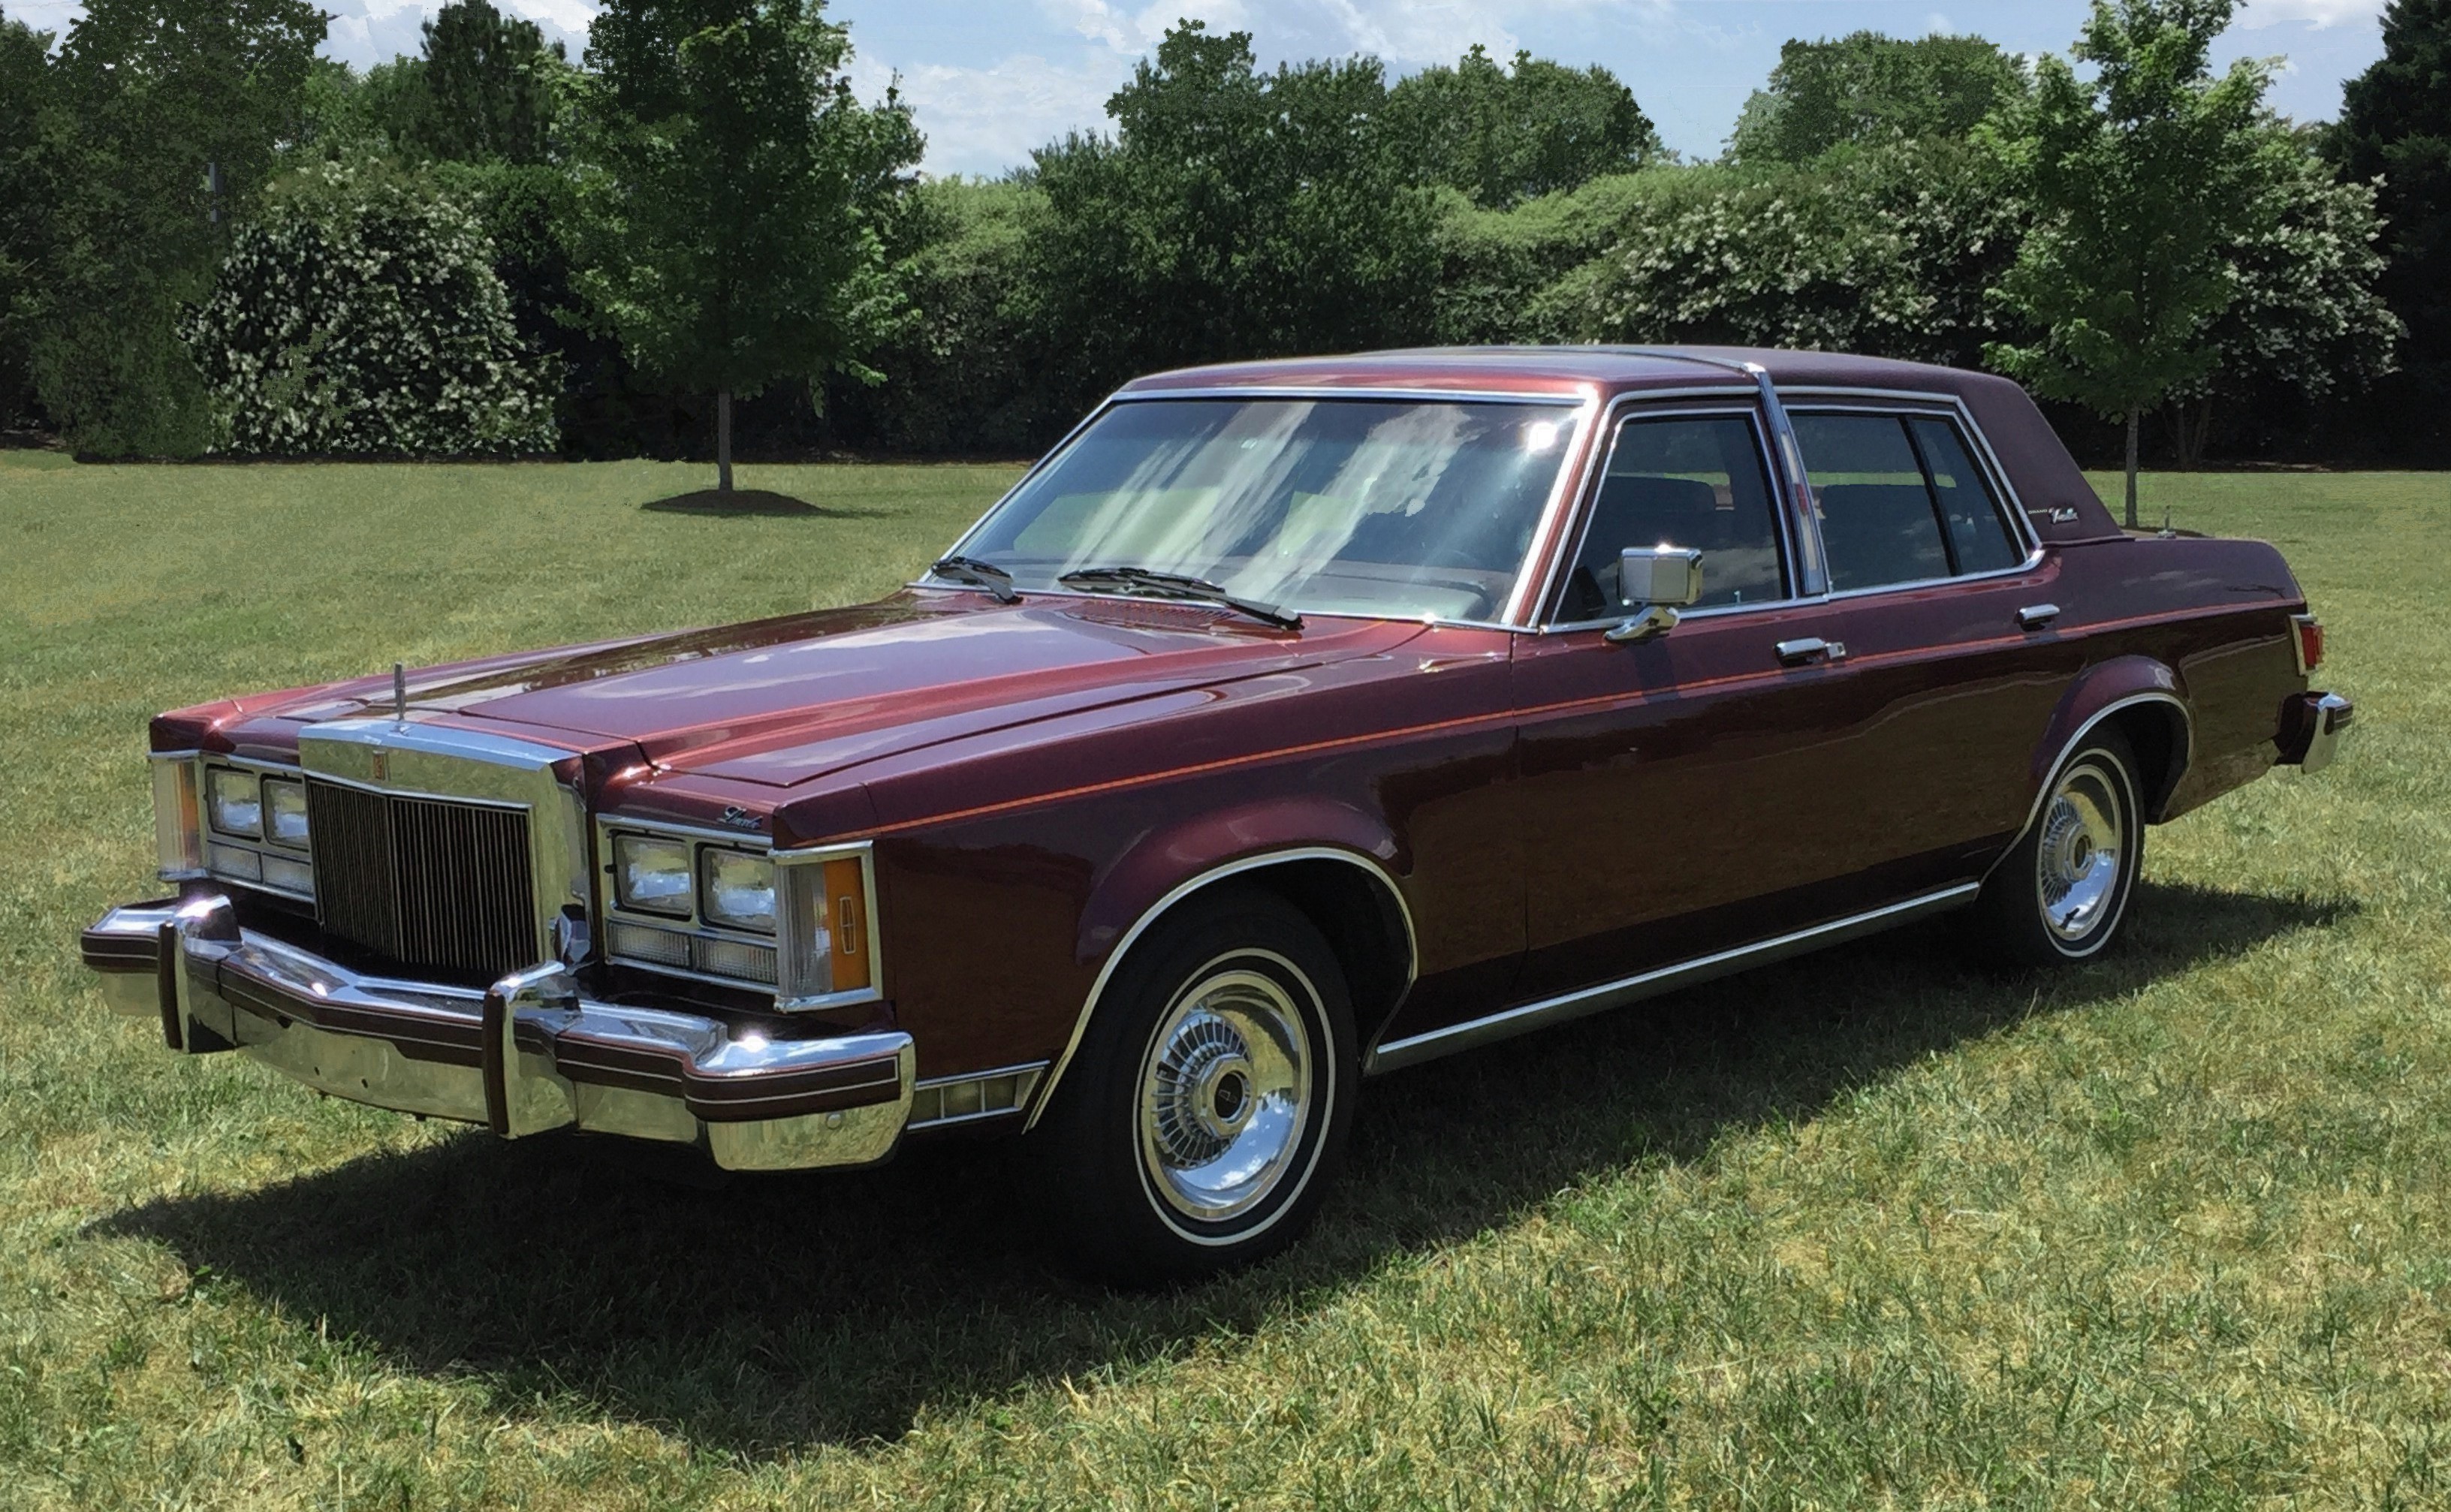
1977 Lincoln Versailles (28k mile all original) Sept 2019 - Added this all original car to my collection. Two-tone Cordovan Metallic over Dark Cordovan with velour cloth flight bench interior.
|
Chrysler Cordoba - 1975-1979
1983-1986
Chrysler LeBaron - 1982-1988 second generation
1968-1971
Lincoln Versailles - 1979 Commercial
Lincoln Versailles - 1977-1980
Mercury Cougar XR-7 - 1980-1982 5th generation
|
|
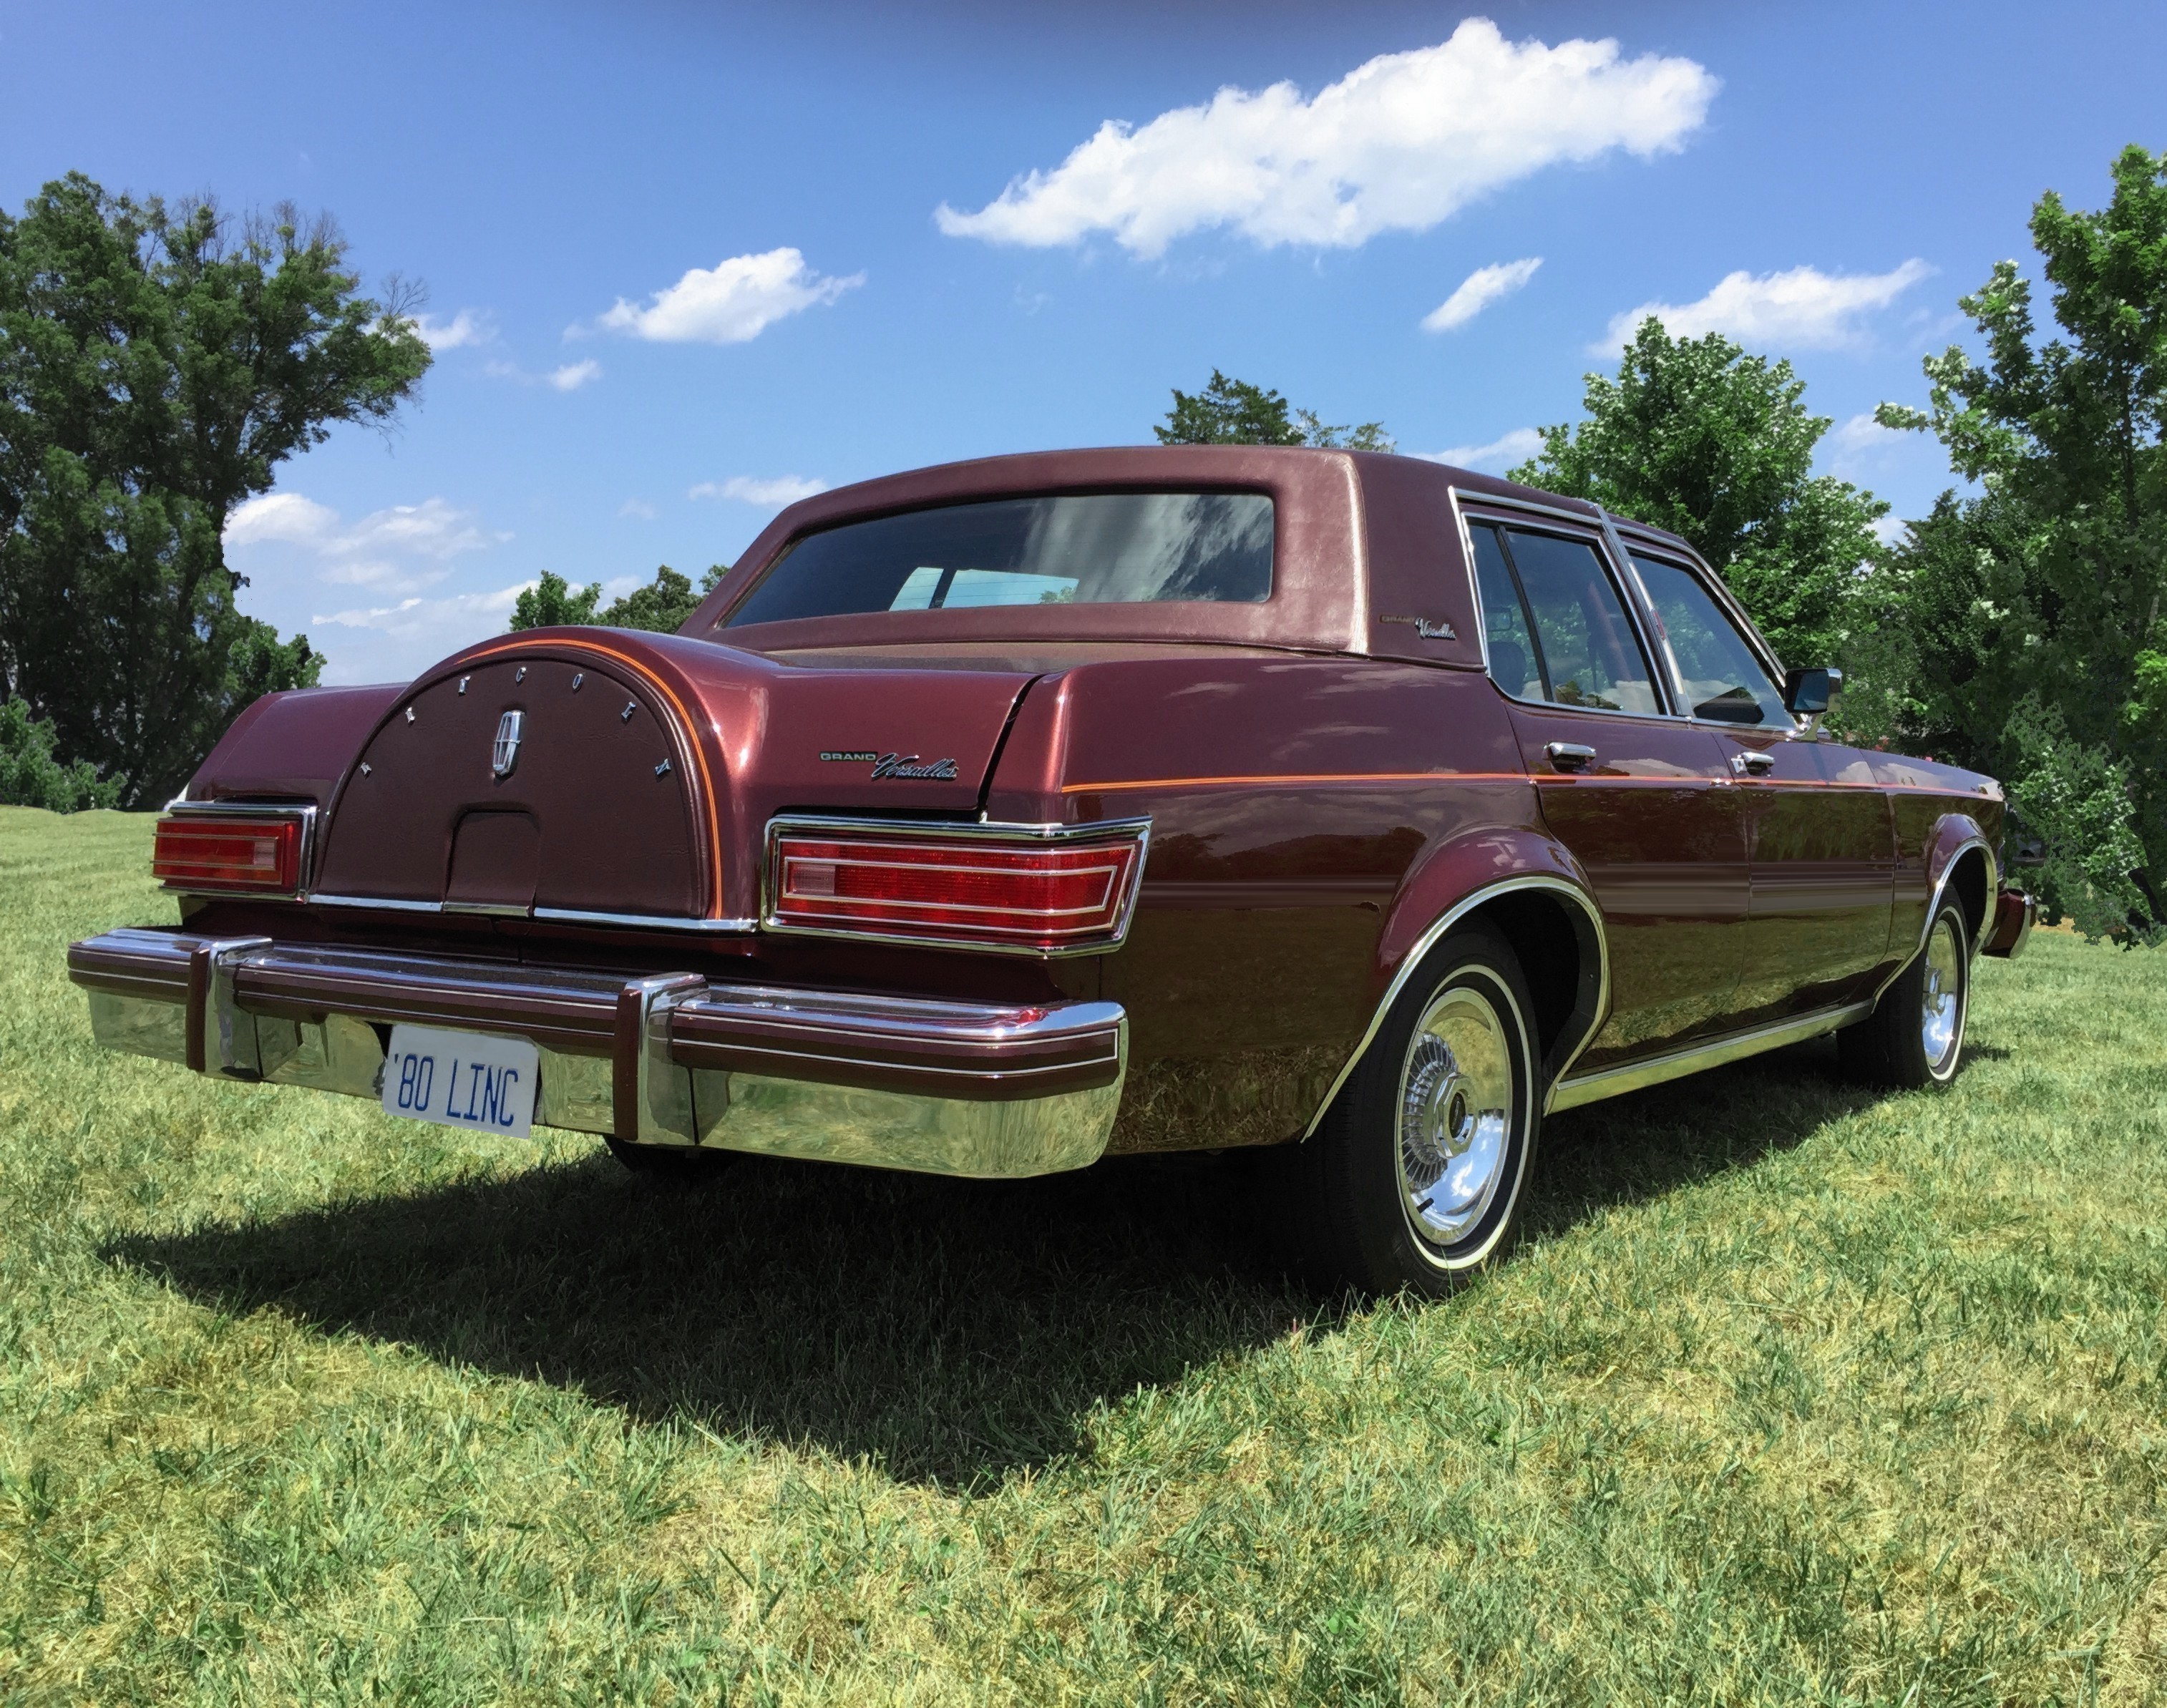
1980 Lincoln Versailles (Grand Versailles project) This is my first collector car. I purchased this car in December 1997 to learn about cars and how to work on them and how to restore them. Cars had always been a passion. I especially have a soft spot for the unloved cars that are often overlooked and forgotten. This was one of my father's favorite cars, as well as mine. I purchased the Versailles to learn more about cars and to honor the memory of my father. The car has a complete color change inside out. See pics of the restoration here.
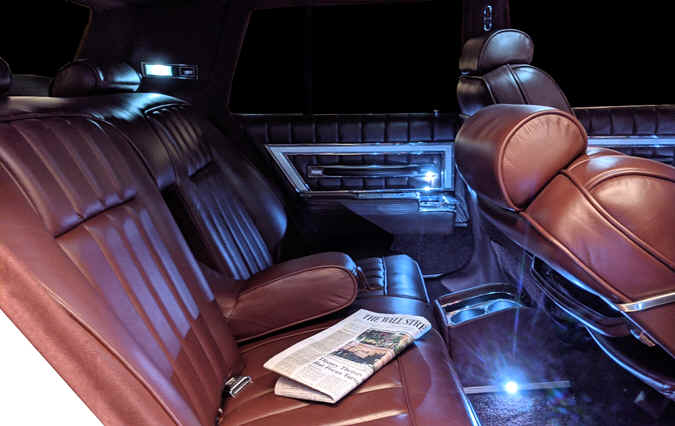
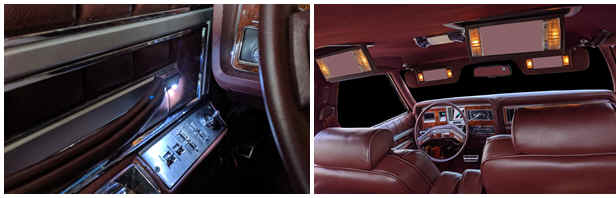
July 2, 2020 - reseal the rear differential and new pinion bearings, replace transmission pan gasket, replace kickdown cable November 30, 2019 - Completed interior project by installing leather covered consoles (front and rear) with cup holders, bins and illumination; also added ambient lights in the door panels, floor wells and consoles; added rear seat illuminated vanity mirrors
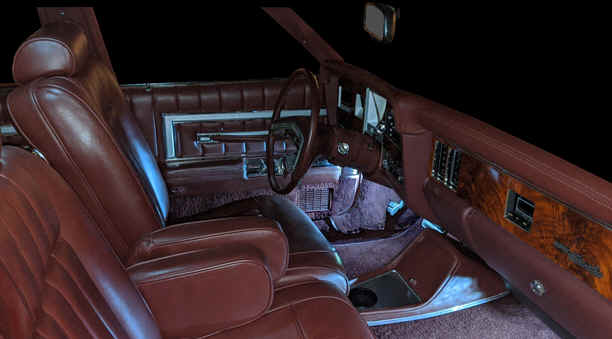
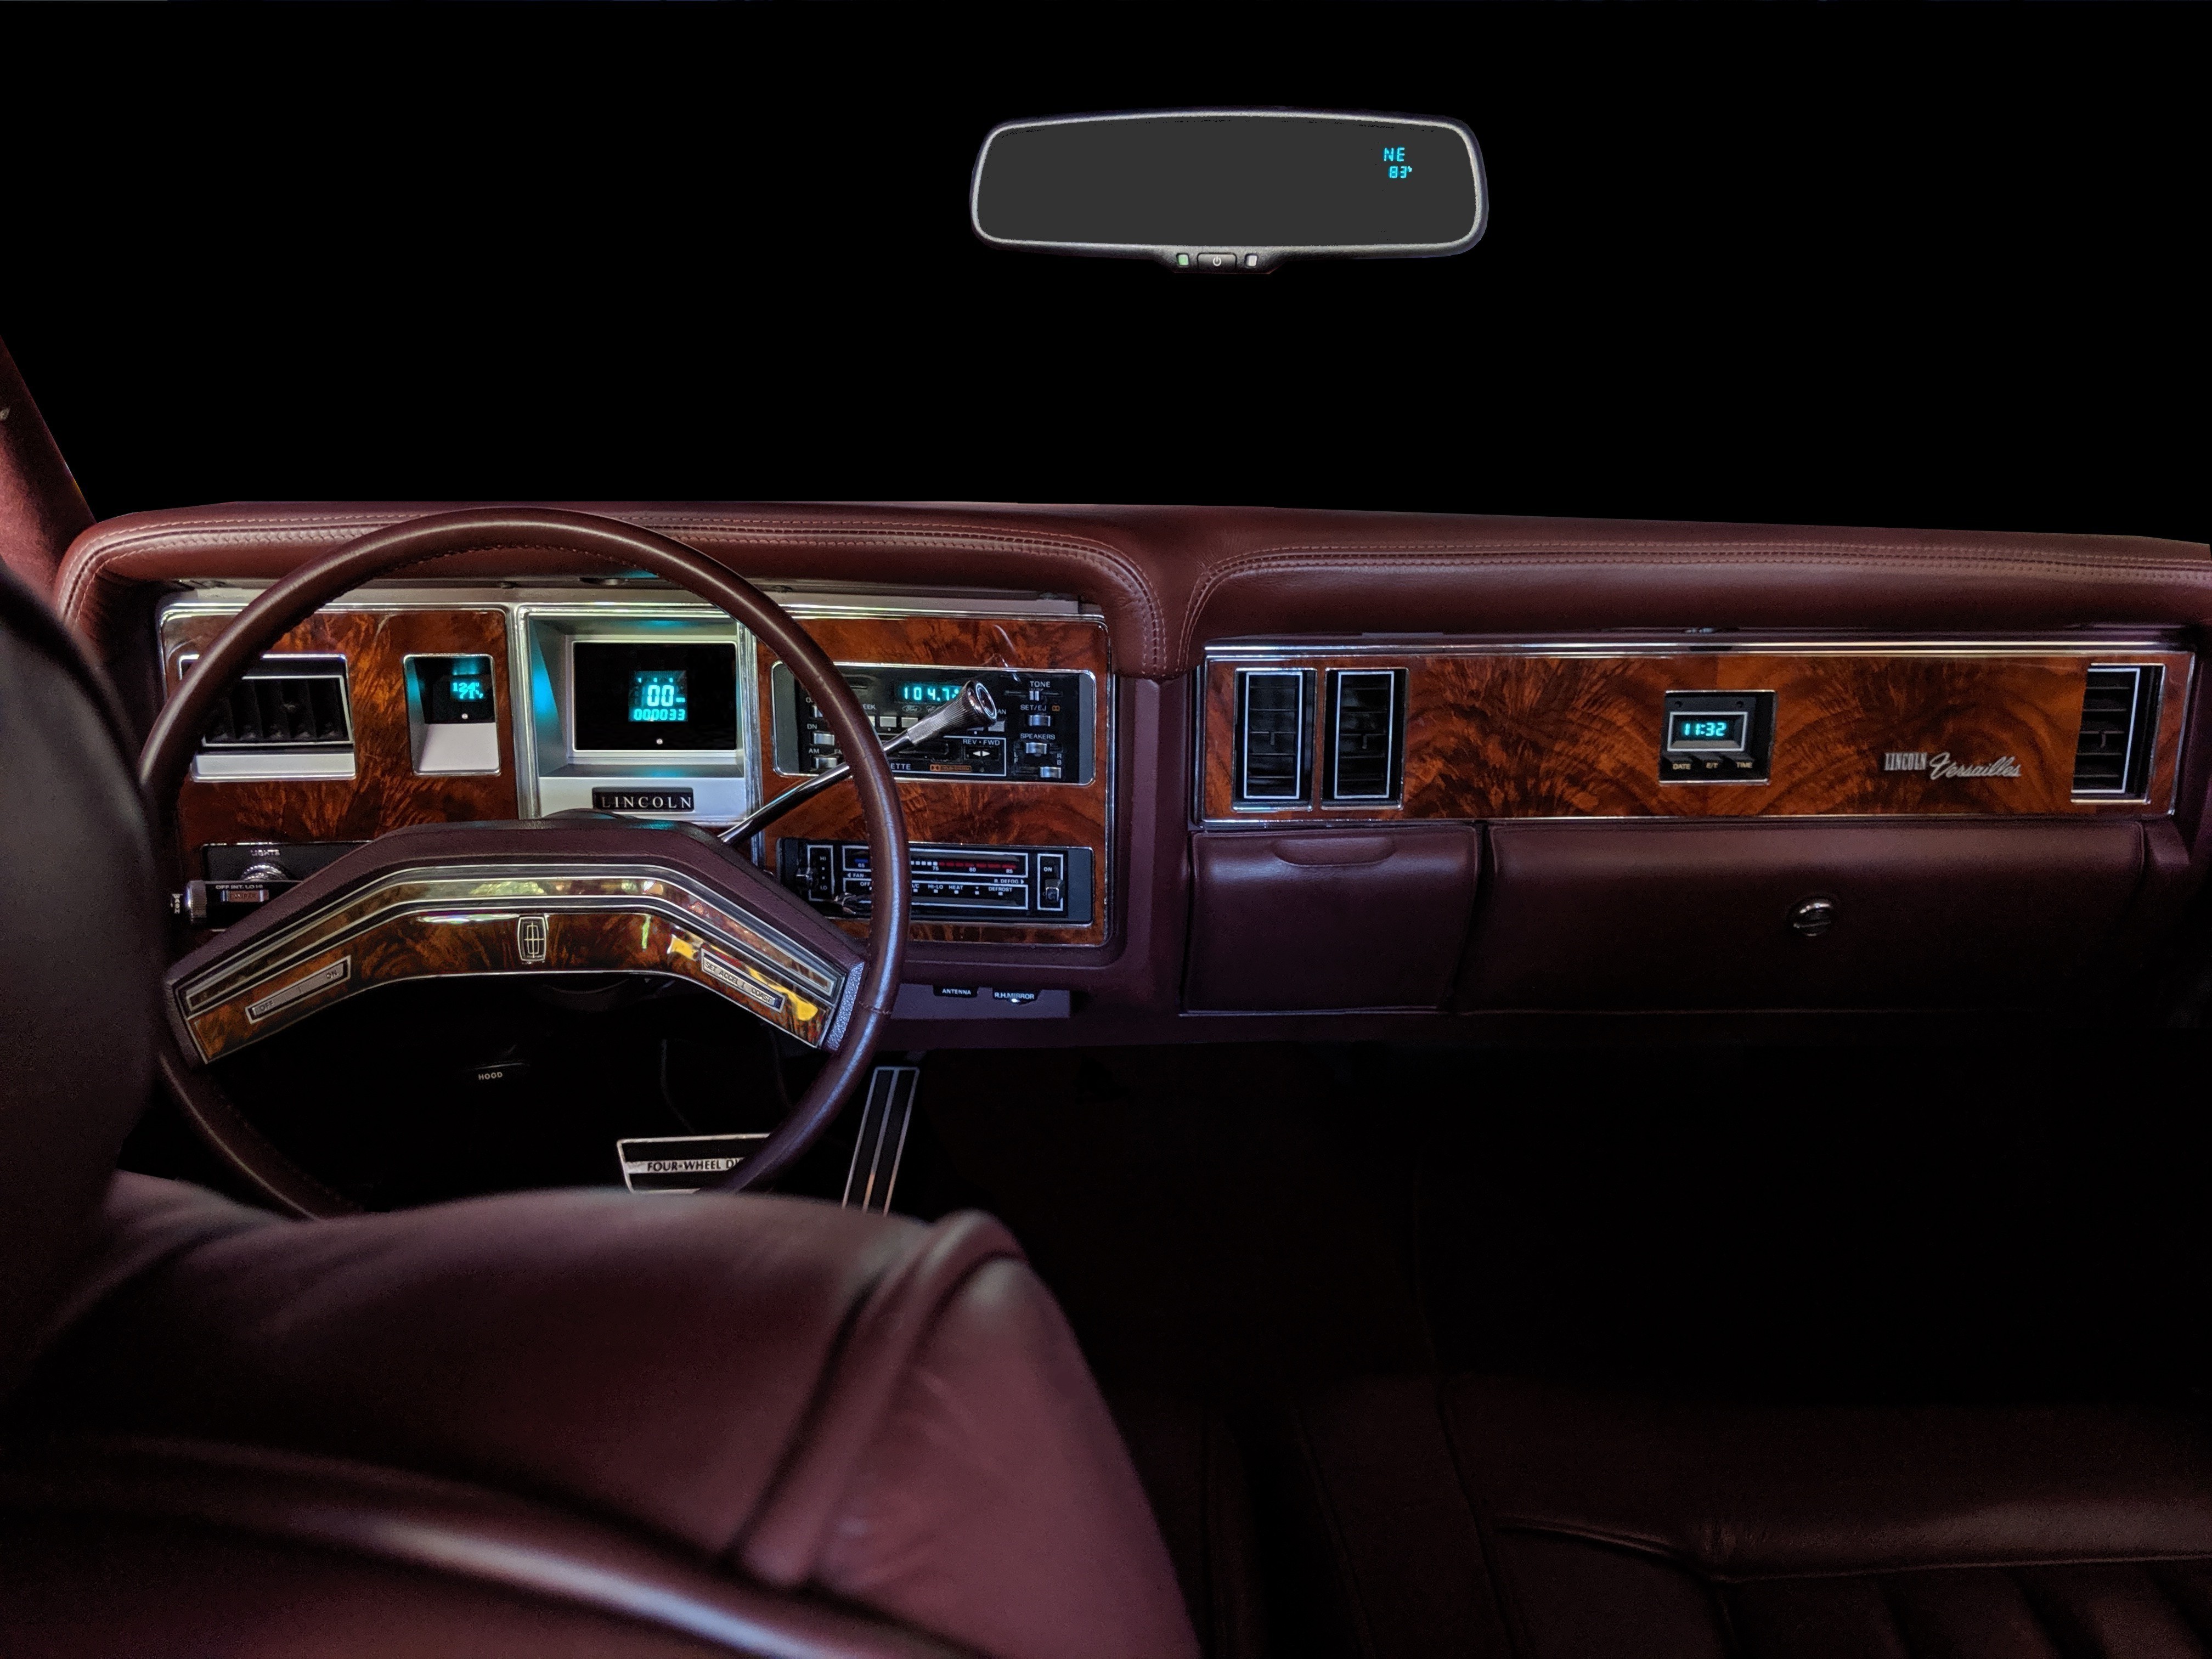
May 3, 2019 - New heater core, install digital gauges' sending units, oil change, front disc brakes dust caps, fix last a/c leak April & May 2019 - Installed custom digital gauges and mirror I had made by Dakota Digital.
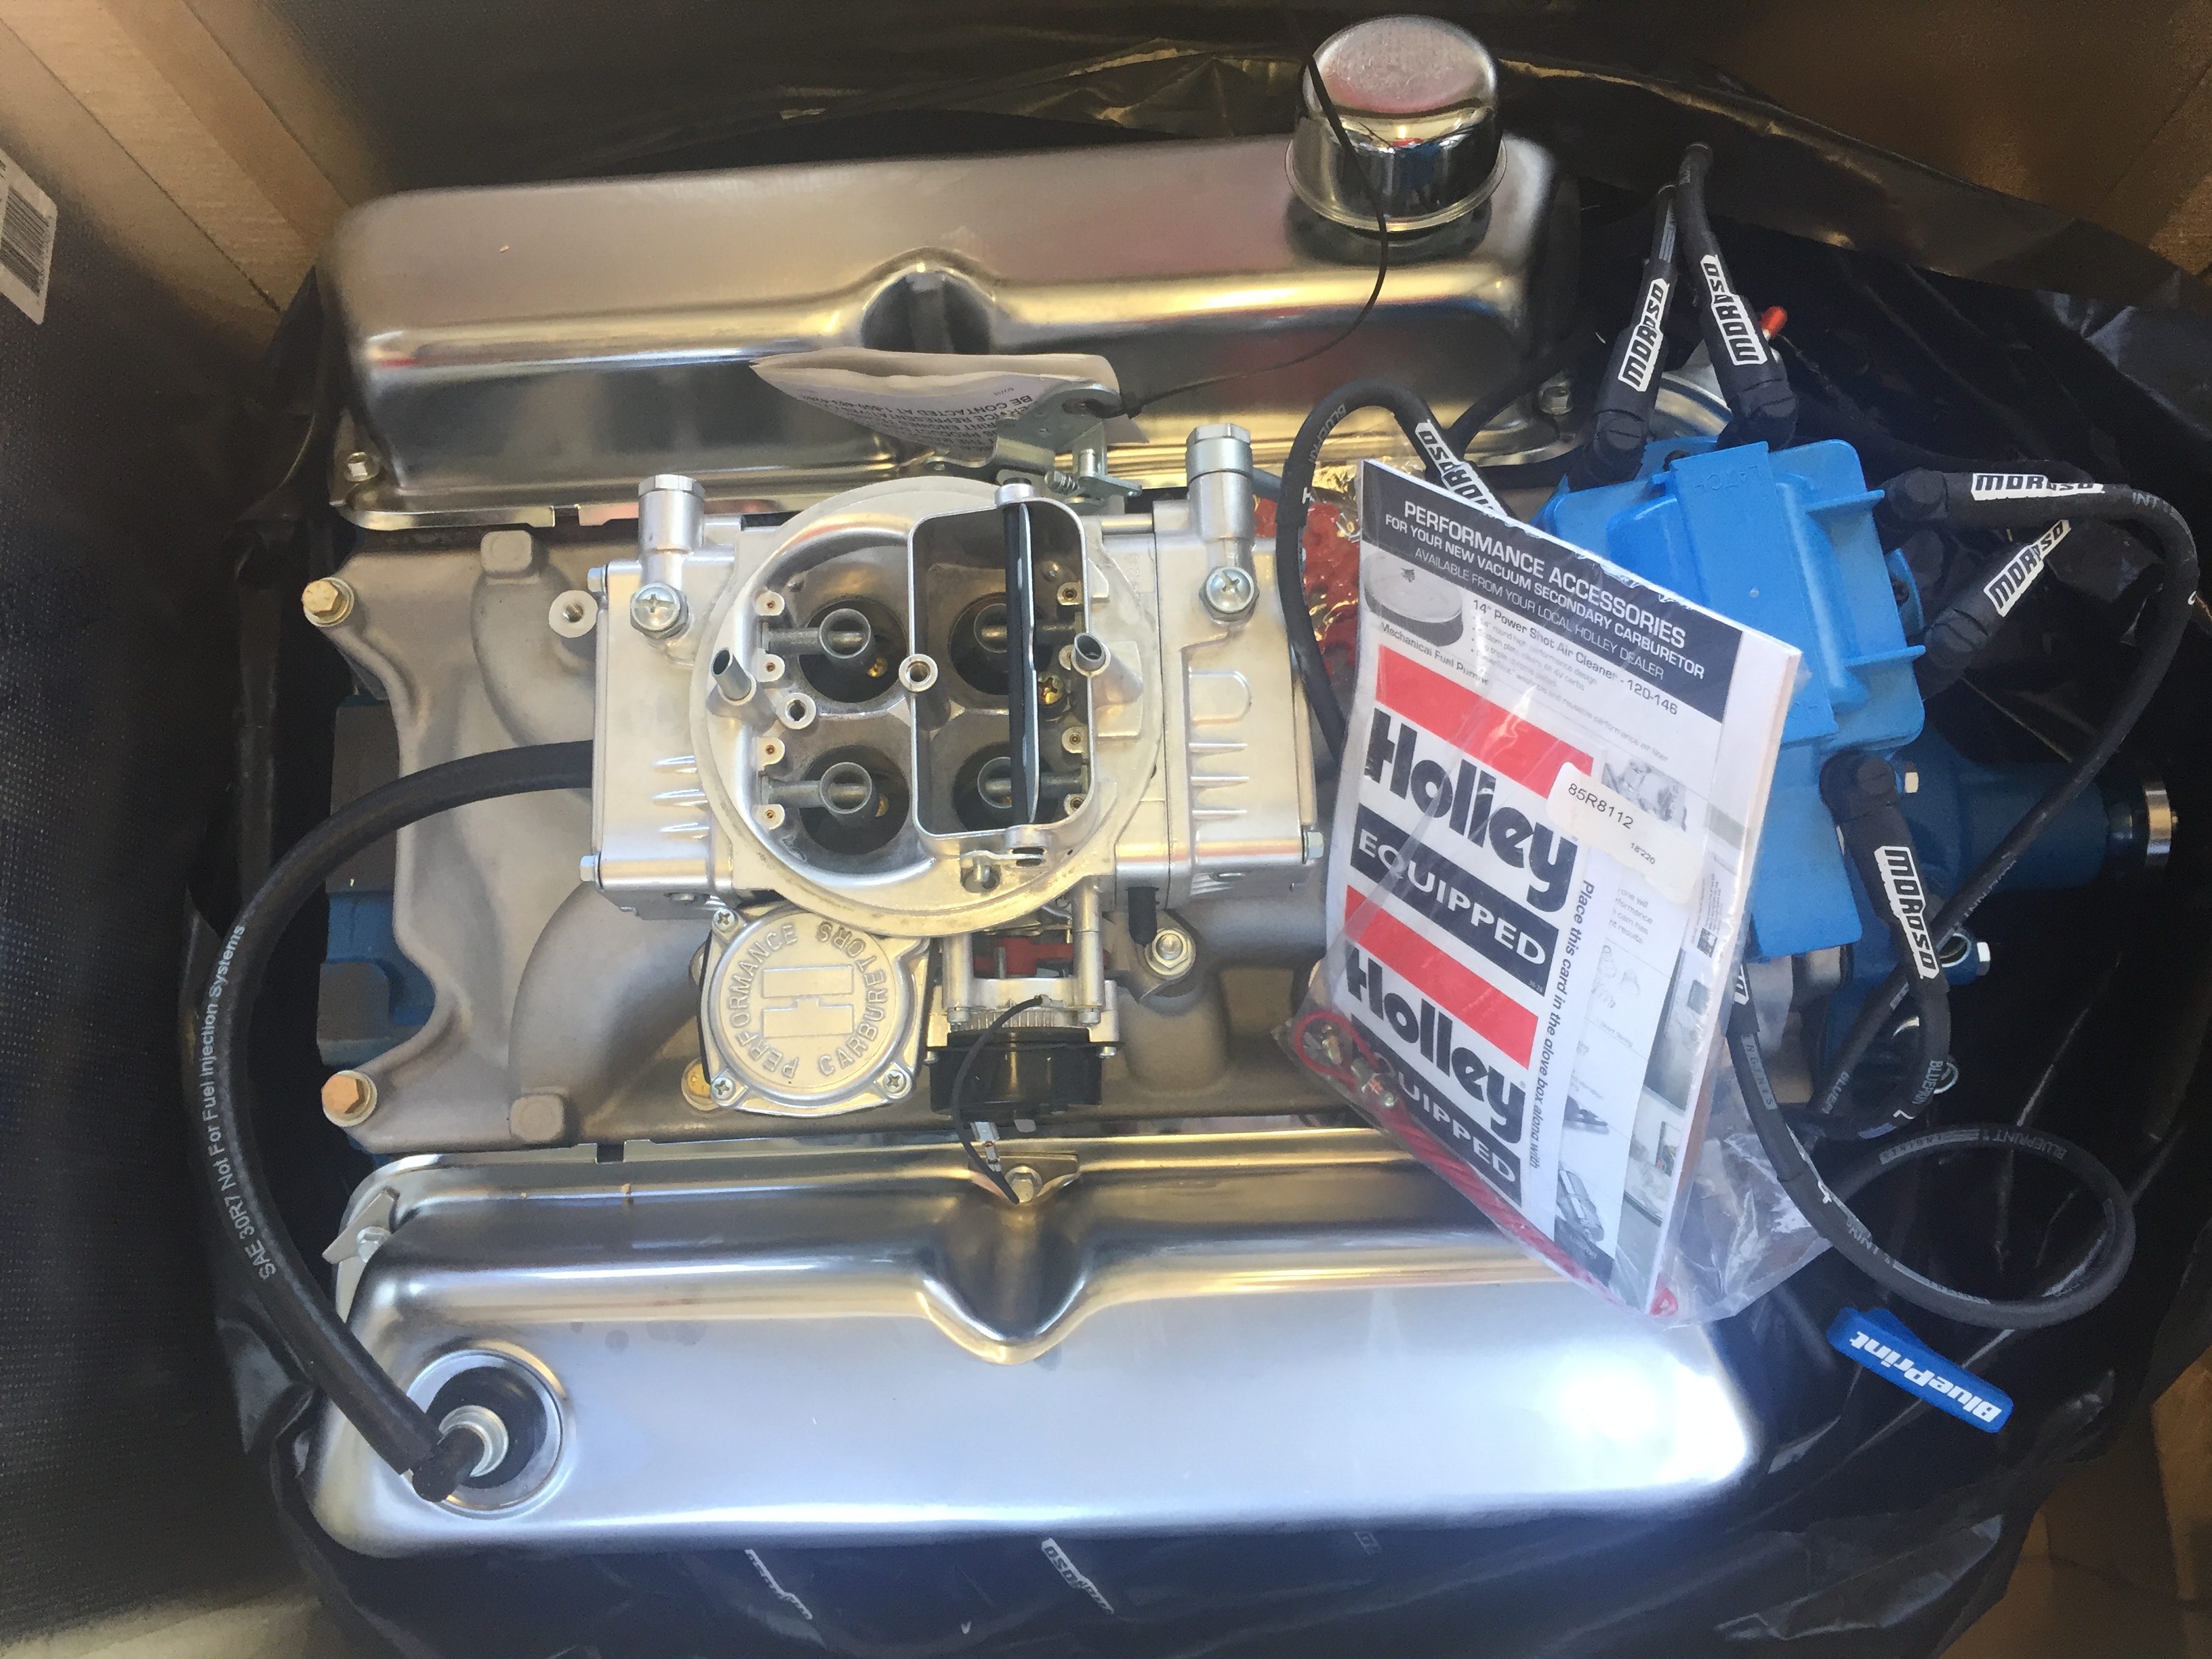
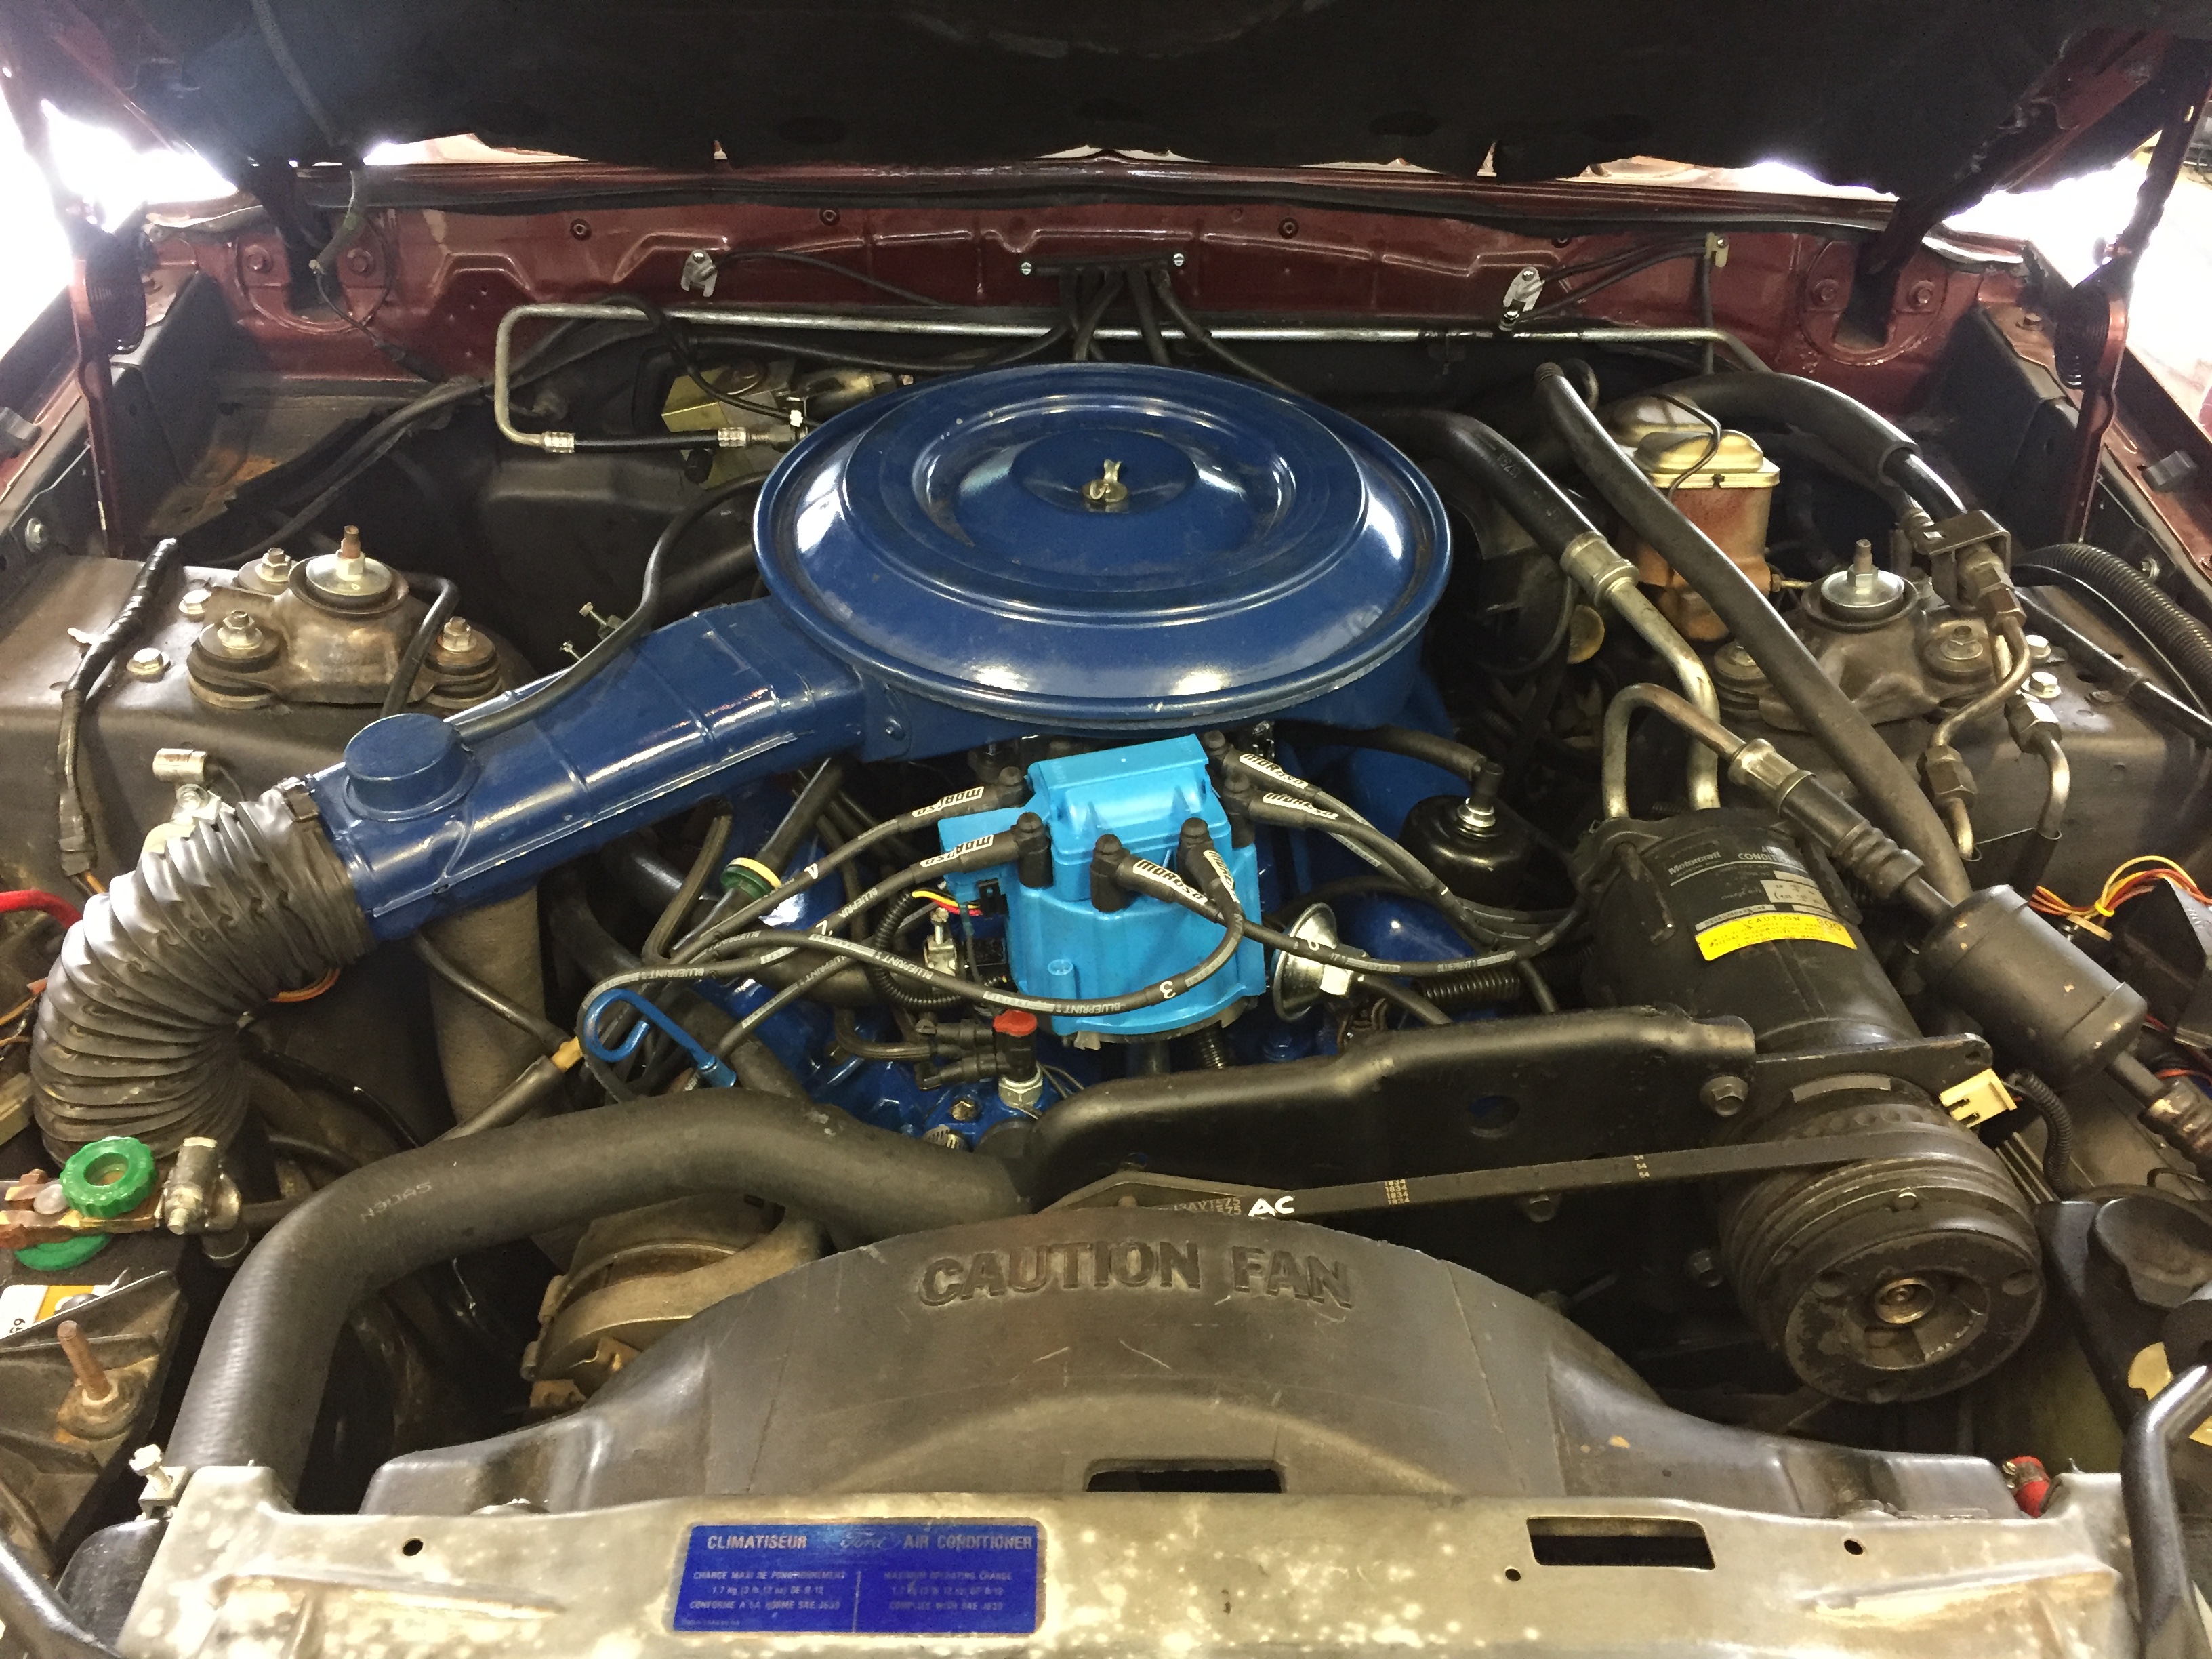
February & March 2019 - It's a busy and grand time for the Versailles. After hitting 172k miles, I decided it was time for new engine and new interior project. I ordered a new Blueprint engine from Jegs. It almost bolts in, but had to get a water pump that faces the correct way for this application and a new flexplate that matches the new engine as opposed to the original engine. Car gains 78% in horsepower, now rated at 235 and gains 34% in torque. Painted the engine Ford blue and installed the original valve covers so it looks as stock as possible under the hood. Only the new distributor stands out as not being Motorcraft parts.
New crate engine
New engine installed in car and looking OEM
February & March 2019 - As part of this project, I will update the interior which is in already excellent shape. This will be a 2nd interior that I can swap in and out with the current interior. I have duplicates of everything so I can stay original or switch to the custom look. The current interior has new, very soft leather, twin comfort lounge seats. The new, second interior will include:
June 30, 2017 - Spent the evenings all week long tracking down a power window problem. The rear left door would only go down from the door switch. The master panel switch didn't work at all and the window wouldn't go up. After removing the 2 left door panels, b-pillar trim and kick panel, I was able to trace the wires and where the up wire was and wasn't getting power. Turned out the wire was severed in the driver's door jamb. I spliced the wire back together and reassembled all the trim. June 3, 2017 - New battery, 36 month warranty January 19, 2015 - Replaced driver door mirror with a thermometer and heated glass unit. October 8, 2014 - Replaced accelerator pump. May 25, 2014 - Fully charged A/C. February 16, 2012 - Versailles is back from the shop with new fuel pump and converted A/C to R134A. Replaced dryer, compressor rear o-ring, compressor seals, and compressor clutch hub bearing. January 12, 2012 - Had the Versailles towed to the shop to replace the fuel pump. Also having the A/C finally converted to R134A. After all this time, the original R12 is getting weak, so it was time to convert. June 12, 2010 - Fixed the 7th power window issue for the year on my collection. This time, the rear passenger window would not go up; just down. That meant a wiring problem. I removed two screws on the bezel and underneath there was a loose wire. I reconnected it. Whole process took less than 5 minutes. Dec 10, 2009 - Rebuild carb, properly re-route all vacuum lines. This resolved the cold start stalling and hesitation during acceleration. Nov 14, 2009 - Replaced a front parking lamp socket with an NOS. I had repaired the previous one multiple times, but it was on its last leg and finally stopped working. Nov 7, 2009 - Replaced the front right parking/turn signal bezel with an NOS replacement. The previous lens had too many stress cracks and hazing due to age. Looks so much better now, but probably only I would notice it. Nov 1, 2009 - I acquired three more door ajar switches and installed them in the 3 passenger doors. While I had the door panels off, I completed the change over of the faux-wood painted metal to the brushed metal trim. I may switch the wheels back to the aluminum dish installed of the painted spoke wheels... not sure... I like them both.
Oct 17, 2009
- I continued work on my one-of-a-kind Lincoln Versailles Signature Series
concept. See my unique brochure
here. (For you purists, don't worry. I've kept all the original
cosmetic parts to switch the car back to factory standards. It gives me 2
cars in one!) I connected the door ajar switch in the driver's door so
that the light in the consolette works properly. Also, using an extra set
of door trim, I stripped the faux-wood painted metal and brushed it. You
can see the
before and
after pics by clicking on the link. May 2009 - Repairs: replaced radiator and all hoses April 2009 - Repairs: Replace intake manifold gasket due to leaks of both anti-freeze and oil; replace starter; new battery cables; cooling system flush; oil change August 2007 - Repairs: fixed switch on driver's door for illuminated entry; Installed shift linkage seal, band seal, pan gasket and seal rear-end yoke (but now it leaks even more!) March 2007 - Repairs: Adjust timing (finally running right) August 2006 - Repairs: new battery, new starter, new cables July 2006 - Repairs: 4 wheel alignment and new wiper blades June 2006 - Repairs: tune-up, replace valve cover gaskets, new gas tank, replace all 4 shocks, replace steering link and hoses June 2005 - Repairs: Replace master cylinder and brake fluid April 2005 - Repairs: replace all front end bushings and re-align front-end February 2003 - Repairs: New tires March 2001 - Repairs: replaced cracked and peeling dash vinyl wood trim with real wood veneers (no NOS can be found for the original vinyl appliqués) August 2000 - Repairs: new battery June 2000 - Repairs: re-chromed dash bezels, new leather wrap for steering wheel, new hood pad March 2000 - Repairs: replace inside driver door handle February 2000 - Repairs: sew new leather dash pad and door panel armrests December 1999 - Repairs: new turn signal stalk September 1999 - Repairs: radio rebuilt again under warranty, new seat belt webbings, July 1999 - Repairs: Install new vinyl top and rear deck vinyl, replace plugs, carb pump, distributor June 1999 - Repairs: Recharge A/C (still old freon in it), new carb, new fuel pump January - June 1999 - Repairs: Interior and exterior restoration. Complete color change, new paint, leather interior, new carpet, radio rebuild, 4 speakers replacement, new windshield, May 1998 - Repairs: new battery, new parking brake cable, March 1998 - Repairs: track vacuum leaks, adjust idle, repair 3 power window motors February 1998 - Repairs: new belts, resonator, weatherstripping January 1998 - Repairs: tune-up, car rebuild, new muffler, air pump, |
|
|
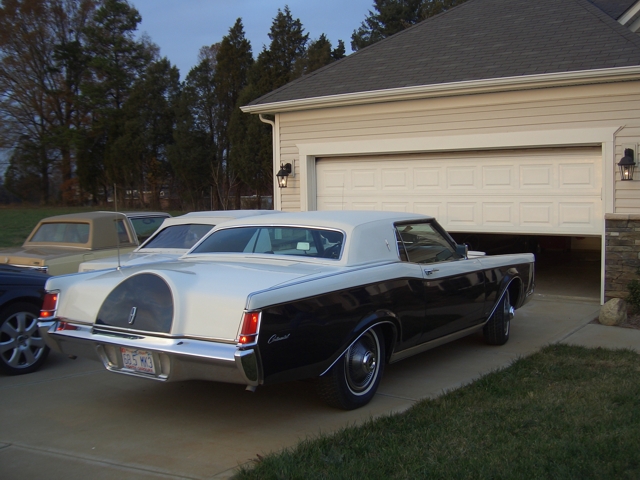
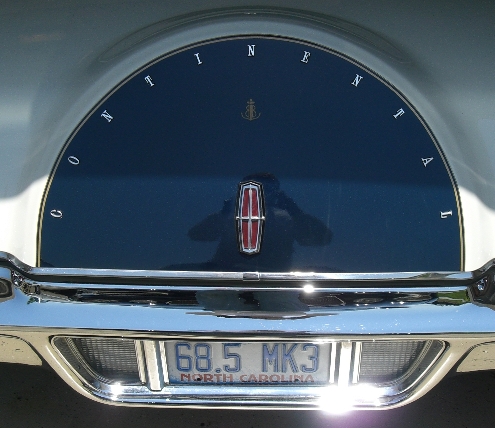
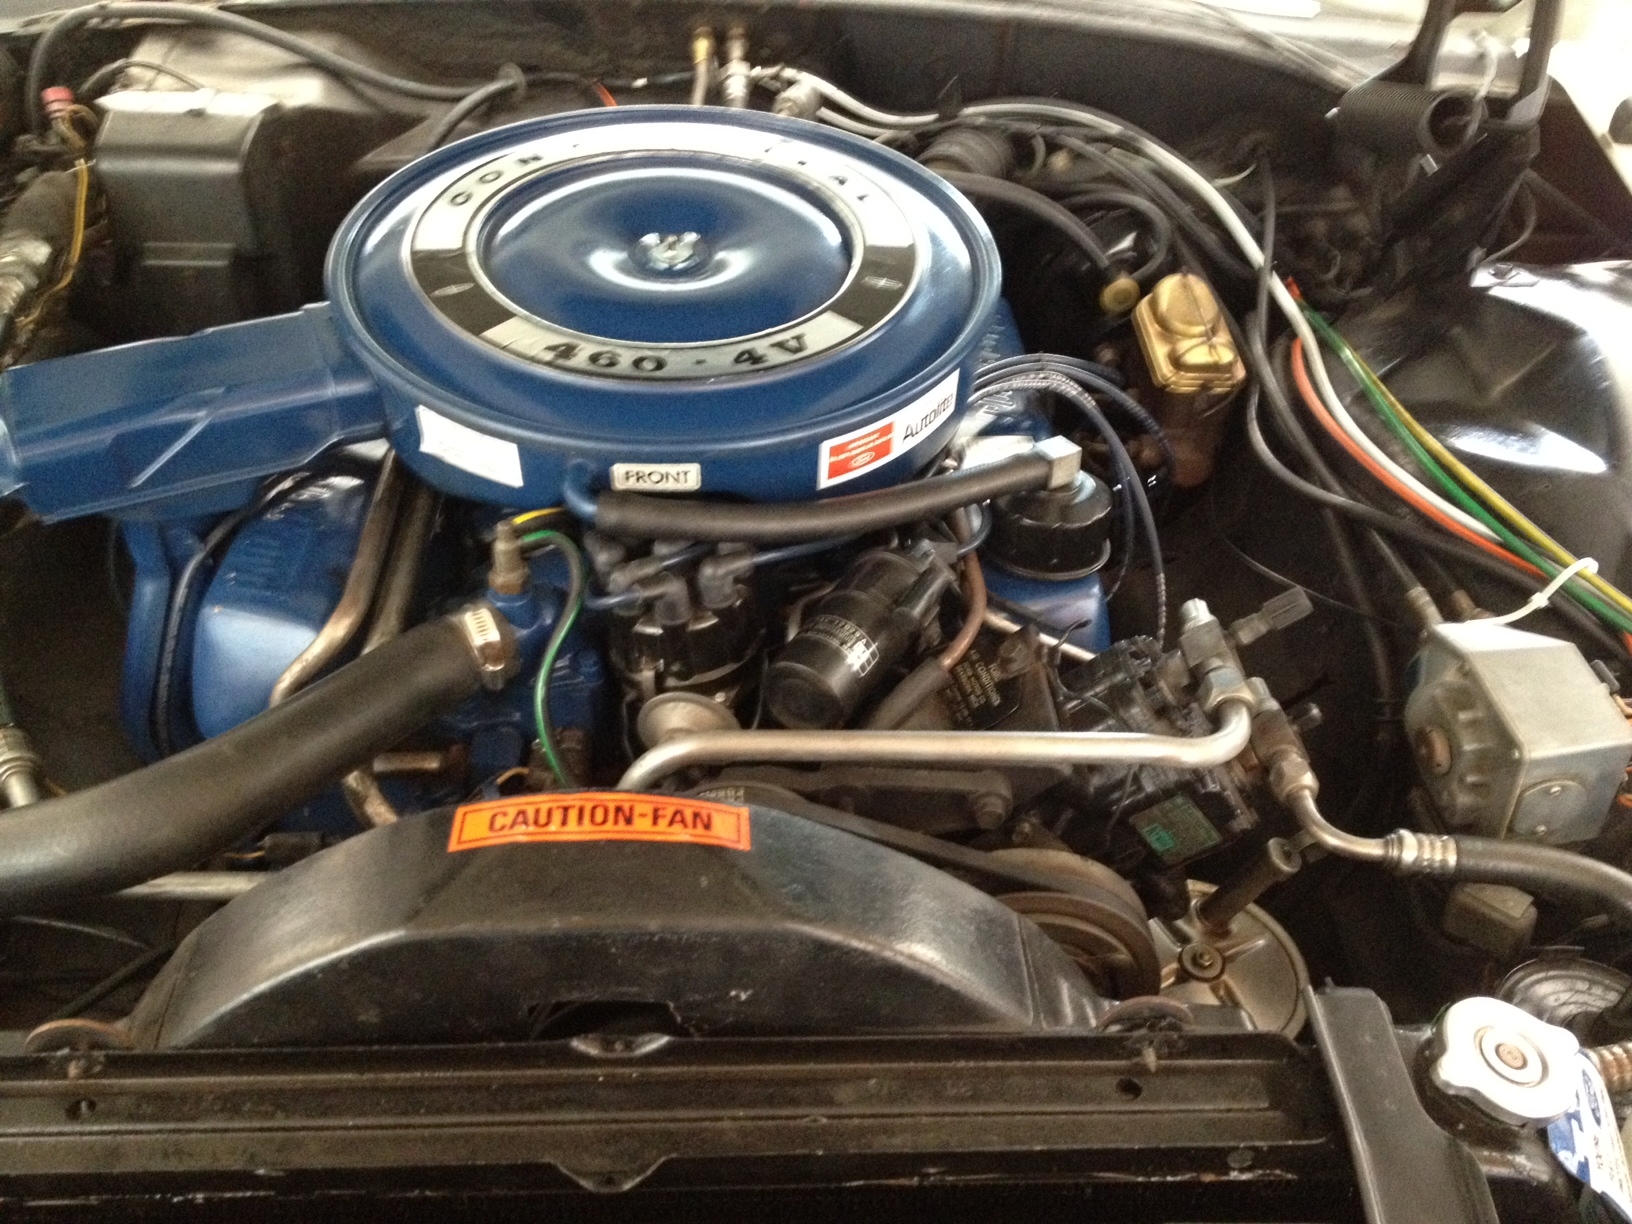
1968½ Continental Mark III I purchased this car in April 2005. It was a gift to myself celebrating 18 months as a cancer survivor. (I had just turned 41 years old when diagnosed.) This would be the car which I would have fun and be creative, while honoring the Lincoln heritage. My goal was to make this Mark III look like a Mark V Bill Blass and keep it all Ford parts. I believe I have succeeded with that task. I get more compliments on this car than any other. It was a complete transformation. See the pics here.
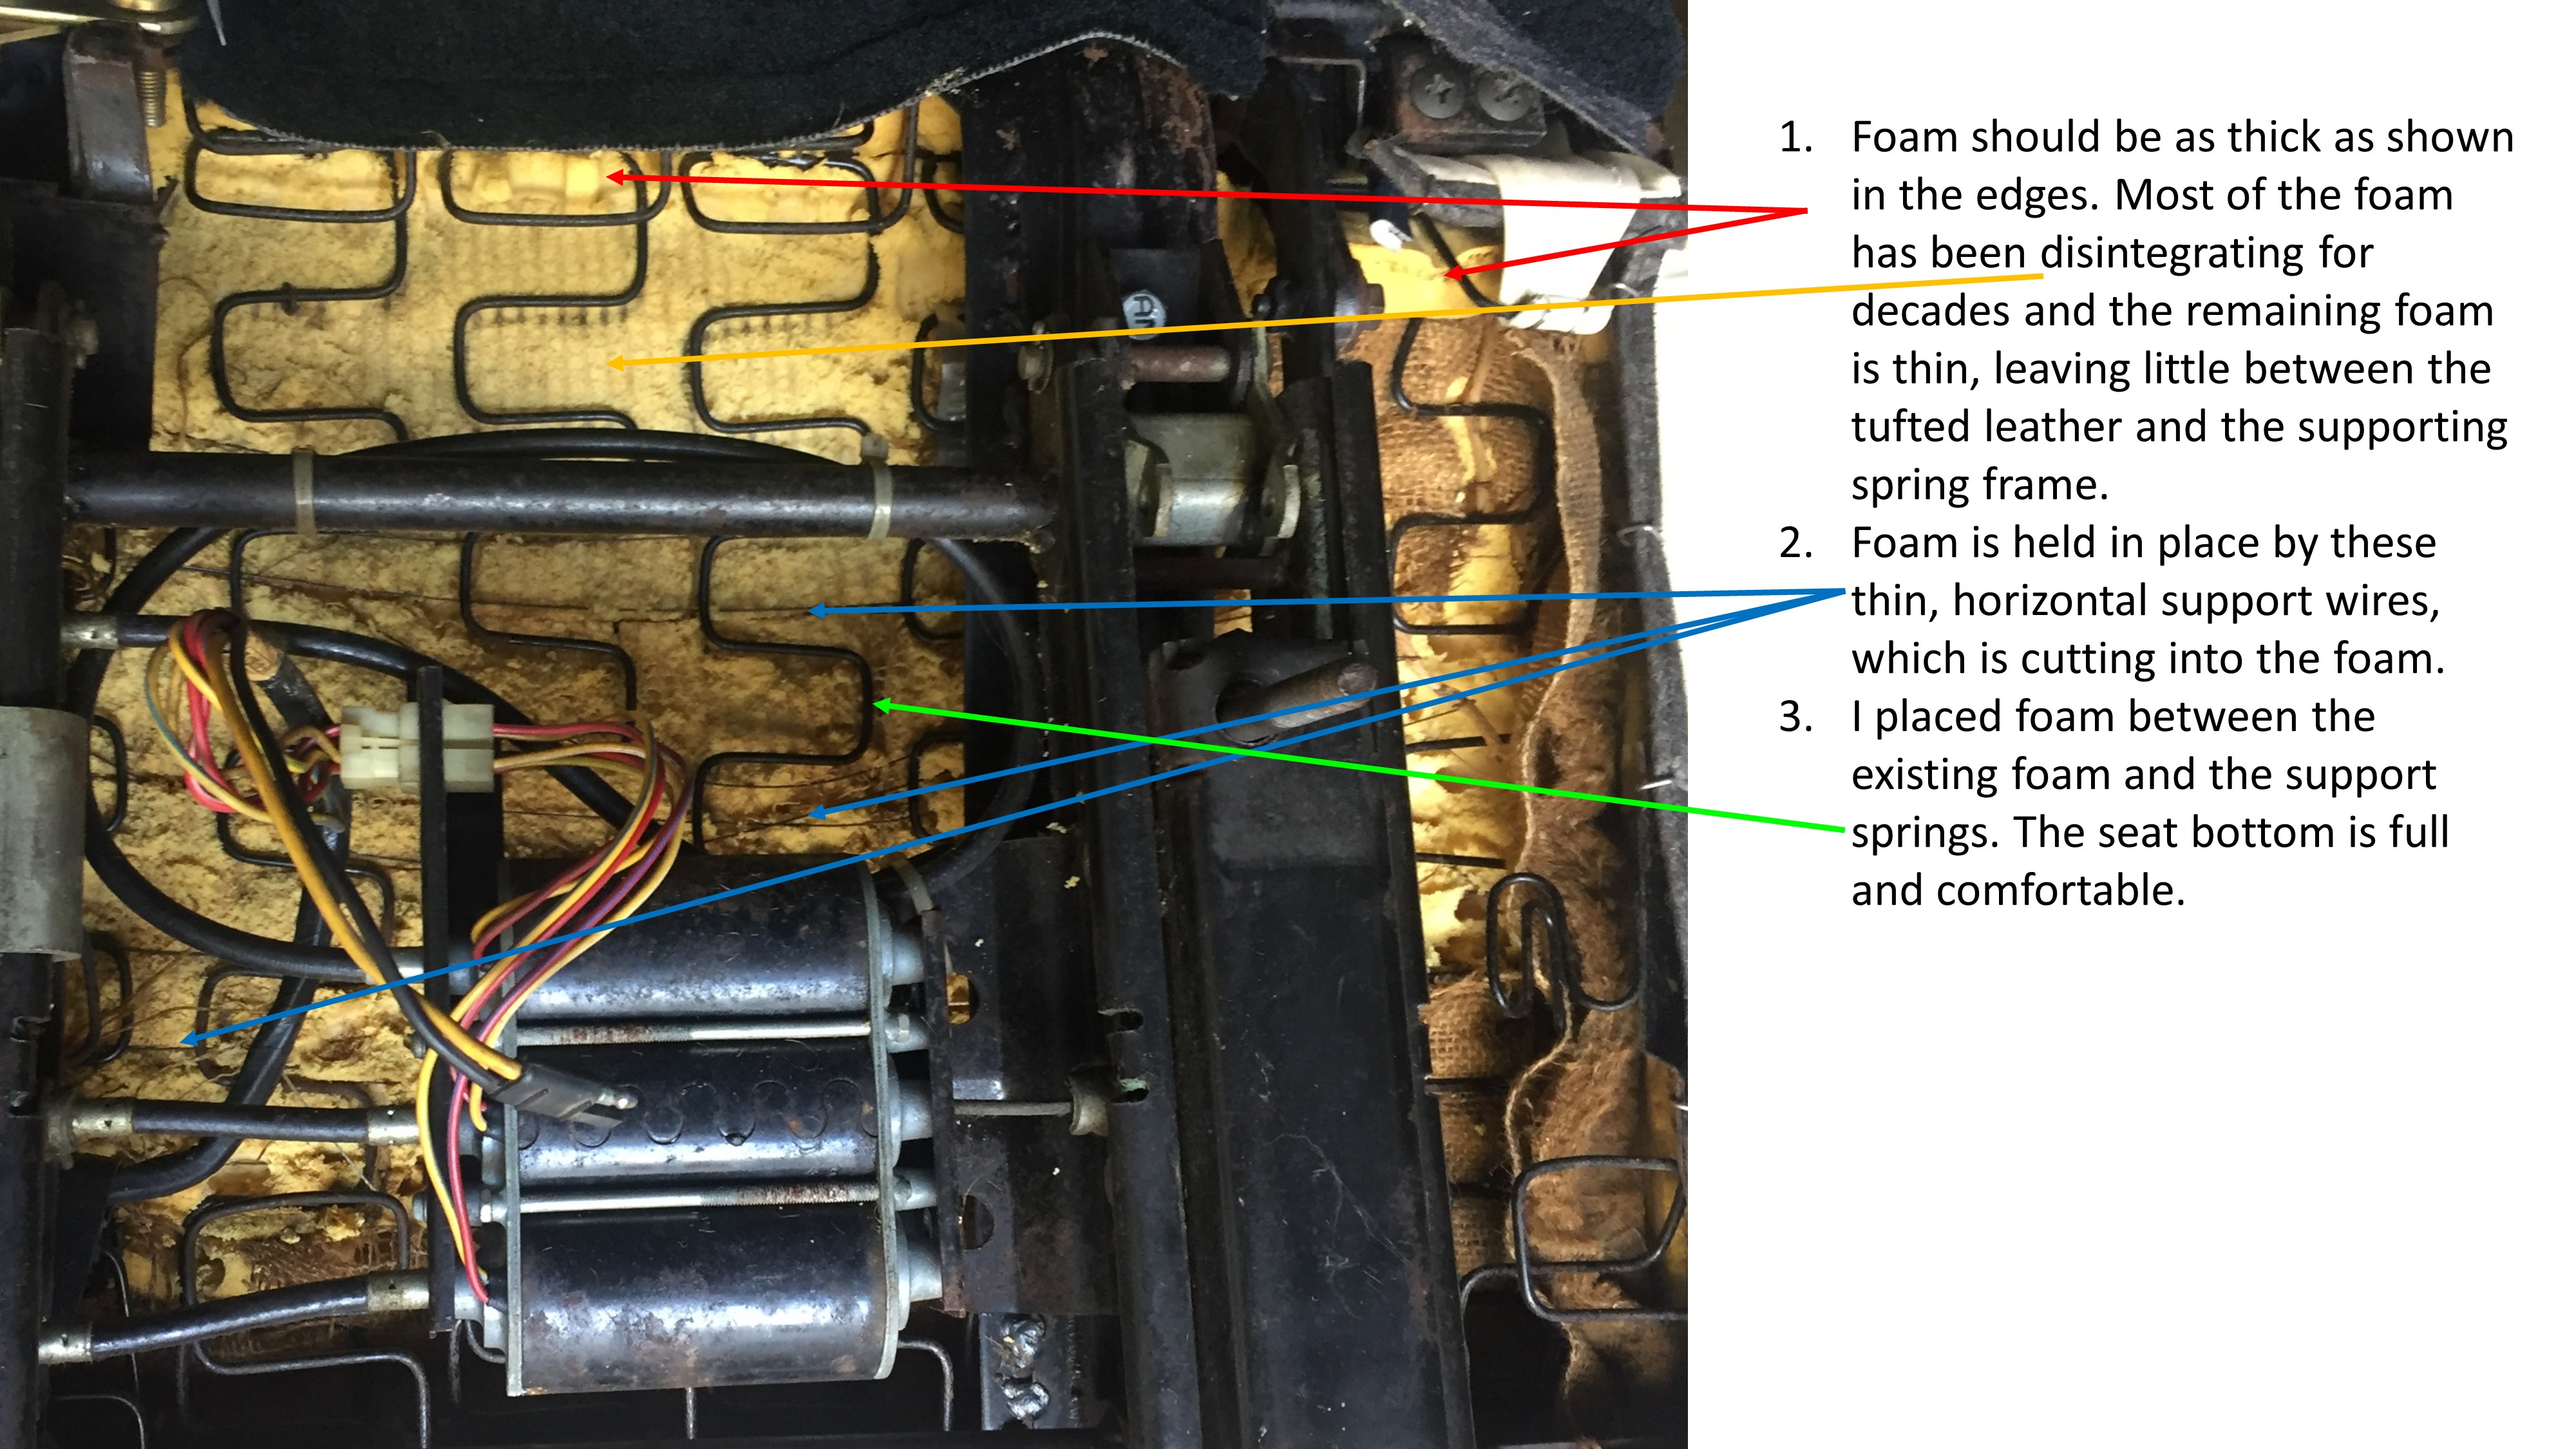
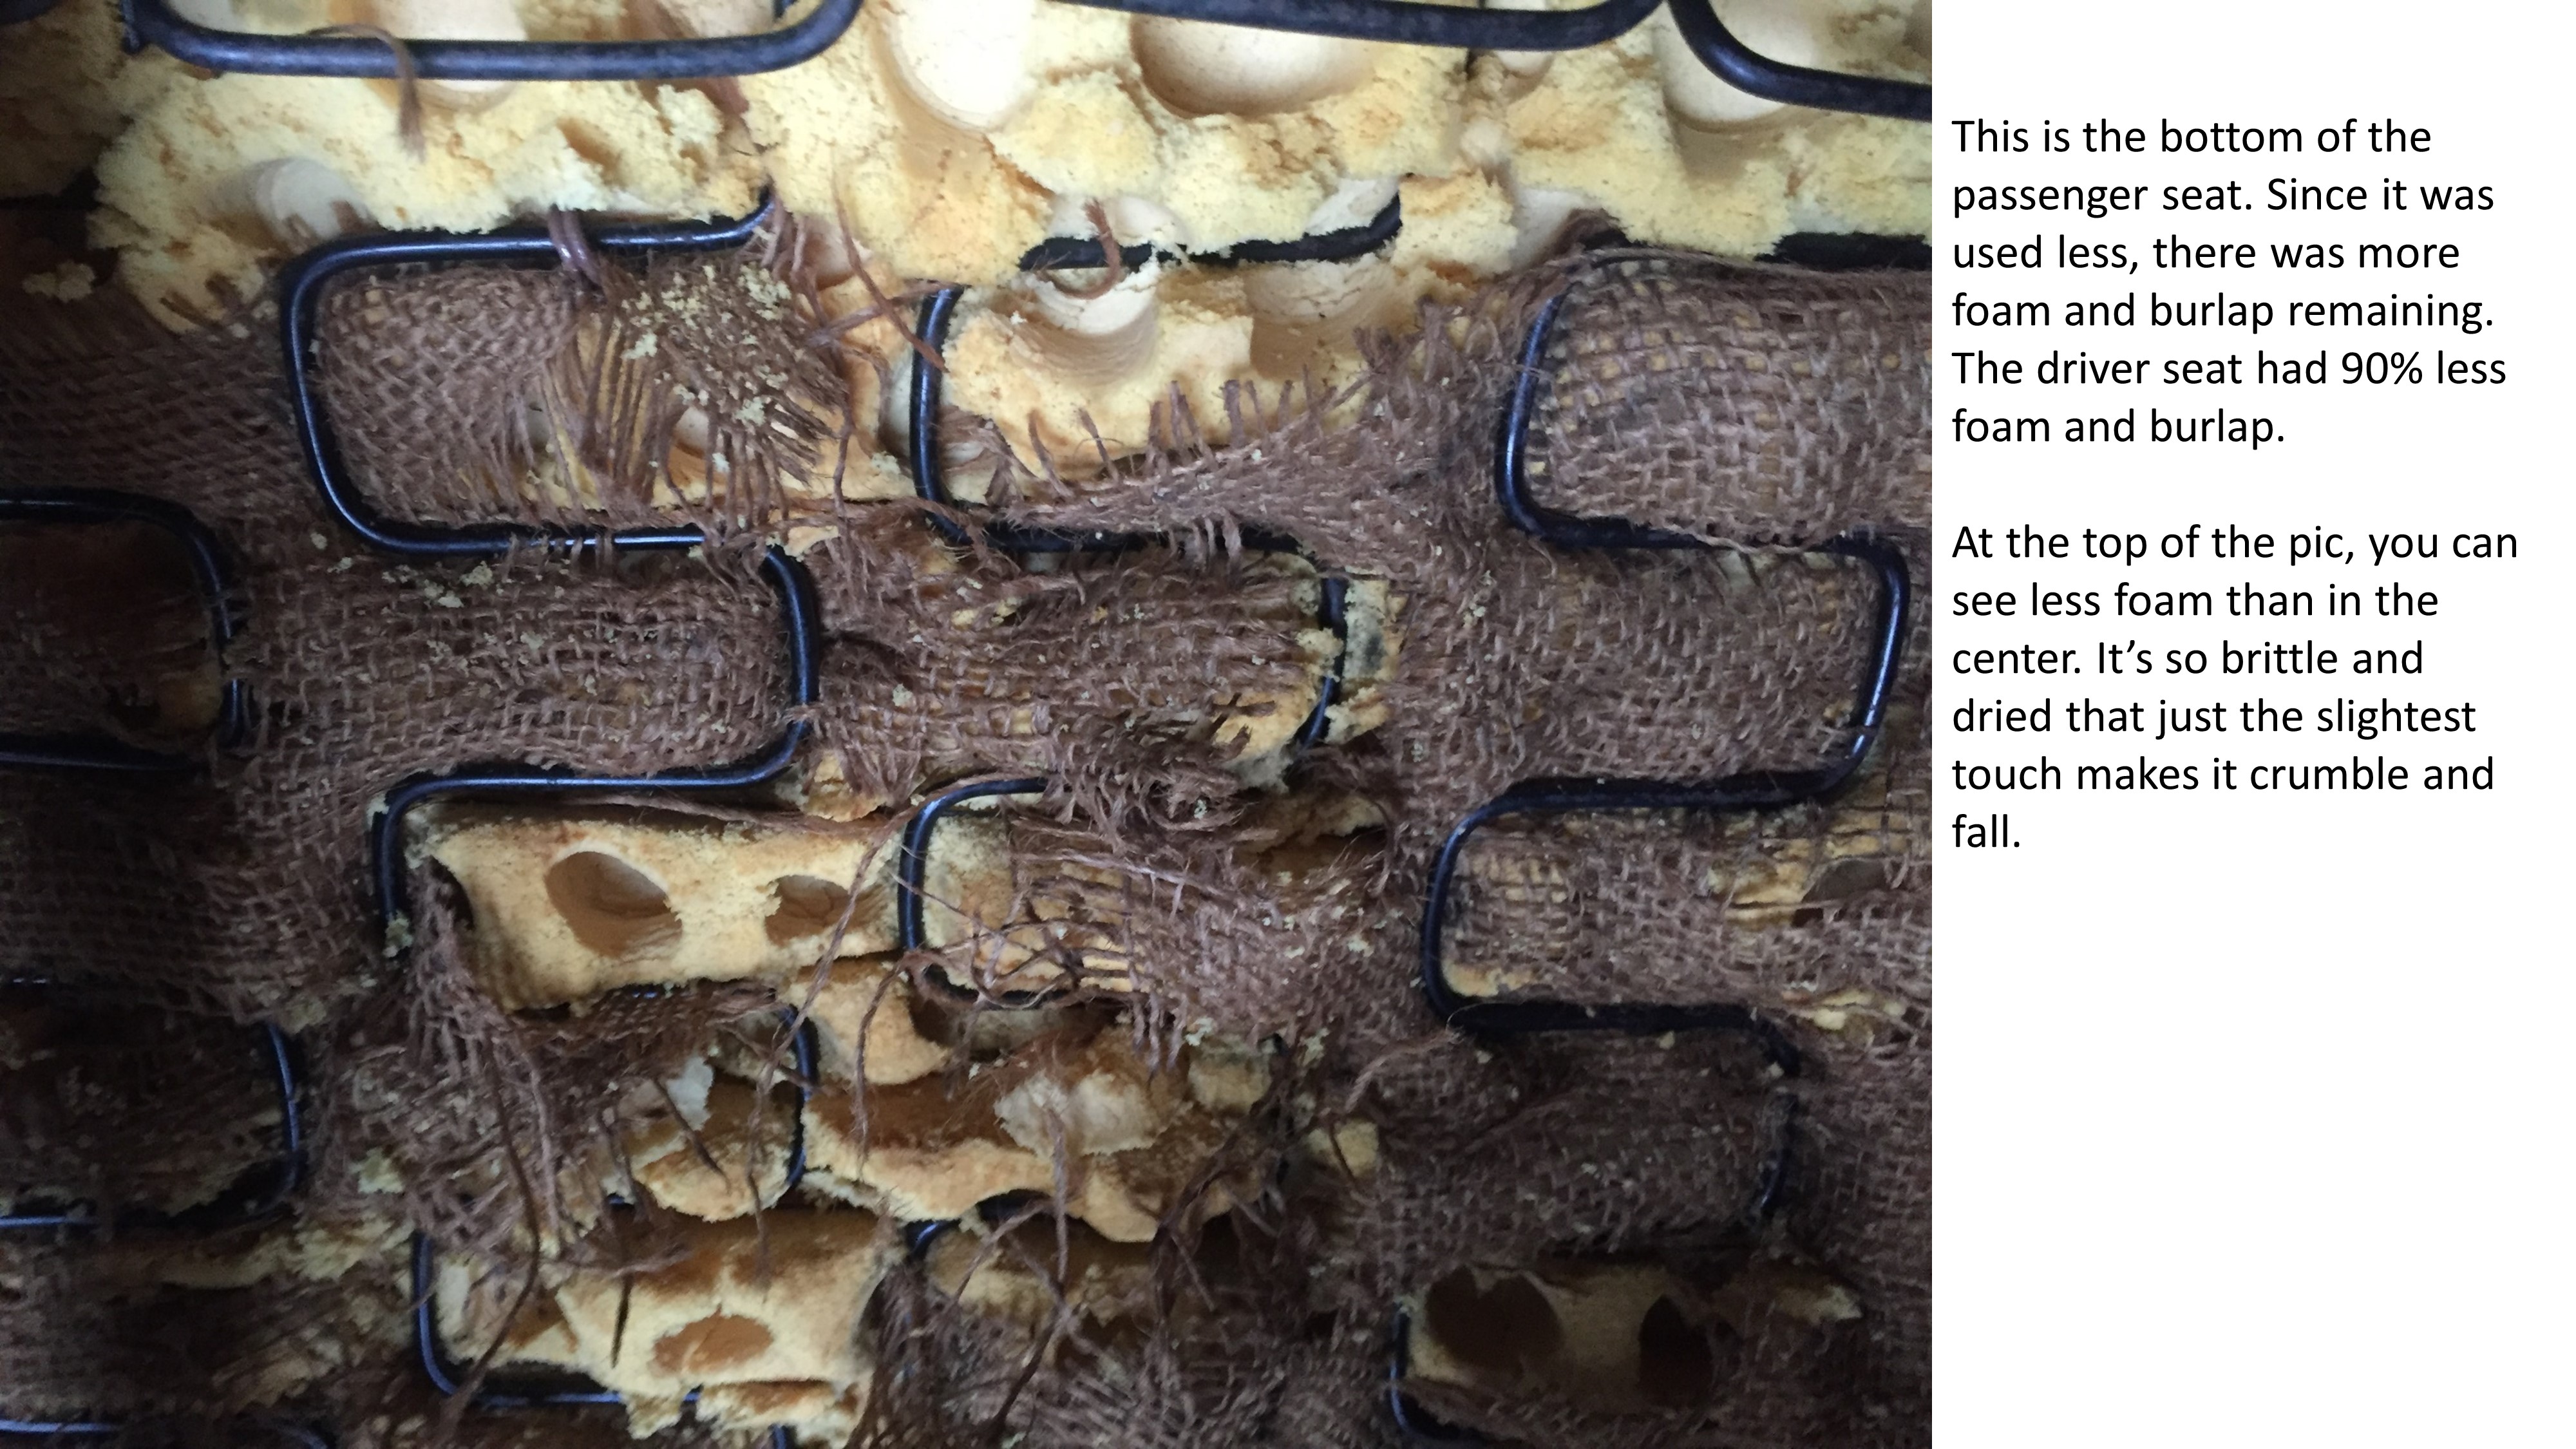
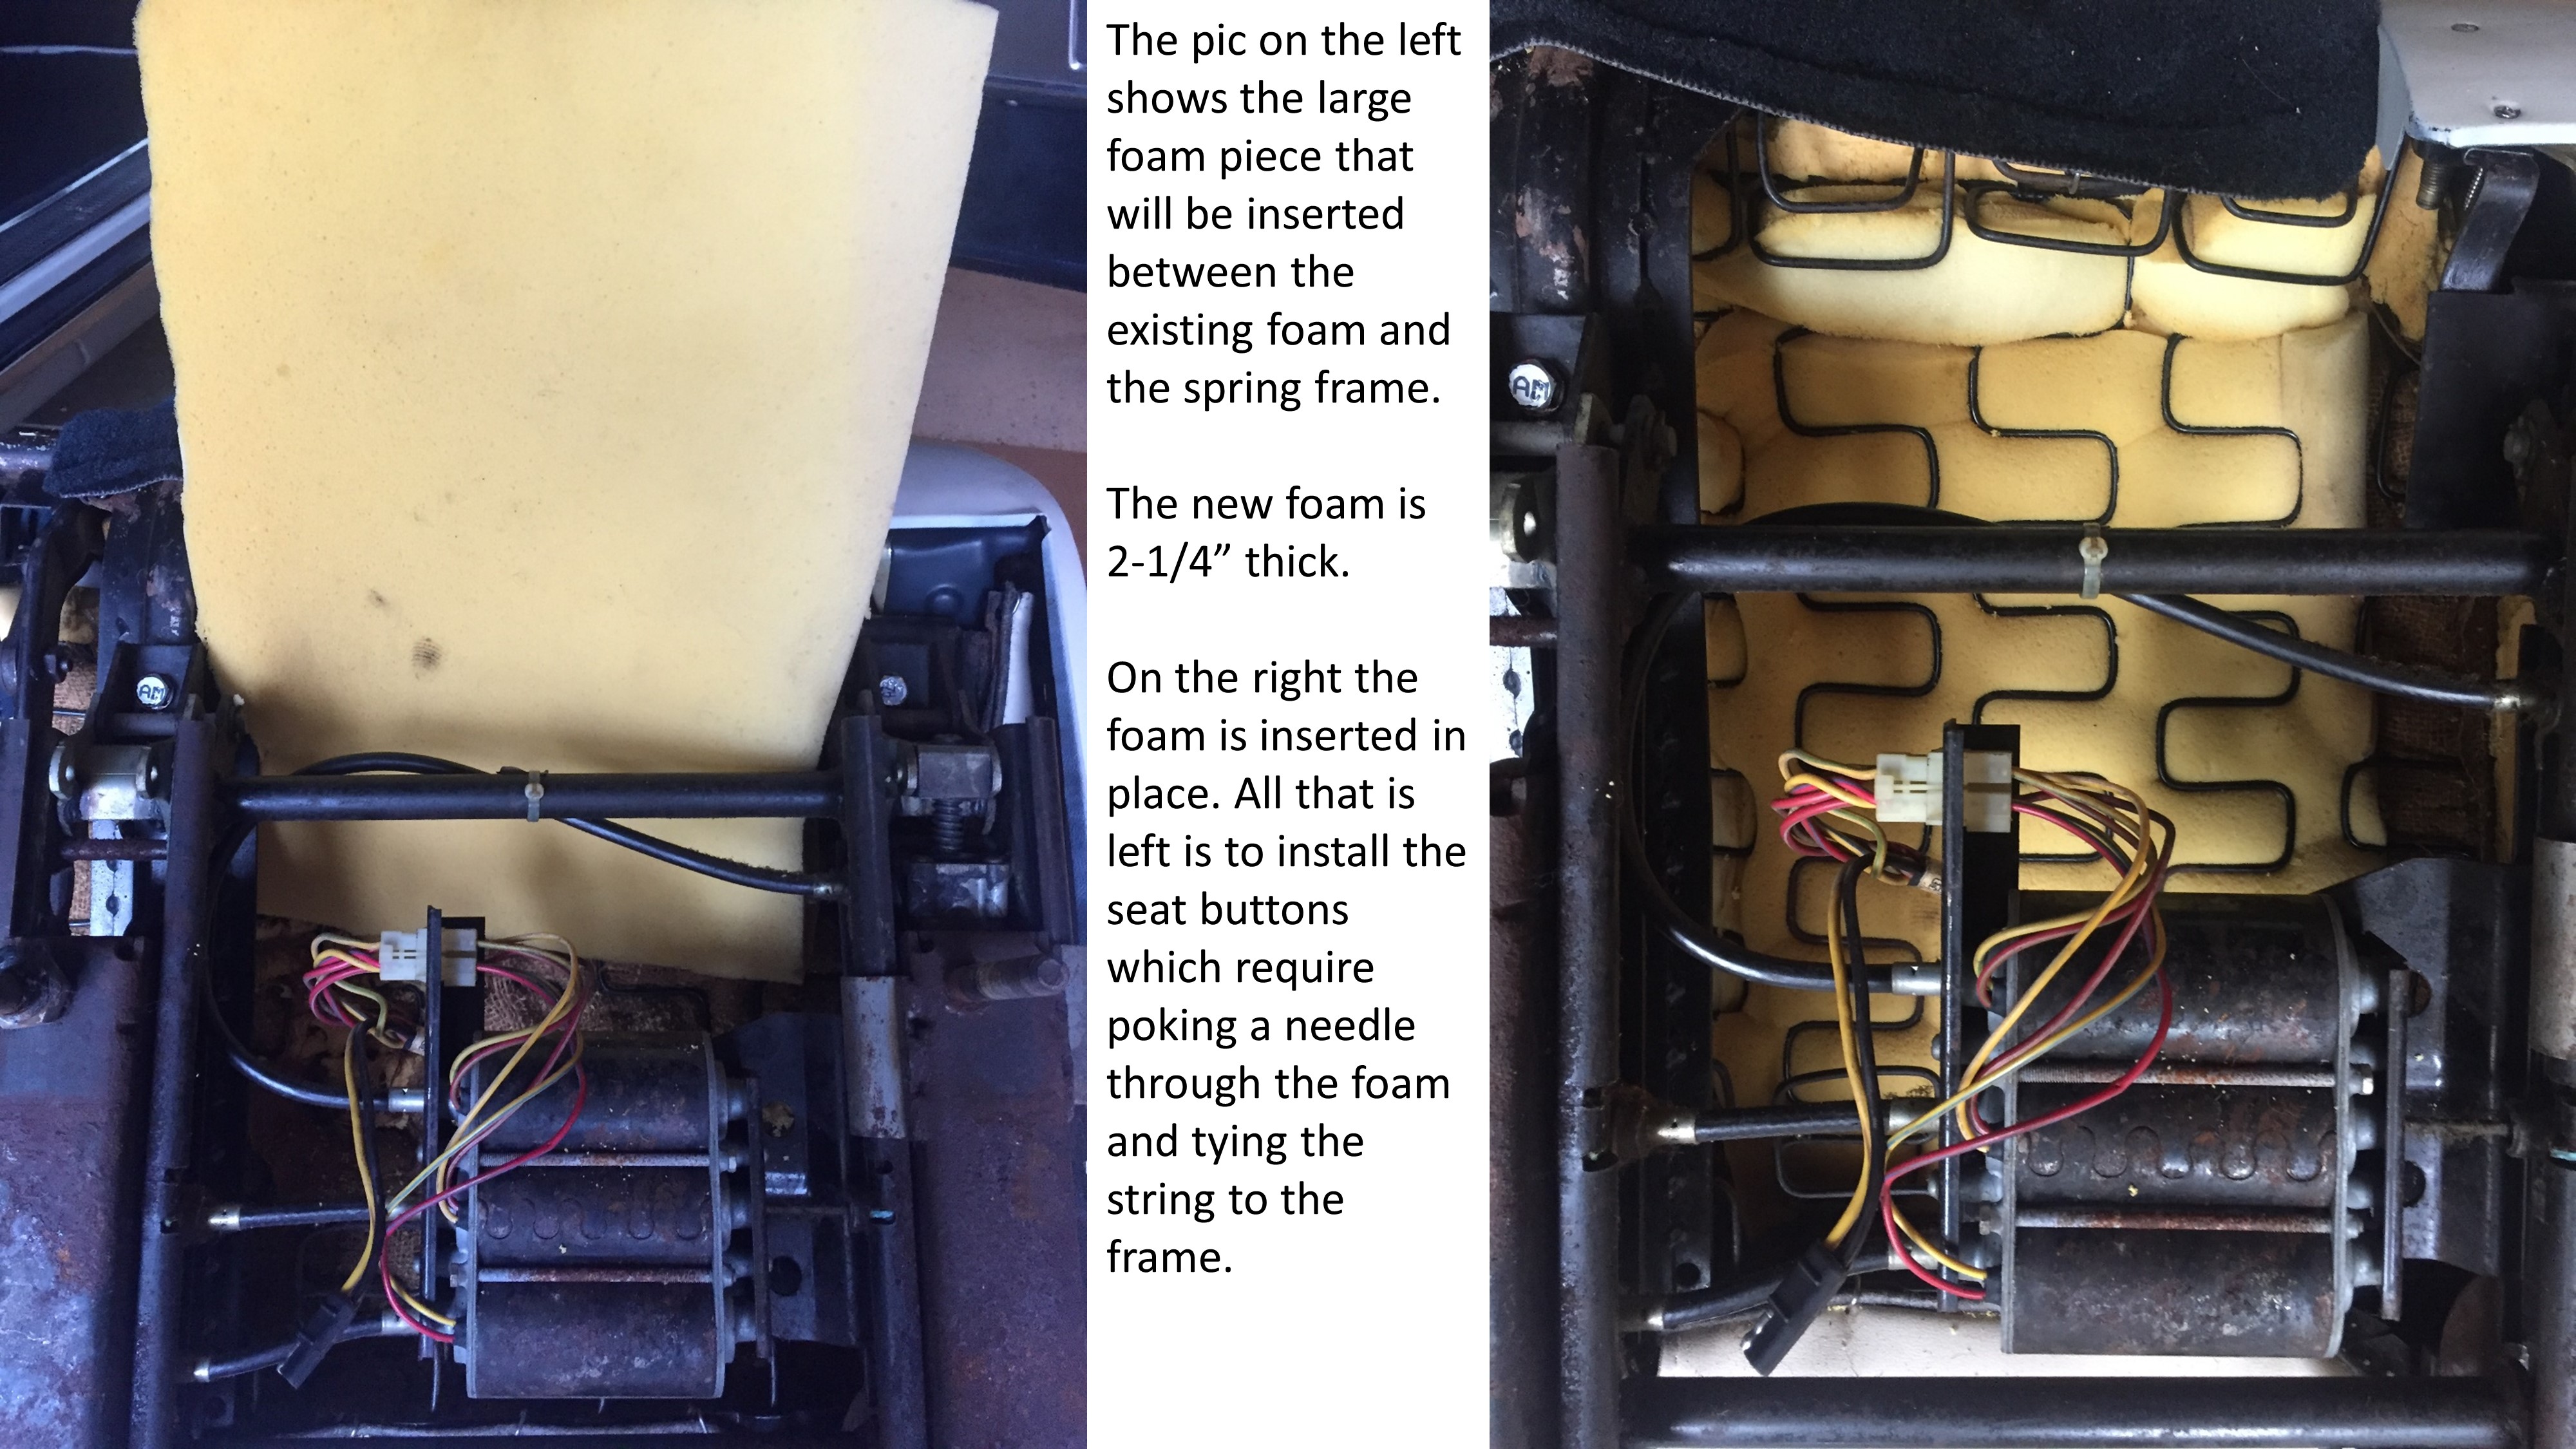
May 17, 2019 - Oil change, degrease engine, replace transmission shift shaft seal, modulator valve and servo gasket; replace valve cover gaskets, degrease rear differential September 29, 2018 - New battery. July 31, 2017 - Replaced the passenger power seat switch. July 15-16, 2017 - Removed the front seats and added foam to the seat bottoms to replace the foam that has disintegrated and disappeared over the decades.
July 4-5, 2017 - Realigned the 2 door windows so they fit properly in the space. There are 9 different adjusting points for the glass in the frameless doors. Windows in framed doors are far less complicated. August 16, 2016 - Installed new fuel pump. September 8, 2014 - Replace battery. August 9, 2013 - Stop oil leaks - new rear main seal, new engine mounts, new rod bearings and main bearings, new ignition coil and points. August 9, 2012 - Received and installed the rebuilt headlamp cover vacuum motor actuators from West Coast Classic Cougar. They work great and keep the lids closed. That's mostly the result of removing the inner spring that opened the covers when there was a loss of vacuum. July 29, 2012 - I've been driving the car a lot. It is running better than ever. Very smooth, quiet and confident compared to before. It's never been this good before. July 25, 2012 - Remove trash buildup in carb; replace missing clips on carb; replace condenser and points; adjust timing. July 21, 2012 - Removed the headlamp cover vacuum motors and shipped them to be rebuilt. July 14, 2012 - Painted the factory colored stripes on the lower part of the engine bay connecting to the headlamp cover vacuum motors. June 30, 2012 - Purchased new vacuum hoses, painted the factory colored stripes on them and installed them on the top of the engine bay. I still need to do the same for the lower hoses that connect to the headlight door vacuum motors. May 14, 2012 - Replaced the universal glass pack resonators with OEM. Sounds better! May 12, 2012 - Slight leak on transmission fluid. Turns out a pan bolt on the corner was missing; probably since the transmission was rebuilt in Feb of 2011. January 31, 2012 - Replaced the incandescent headlights with halogen units. It made a marked improvement in the light. 3 of the 4 incandescent bulbs that I removed appear to be original to the car as they still have the FoMoCo stamp on the lenses and SAE68 stamp on the back. I guess that's not too surprising as the car has about 70,000 original miles. January 21, 2012 - Replaced the glove box light switch. October 10, 2011 - Had the contacts in the ATC "brain" (potentiometer) cleaned and repaired blend door to stay closed tight when it should. I was getting heat through the vents with the unit off and a front window was down. Had the A/C charged with 3lbs of refrigerant. I've never have charged the system since I've owned it and it was time. October 19, 2011 - The battle of the power windows continues. The left rear window stop working; thank goodness in the closed position. I had to remove the rear seat, the interior rear quarter panel assembly and the whole window assembly to get to the motor. Seems the gear just got stuck. Put the whole thing back together. It works as it should. Process takes 3 hours. I'm getting faster at it since I've disassembled this a couple of times now and know what to do. June 3, 2011 - Car rides and drives better than ever with all the new suspension work and more work on the carb. Install carb kit for needle & seat clean out; replace front and rear shocks and coils; replace front lower control arm bushings; replace rear lower control arm bushings; replace door jam switch; 4 wheel alignment February 18, 2011 - Had the transmission rebuilt again since the previous repair was shoddy. I'll drive the car more over the weekend, but I'm encouraged. The drive-ability has greatly improved and the performance seems confident as when new. May 30, 2010 - Replaced the headlight switch in an effort to eliminate leaks in the headlight door system. It helped to double the amount of time the doors stay closed after turning the engine off from 2 to 4 minutes. But, they should stay closed for days. So, now I have to keep checking for other leak sources. May 15, 2010 - I just finished working on the Mark's rear driver power window again. The last repair failed after a couple of weeks. The magnet in the motor casing came off the case and stuck to the motor again. So, my mechanic and I cleaned and rebuilt the previous motor. It works strong. It's insane, all the things I had to remove to get to the motor: rear seat, door sill, armrest trim bezel, armrest, disconnect wiring to cigarette lighter, upper quarter panel retaining trim molding, upper quarter trim panel, lower quarter trim panel, metal shield protecting the entire quarter panel (from what I have no idea), metal window assembly (with window, motor, rails, etc), then I had to disassemble that assembly to get to the motor, then I had to disassemble the motor to get the gears out that I needed for the replacement motor... it's no wonder the car weighs 5,000 pounds! May 9, 2010 - Tested the vacuum lines and motors associated with the headlight doors to determine the cause of the doors opening within 2 minutes after the engine was shut off. Problem was isolated to the headlight switch. By bypassing the switch, the headlight doors stayed down. Because the Mark has the auto-dim headlight feature, there are no NOS or new switches available. I'll have to send the switch away to be rebuilt. May 8, 2010 - Replaced the driver's door master power window switches with new units. So, now all power window switches in the car are new. Also replaced the vacuum power door lock actuator. It would lock, but didn't have the strength to unlock the door. Apr 22-25, 2010 - Drove the Mark III to Ocala, FL for the 2010 LCOC ENM. Visited the Don Garlits Museum and the NPD HQ & Car Collection. The latter was extremely impressive. I drove 1,041 miles roundtrip and averaged 14.77MPG. Not bad for such a big car with a big engine! Plus, I drove the car about 60% of the time with the A/C on. I won 1st in my class, "modified" because of my color scheme. Fixed the power trunk lid. The rod in the vacuum actuator needed lubrication. One power window motor that was repaired, needs to be replaced now. Found out why the car sounds throaty to me. The mufflers are small. They should be about 5-6 times larger. Finally, I need to replace the shocks with something Ford branded or at least looking original. Apr 16, 2010 - The devil is in the details. I've made 2 changes: 1) I replaced the lock cover backing with a red reflective tape, instead of being the background color. This metal plate kept falling out and I was out of the navy metallic paint. Plus, the red reflective plate represents the look used on all future Marks and makes the car a bit more visible and safer at night. 2) I added labels for the master switch panel on the driver's armrest. The brochure shows labels for the power door locks and window locks. I think over the years, these easily are wiped when cleaning. Apr 14, 2010 - Over the past 6 months, 3 of the power windows have failed on the car. Marks are known for non-working rear quarter windows. I had this fixed once. At that time it was not the motors, but the switches. Previously, the switches were removed, cleaned and re-installed. This time, the switches are being replaced with new switches. After the switches were replaced, the motors were acting irregularly or sporadically. So, I replaced both motors. Also, the right rear quarter window was binding against a lose piece of the weather stripping and getting stuck. That channel and weather stripping had to be repaired. It's a lot of trouble to remove the back seat and armrests to get to the side panels and the switches. So, while everything was out, I replaced the rear quarter courtesy lamps with new units. The existing units were pitted. The new ones look great! Finally, the passenger power window motor just died. That has been replaced with a new motor and also a new switch. One day, I'll need to replace the master control switches on the driver's door armrest. They can be a bit sticky. Mar 29, 2010 - Reconnected the vacuum line that open/closes the rear vent in the package shelf. Mar 6-7, 2010 - Clean and detail engine bay (first pass), touched up paint on engine and some underhood components, applied all missing underhood decals, replaced windshield washer pump and replaced front marker/turn signal lenses with reproductions. Feb 27, 2010 - Fixed leak in windshield washer bottle; realigned wiper arms so they lay flat and low on the windshield/cowl line; stripped pealing paint off metal trim above glove box door and polished it... looks bright like chrome Dec 15, 2009 - Resolved two problems on the car: 1) strong gas odor caused by a leaking fuel line and a disconnected vapor canister and 2) functioning of the ATC system which was put in disrepair by two unrelated other repairs. When the interior carpet was replaced, the shop accidentally tugged on the wire that led to the ambient temp sensor in the kick panel. This caused the wire to break at its weakest point which was inside the sensor itself. With the sensor not working, the system defaulted to putting out heat all the time. The other problem occurred when the transmission was rebuilt. When it was reinstalled, they pinched the vacuum hose that provided the source of vacuum to the ATC's brain box. This kept the temp setting and motors to the different blend doors from working properly. With the sensor replaced and the vacuum source restored, the ATC system works as it should. Yeah! Nov 18, 2009 - Replace front crank shaft seal; rebuild power steering pump; replace freeze plug; replace timing chain; oil change Aug 1 2009 - Took the Mark III to the NC Transportation Museum in Spencer for their annual All-Ford show which is held on the 1st Saturday of August. 102 Ford cars and trucks were in attendance. This year, the feature make was Lincoln and there were eight Lincolns there. I almost didn't make the show because during the previous week, the Mark was running rough; very sluggish under any load and on hills. It appeared to be two causes of the symptoms: 1) a frayed wire on an electrical connection between the distributor and coil and a clogged nipple on the vacuum line leading to the transmission. After correcting these two items, the car ran great and smooth. June 2009 - Repairs: replaced gas sending unit, new starter, re-align car after bolt popped (no charge) April 2009 - Repairs: replaced turn signal stalk January 2009 - Parts: replaced door sills with NOS (very hard to find) September 2008 - Repairs: 4 wheel alignment August 2008 - Repairs: Rebuild radiator, exhaust leak at choke heater, place driver window back on track, rebuild transmission June 2008 - Repairs: Tighten loose connections on voltage regulator, replace distributor, adjust timing, replace fan clutch, adjust carb float, replace front strut rod bushings May 2008 - Repairs: replace all 5 stereo speakers March 2008 - Repairs: Water heater control valve, valve cover gaskets, new plug wires, PCV valve, February 2008 - Repairs: Traced, corrected and verified all vacuum lines January 2008 - Repairs: Power passenger seat switch, ignition switch wires, rear reading lamp switches, trunk lamp and harness, trunk vacuum actuator December 2007 - Repairs: New tires, new horns. Interior restoration: reupholstered seats, door panels, headliner and replaced carpet June 2006-December 2007 - Paint and body shop: complete, strip to metal restoration. Parts: ordered interior leather, vinyl, headliner and carpet May 2006 - Repairs: Replaced overhead warning light bezels. Parts: NOS Bill Blass stripe kit, custom Bill Blass decals April 2006 - Repairs: carb replacement. new plugs, new brake proportioning valve, new brake master cylinder, March 2006 - Repairs: Brakes overhauled at each wheel, new battery, carb rebuild (didn't work), January 2006 - Repairs: replace fusible link, clock restoration, December 2005 - Repairs: re-chrome dash bezels and trim, new cruise control switch November 2005 - Repairs: High speed blower relay, re-chrome grille shell, instrument panel voltage regulator. Parts: weatherstripping, hood pad, belts October 2005 - Parts: Collect parts for exterior paint and trim restoration: tail light bezels, turn signal bezels, engine decals, door handles, grille shell and slats, bumper caps August 2005 - Repairs: Replace exhaust system, new temperature sending unit, replace all dash and exterior light bulbs |
Chrysler Cordoba - 1975-1979
1983-1986
Chrysler LeBaron - 1982-1988 second generation
1968-1971
Lincoln Versailles - 1979 Commercial
Lincoln Versailles - 1977-1980
Mercury Cougar XR-7 - 1980-1982 5th generation
|
|
Special Blog - Ford's Historic Review of Lincoln-Mercury Heritage Event I've been invited to attend a Ford employee event for the historic review of Lincoln-Mercury in Detroit. This limited-participant event will highlight most years and models of Lincolns and Mercurys since both marques inception (introduced by the world’s oldest driving, and still family-owned, Leland-Built 1921 Lincoln Model L and the 1939 Mercury Town Sedan (Mercury Serial Number 1)) and will also include several examples of Canadian Lincoln-Mercury or Mercury-Related brands and products: Monarch, Meteor, Frontenac, and Mercury Truck. Ford has requested that I bring my 1982 Mercury Cougar XR-7 LS to the event. Attendees will be the management, employees, and suppliers of Ford Motor Company and Lincoln Motor Company, as well as invited guests.
I had not planned on attending any events in 2015 due to a hectic work, school and family schedule. But I find this event to be exciting and a reason to put some more love-n-care into my Cougar (aka Ellie). I will highlight below the activities leading up to the show:
July 17, 2015 - I drove the car onto the show field, only 2 miles away. It was a great event with many wonderful Lincolns and Mercurys of all generations. See my video slide show here on YouTube: https://www.youtube.com/watch?v=bEJ0d5WzDw0
After the show, I drove to a Lincoln dealer a half-mile away. I left the car there for repairs (new thermostat) and flew home the following day. I'll have the car transported back home.
July 16, 2015 - 8 hours into the 10 hour drive to Detroit, the car starts to overheat. I have it towed and we think the problem is the radiator cap. It's replaced. 30 minutes later, it begins to get hot again. This time I had it towed the hotel in Dearborn. June-July - More cleaning and detailing under the hood as well as degreasing and washing the undercarriage. See a video of the undercarriage on YouTube: https://www.youtube.com/watch?v=qVj1tknYG9s
May 30/31, 2015 - Degreased, cleaned and detailed underhood May 29, 2015 - Replaced tailpipe from catalytic converter to end and muffler May 28, 2015 - Removed overspray paint of bumper rub strips May 25, 2015 - Adjusted timing and carb resulting in peppier launches from start and easy starts with hot engine; steering noise at idle seems less noticeable May 24, 2015 - Touched up front leather seats in spots where leather veneer was worn through May 23, 2015 - Refinished interior door panels; plastic was deteriorating and peeling while color was fading and showing multiple shades May 16, 2015 - Refinished interior, rear quarter panels; plastic was deteriorating and peeling while color was fading and showing multiple shades May 2, 2015 - Pulled and re-glued vinyl top where loose (about 1/8"), just above molding on driver side rear quarter so it rests under the molding as it should. April 26, 2015 - Replaced front wiper blades and removed rear seat and plastic quarter panels for refinishing April 20, 2015 - Replaced passenger side low beam headlamp due to condensation build-up in the old unit. I made sure I replaced it with a Sylvania unit so all 4 headlamps have matching marks; glued loose portions of front bumper rub strips. April 18, 2015 - Disassembled all 4 wire wheel covers, then washed, polished and waxed each piece. They're so shiny!
April 10, 2015 - Replaced the battery with a Motorcraft unit. Did you know it was $20 less buying a Motorcraft battery from my Ford dealer than going to Advanced or AutoZone! April 4, 2015 - The new tires have made a tremendous difference already. A vibration above 55 mph that wouldn't go away with balancing or alignments was resolved with the new tires. It's an indication that one or more of the previous tires were bad even though they had low mileage and lots of tread remaining. April 3, 2015 - Install 4 new tires on the car. The existing low-mileage tires are 11 years old, but have plenty of tread. I don't put many miles on any of my cars. Yet, out of an abundance of caution, I will replace the tires. March 29, 2015 - Ford extends invitation for me to attend and I accept |
Chrysler Cordoba - 1975-1979
1983-1986
Chrysler LeBaron - 1982-1988 second generation
1968-1971
Lincoln Versailles - 1979 Commercial
Lincoln Versailles - 1977-1980
Mercury Cougar XR-7 - 1980-1982 5th generation
|
|
1982 Mercury Cougar XR-7 I purchased this car in May 2008 on a whim. Since then I have detailed the car, repainted the underside of the hood, added a new hood pad, and purchased appropriate shop and owners manuals.
March 11, 2021 - Replaced EEC, starter relay and voltage regulator September 21, 2020 - New starter June 1, 2020 - New vinyl headliner February 7, 2019 - New oil pump and high pressure steering hose February 8, 2016 - Replaced woodtone door bezels (driver and passenger) that house courtesy lamps and power window and lock switches. September 28, 2016 - Replaced radiator and upper and lower hoses. September 16, 2016 - Replaced fuel pump and oil pressure switch. May 9, 2016 - Replaced PCV valve and air breather filter. May 5, 2015 - Replaced power steering line, set ignition timing, repacked rear wheel bearings. April 23, 2014 - Installed new wiper blades... now ready for all those spring showers. May 26, 2013 - Painted the exterior window frames in semi-gloss black as the original paint had been too faded. May 17, 2013 - Repaired the driver's seatbelt buckle (female side) so it would latch strong. May 3, 2013 - Replaced the idle dashpot. April 11, 2013 - Had the timing set to specs and four-wheel balance. December 1, 2012 - Re-installed the interior after having removed most of it so that I could replace the vinyl roof. November 30, 2012 - I replaced the vinyl roof myself. Car is looking great with new paint and new roof. November 17, 2012 - Had the exterior and door jams repainted. Car looks fresh! September 3, 2011 - Replaced the right rear wheel wheel center molding. I had to take a full wheel well molding and cut it down to size to fit the center spot. August 7, 2011 - Rotated the tires at 83,380 miles. June 5, 2011 - Replaced poorly latching driver seat belt buckle with another unit that securely snaps together. May 14, 2011 - It has been over 2 weeks since I've completed the leather re-dye project on the Cougar. The leather is smooth and the seat looks brand new. You can see the driver's side pillow seat in the left column. The process works and the dye adheres very well. I'm very encouraged by it. Now that I know how to do this, I'm going to do the same thing on my convertible. April 17, 2011 - During the past week, I've started the process to re-dye the leather seats. The first step is to allow rejuvenating oil to soften the leather. I've applied the oil, allowed it to sit on a warm sunny day. It really has soften the leather. I'm doing it again for a few more sunny days this week before advancing to the next step to remove the oil and clean the leather. March 20, 2011 - Replace driver door striker bolt February 25, 2011 - Replace brake caliper bushings, replace front brake hoses, replace outer tie rod. February 13, 2011 - Drove the car yesterday for almost 200 miles. It did very well. Still wish I can get the power steering grounding noise to be quieter. I'll have to think more about it. Today, I fixed the passenger lighted vanity mirror. It had loose wires and the switch wasn't making contact. Only the cassette player remains to be fixed on the car. February 11, 2011 - Flush heater core, replace driver power window motor, replace driver door lock actuator, replace AutoLamp relay, replace blower motor and wheel. November 20, 2010 - Replaced the parking brake light switch September 23, 2010 - Had my mechanic shop replace the power valve on the carb. It made a big difference in the performance, shifting and idle of the car. Very nice! Also had an oil change and power steering pump flush and refill. That helped reduce the power steering pump noise that these period Fords are known for. June 20, 2010 - OMG! 2 more power window failures for the year and both on this car. That makes it the 8th and 9th failures for the year on my 5 classic cars. For those that know me, you know the grocery store is one block away. So, the other night, I felt like eating some ice cream and would pick up some other things. Because the store is so close, it's not worth turning the car's A/C on. It wouldn't cool off. So, I lowered the windows for the drive and raised them when I went into the store. On the very short drive back, I lowered the windows. When I got to the driveway, the driver window would not raise. The passenger window did. I went into the house and put the groceries away. Then I went back to the car and removed the driver door panel. I lowered the passenger window to let the breeze flow through the car while I was working on it. I studied the driver's power window motor. It looked fine and the wiring looked fine. So, I thought I would take a break and have a bowl of ice cream while I read the manuals. Before going in to do so, I tried to raise the passenger window. It would not work. I can hear a click when I press the switch for both windows. I was thinking it was the relay. But, while it's possible the relay could fail letting one window work temporarily and not the other window, it didn't seem probable. After reading a few blogs, and covering the car with a cover, I called it a night. This morning, I tried to find the relay under the dash. It's not where the manual says it should be. I could never find it. Remembering the blogs I read, a suggestion was the motors could become stuck. I opened and closed the passenger door firmly. That did the trick. The passenger window now works fine. That trick didn't work for the driver door. So I tapped the motor with a hammer. And that worked for the driver's window. I hope that's the end of power window problems on my cars for a long, long while. Apr 3, 2010 - Since replacing the thermostat did not resolve the lack of heat issue in the car, I back-flushed the heater core. When removing the hoses from the heater core, the problem became obvious. The copper inlet pipe on the heater core was crimped and almost closed completely. So, very little water flow was circulating. I restored the round, open shape and still flushed the core to remove any gunk. I now have strong heat! Mar 26, 2010 - Replaced air filter, gas filter, crankcase filter and thermostat. Thermostat housing was difficult to access. The A/C hoses, gas line and distributor obstruct the lower bolt. What has taken me less than an hour to do on other cars took more than 4 hours to perform on this car. Heat did not improve. Nov 1, 2009 - I re-dyed the vinyl roof as it was looking stained and dirty. The vinyl itself was still in excellent shape. So, I just stripped it clean of detergents and protectants so the new color would take. I've also touch-up some scratches and nicks (especially on the front end from rock chips). Still have a long way to go to cover all the chips. This car did not come with clear coat and the enamel was weak. It easily chips and in the engine bay, the existing paint just wipes off with water and a rag. October 19, 2009 - Installed sockets for the under dash courtesy lamps (which were removed by the previous owner). You can see in the pic at left the coach lamp, illuminated entry key ring , door panel and foot well lamps illuminated as well as dome light (not pictured). October 1, 2009 - Replaced the rear defroster switch/relay. Just in time for fall and winter. July 9, 2009 - Drive: Drove the car from Charlotte to Atlanta for 2 days. Averaged 26.4 MPG. Not bad for a 4.2L V8 with AOD. Car was smooth, comfy and quiet. Love the vent windows. The car seems to drive and handle as if it was a cross between my Mark III and my LeBaron. The power steering pump is noisy, making a whirring sound. It needs to be flushed and refilled including an additive. June 2009 - Repairs: Replace front and rear u-joints (3) and centering ball November 2008 - Repairs: new battery, replaced grille with NOS grille September 2008 - Repairs: Replaced fusible link August 2008 - Repairs: New headliner July 2008 - Repairs: Replaced all headlamps, plug wires and wiper blades, cooling system flush, replace rear main seal, install exhaust hose at catalytic converter, replace crankshaft bearings, alignment, intake manifold gasket, replace front crankshaft seal, replace oil pan gasket, replace rack and pinion bushings, replace oil pump screen, replace power steering pressure hose, new oil pan drain plug, replace thermostat & housing, replace distributor o-ring, replace belts |
|
|
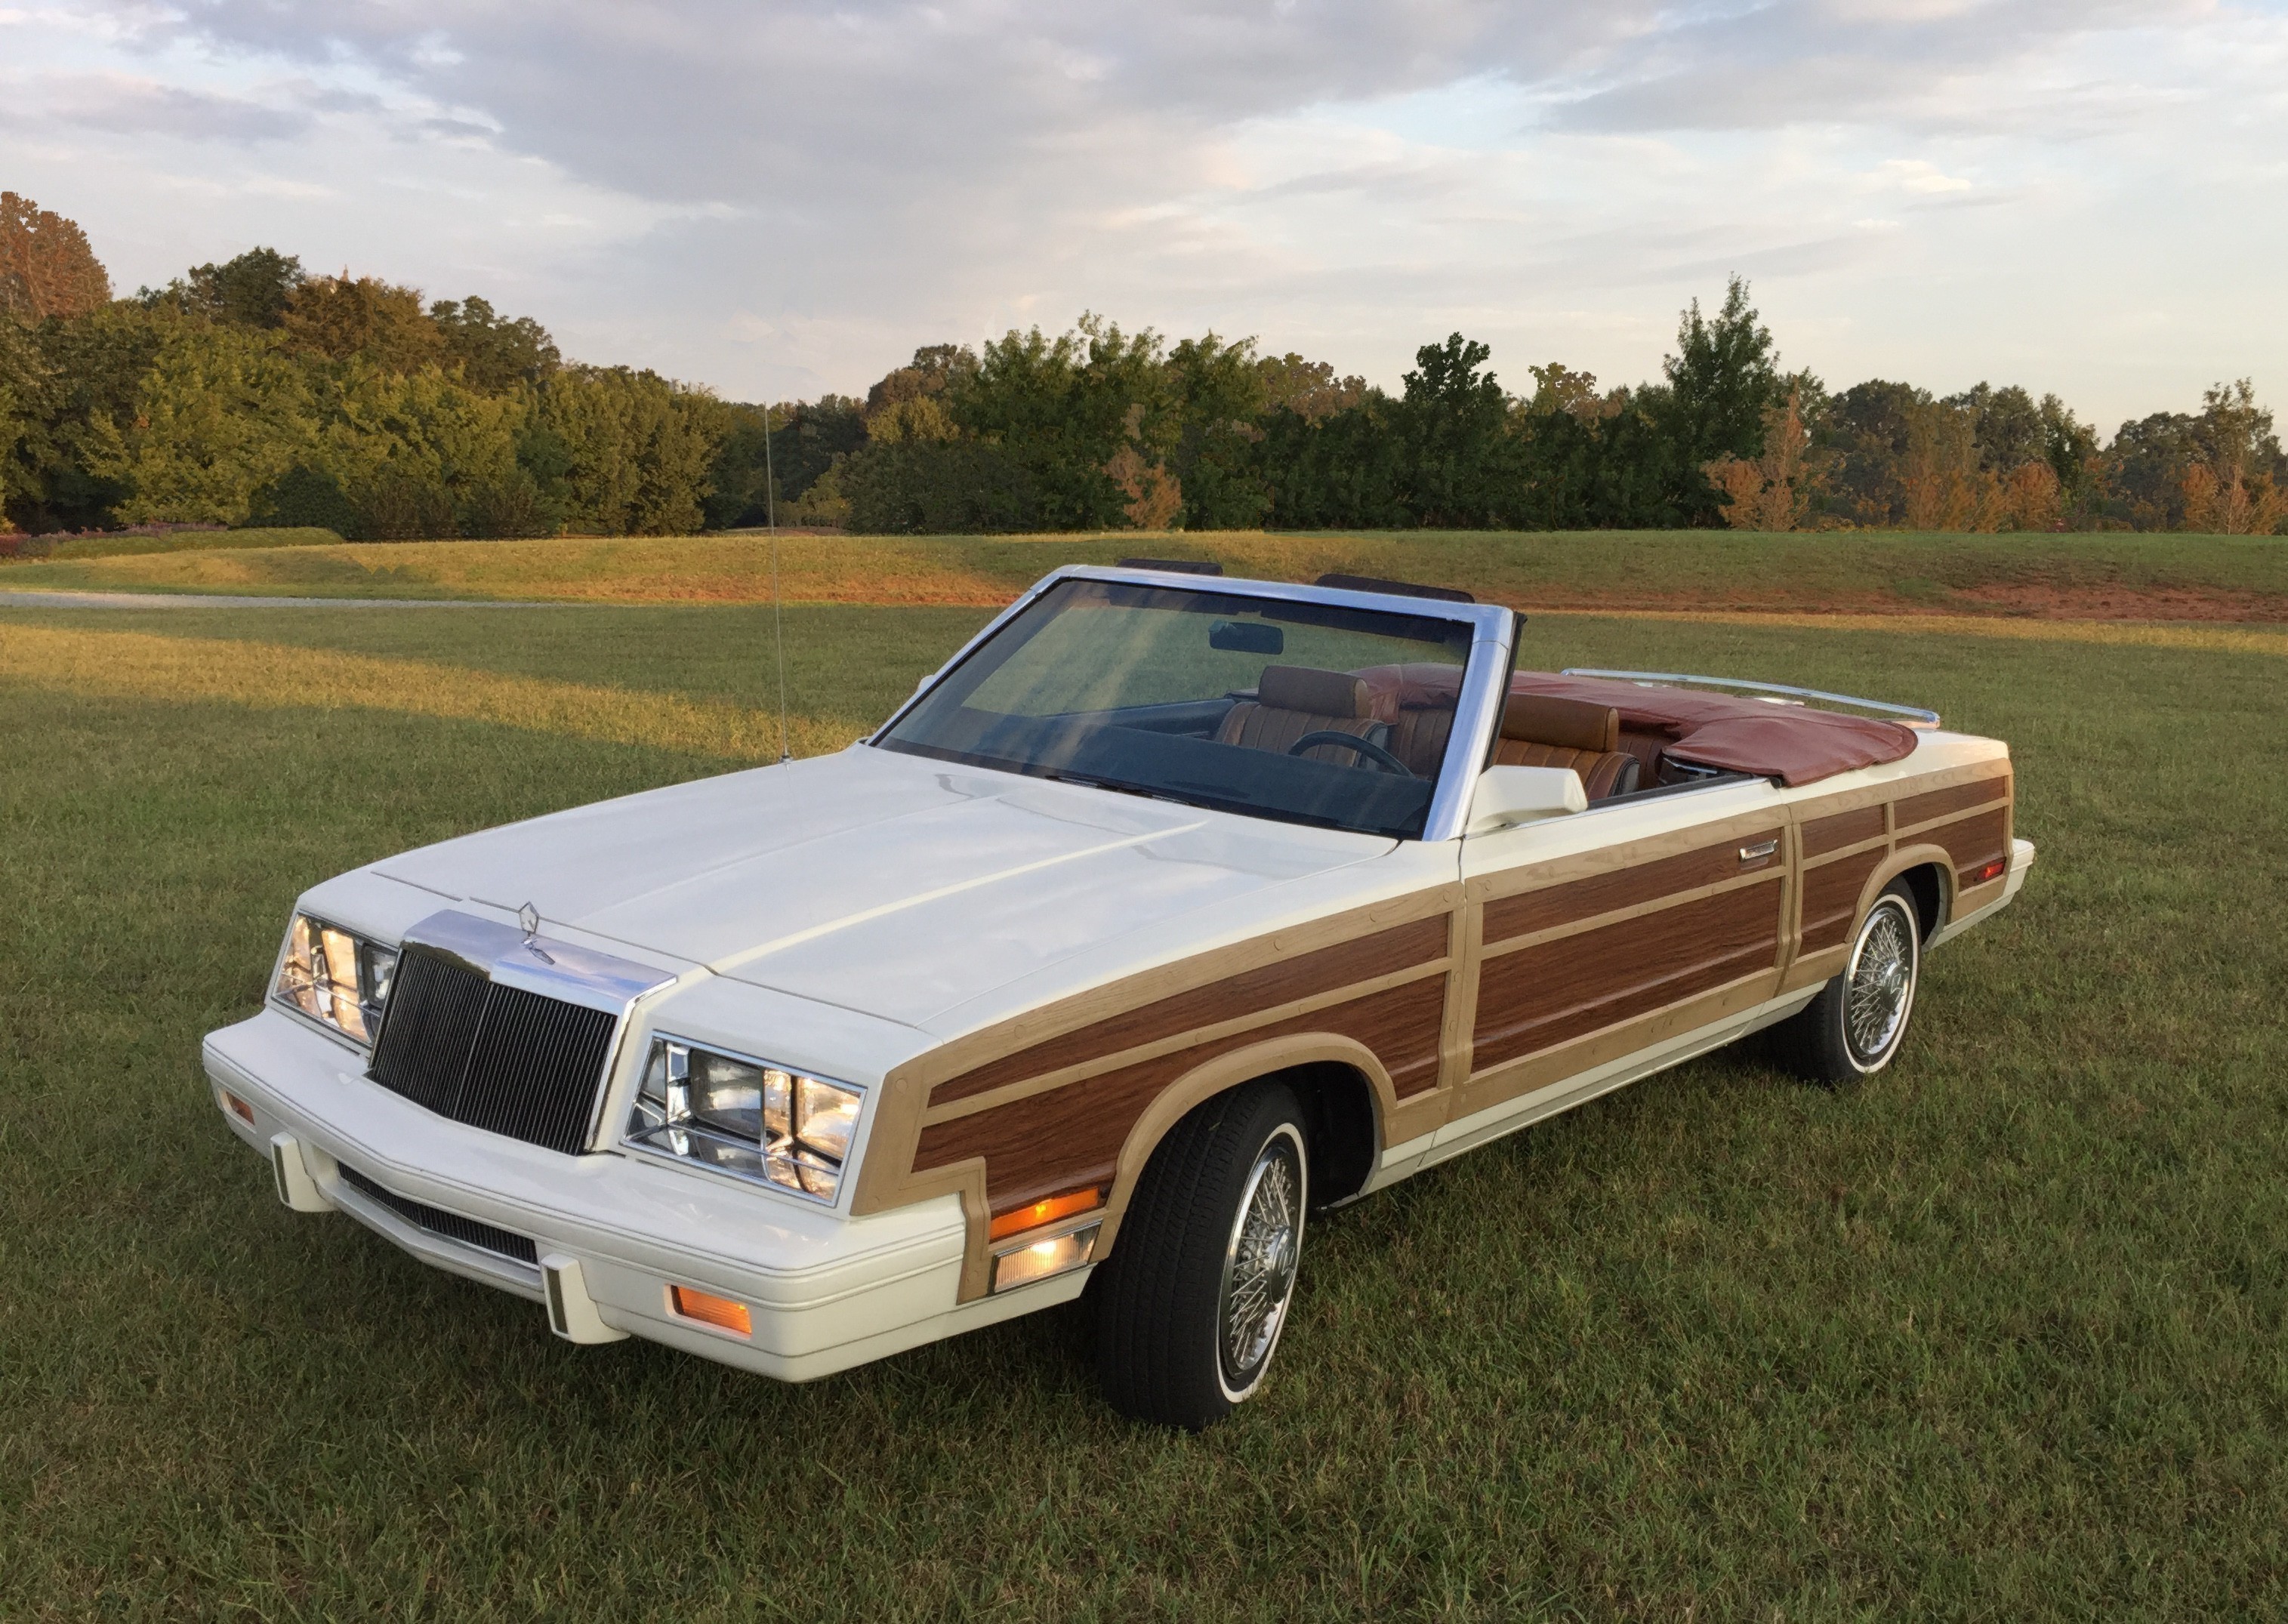
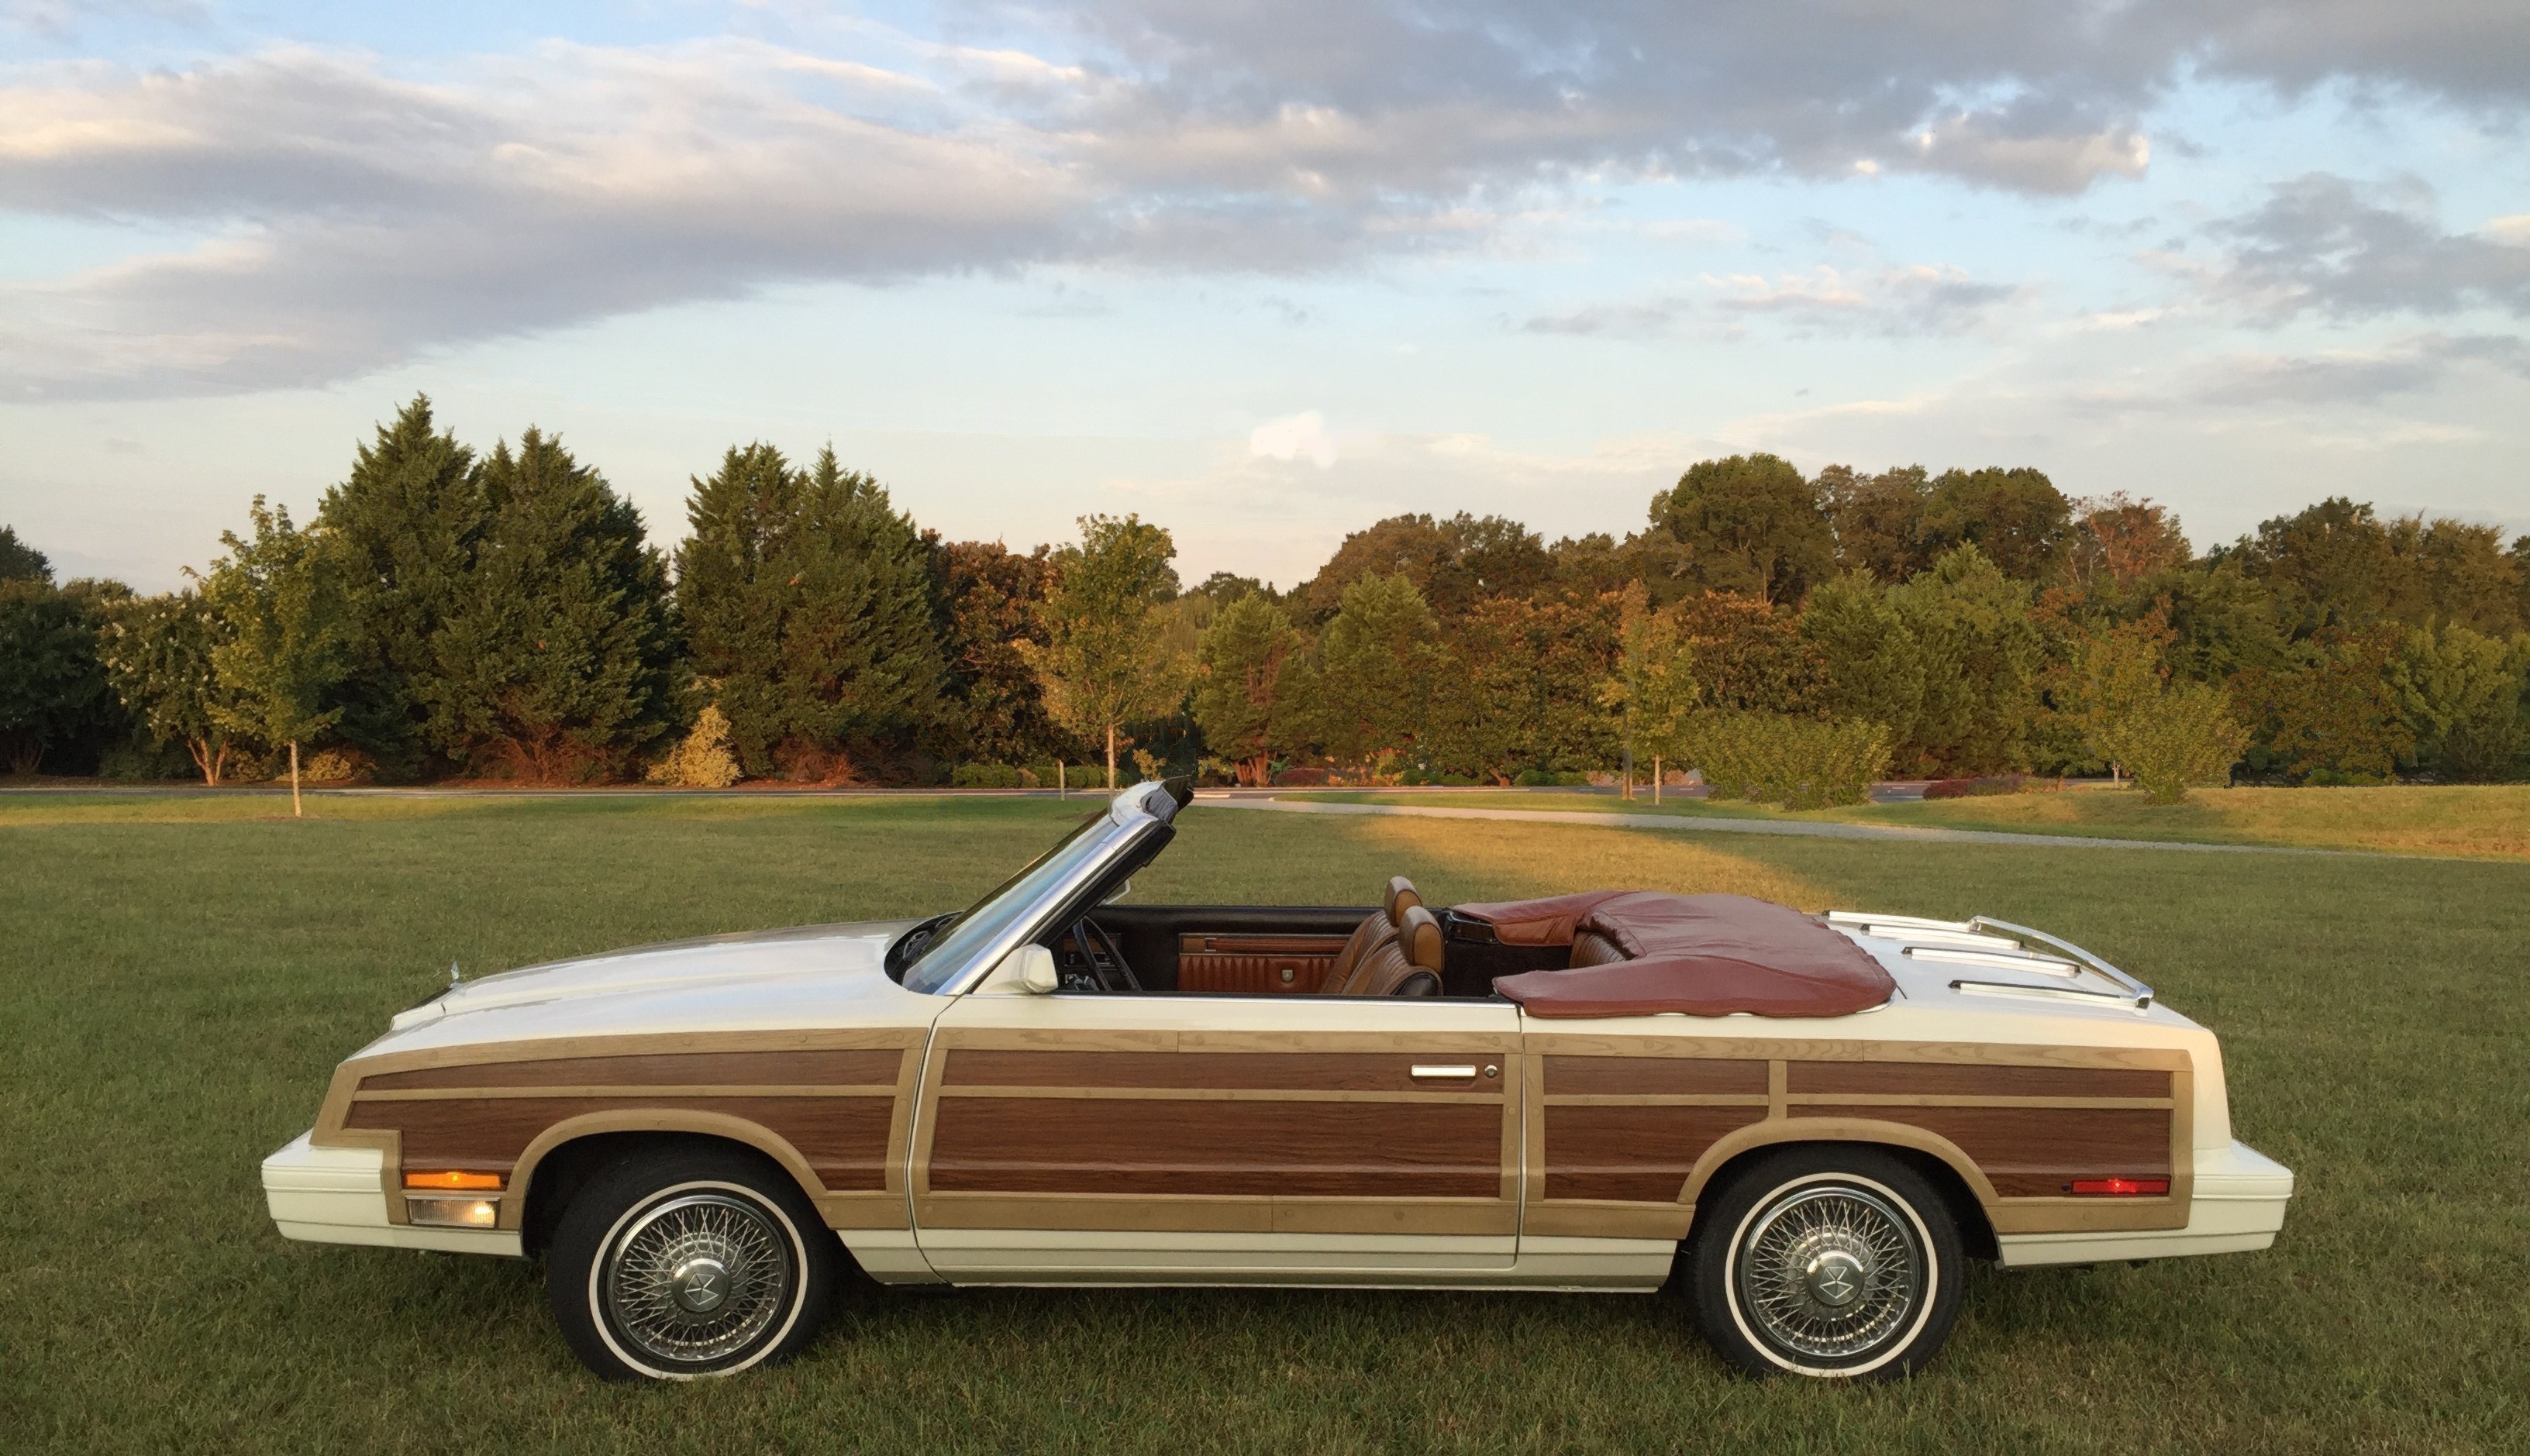
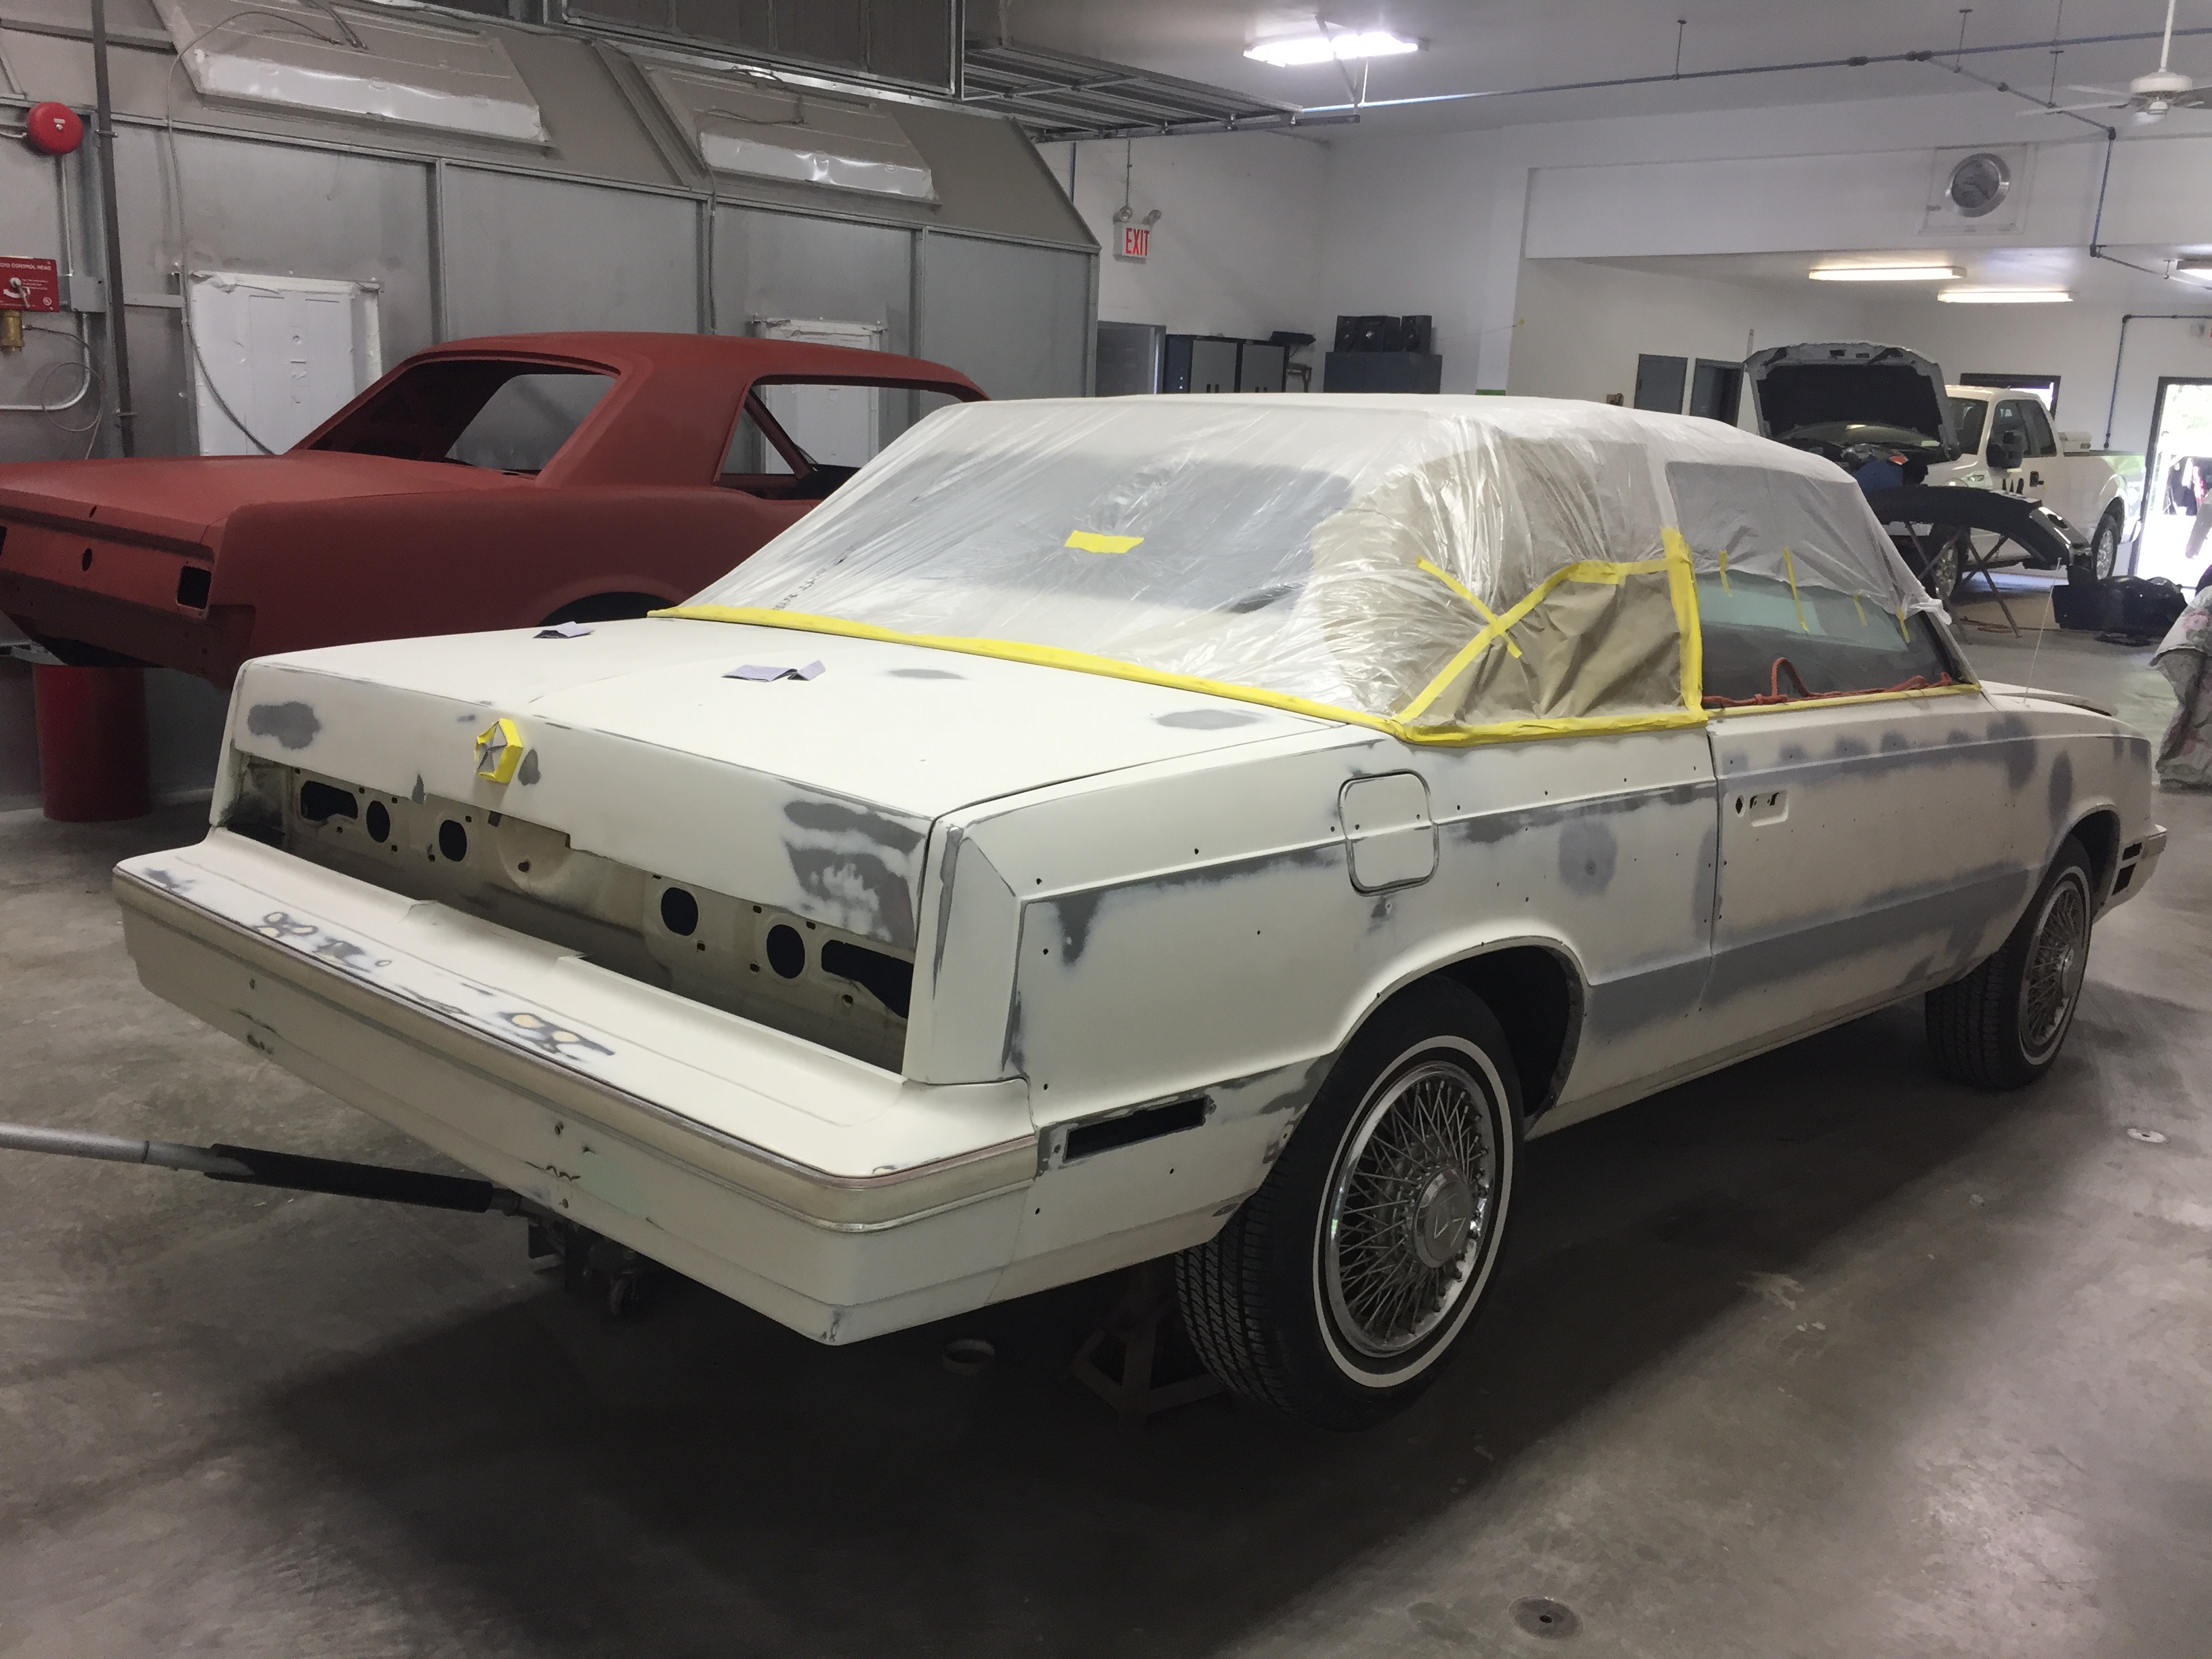
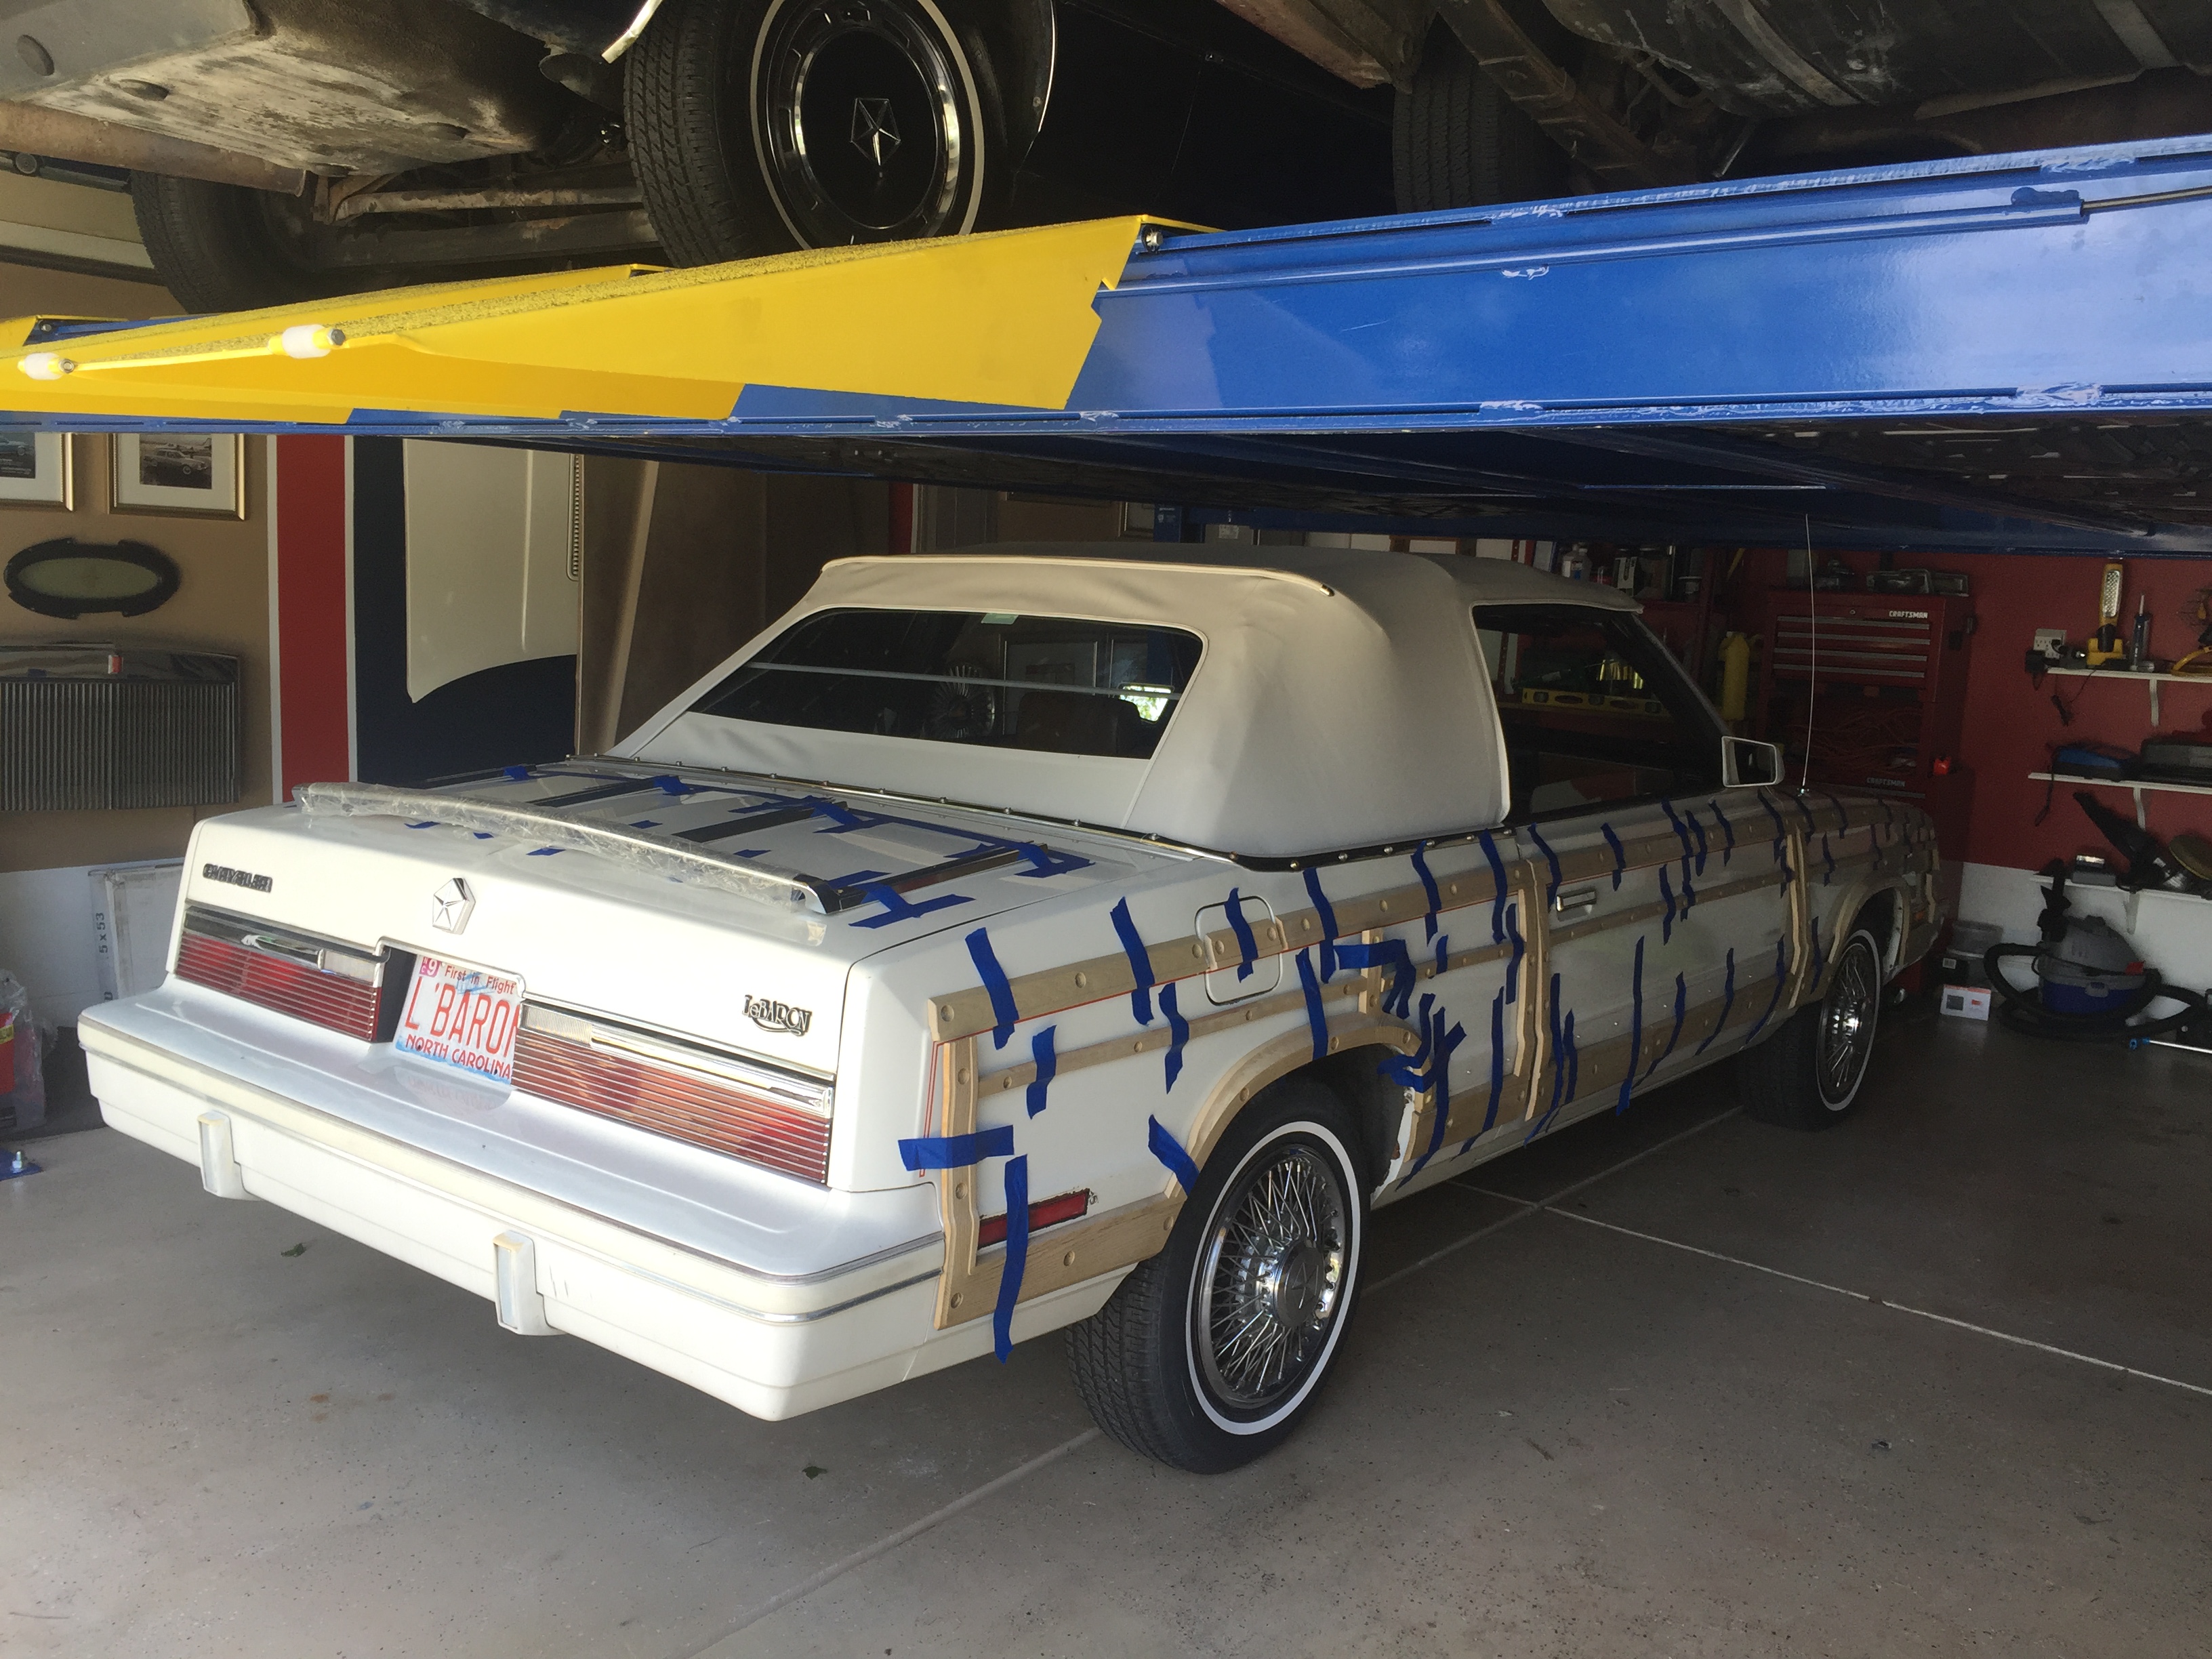
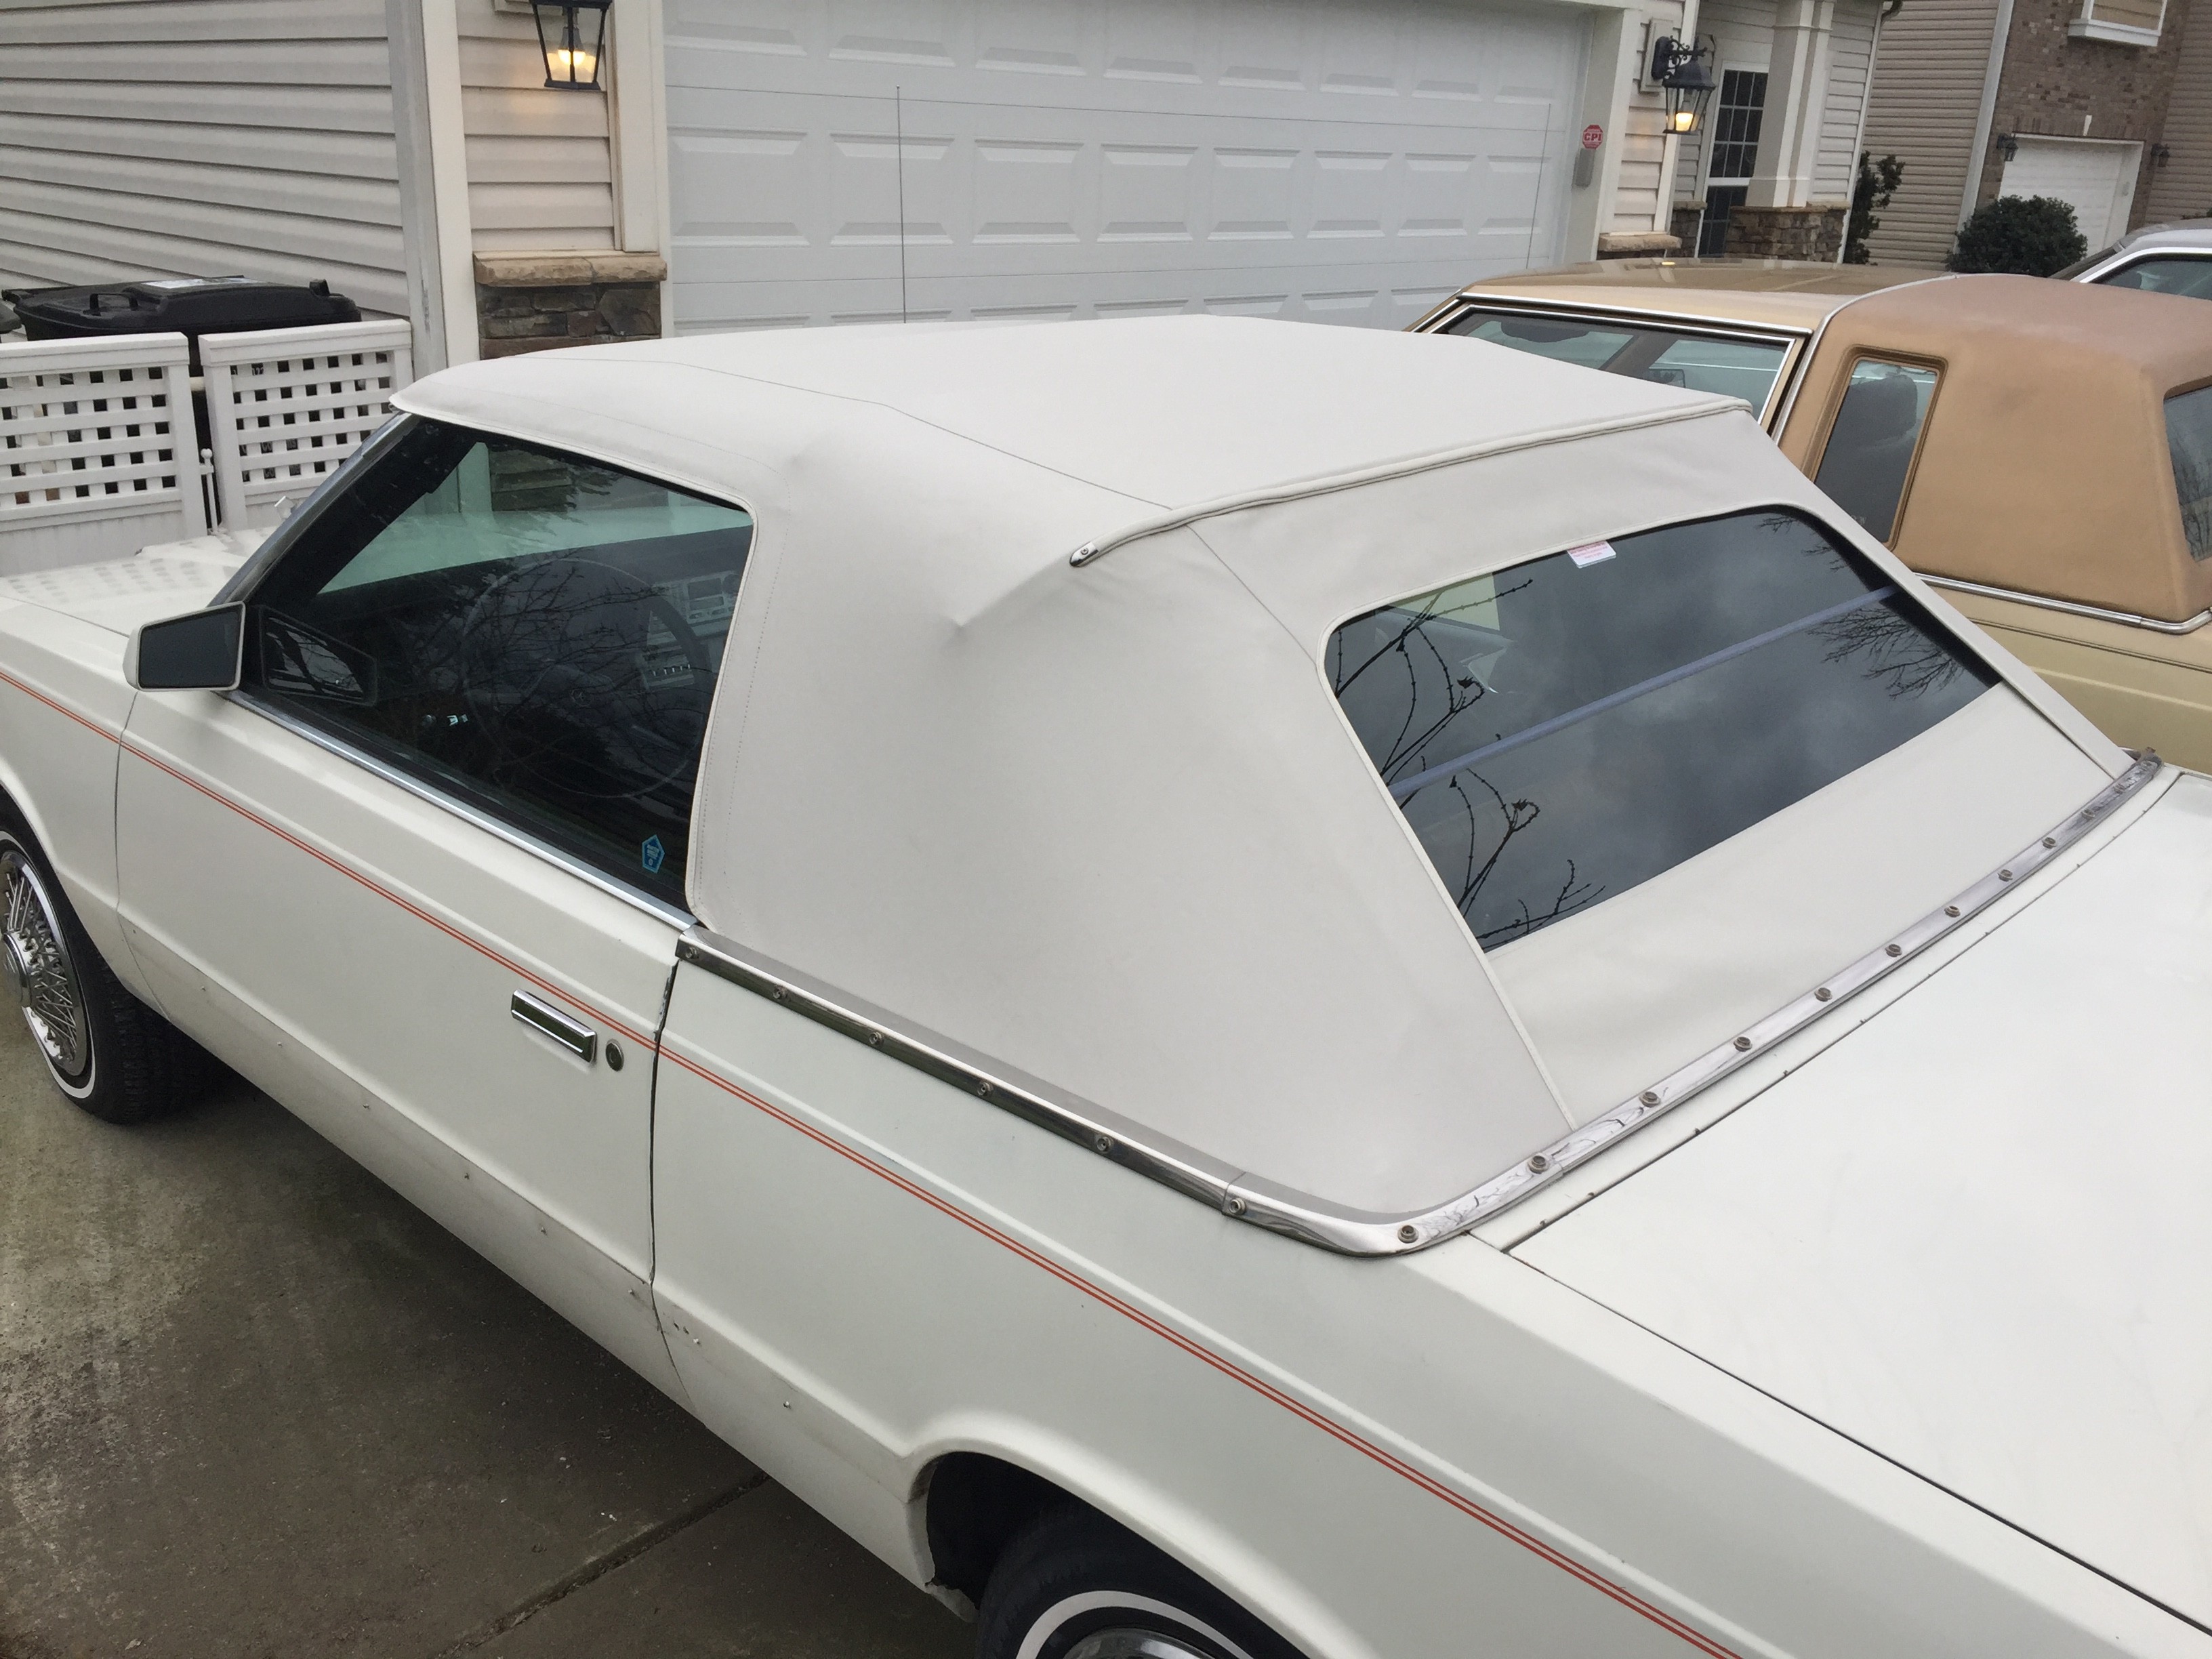
Special Blog - The Making of a Town & Country Convertible I've always wanted a Town & Country convertible. While I have a wonderful and fully loaded 1982 Chrysler LeBaron Medallion Mark Cross convertible, it's not a Town & Country model. That's because Chrysler didn't make them in 1982. They started in 1983.When a full set of used wood trim moldings became available, I purchased them and embarked on this project to convert my convertible into a one-of-a-kind Town & Country model that will look like it came out of the factory that way. It was time for a new top and new paint for my car, so might as well do something special and fun at the same time. This is the finished restoration project. She looks great!
July 1, 2017 - After Cars & Coffee in the morning, I returned home and replaced the washer reservoir, hood pad and a headlight adjusting screw on each of the low beam lamps. August 27, 2016 - I cleaned and polished all removed trim pieces from the car. I repainted the black areas of the upper and lower grille slats. I replaced the neoprene on the back of the wood trim moldings August 8, 2016 - Dropped the car off at the body shop for painting.
July 2016 - I taped the wood moldings to the car, check door alignment and opening and marked the holes to be drilled. I then drilled 173 holes into the car. It goes a lot faster than you would think.
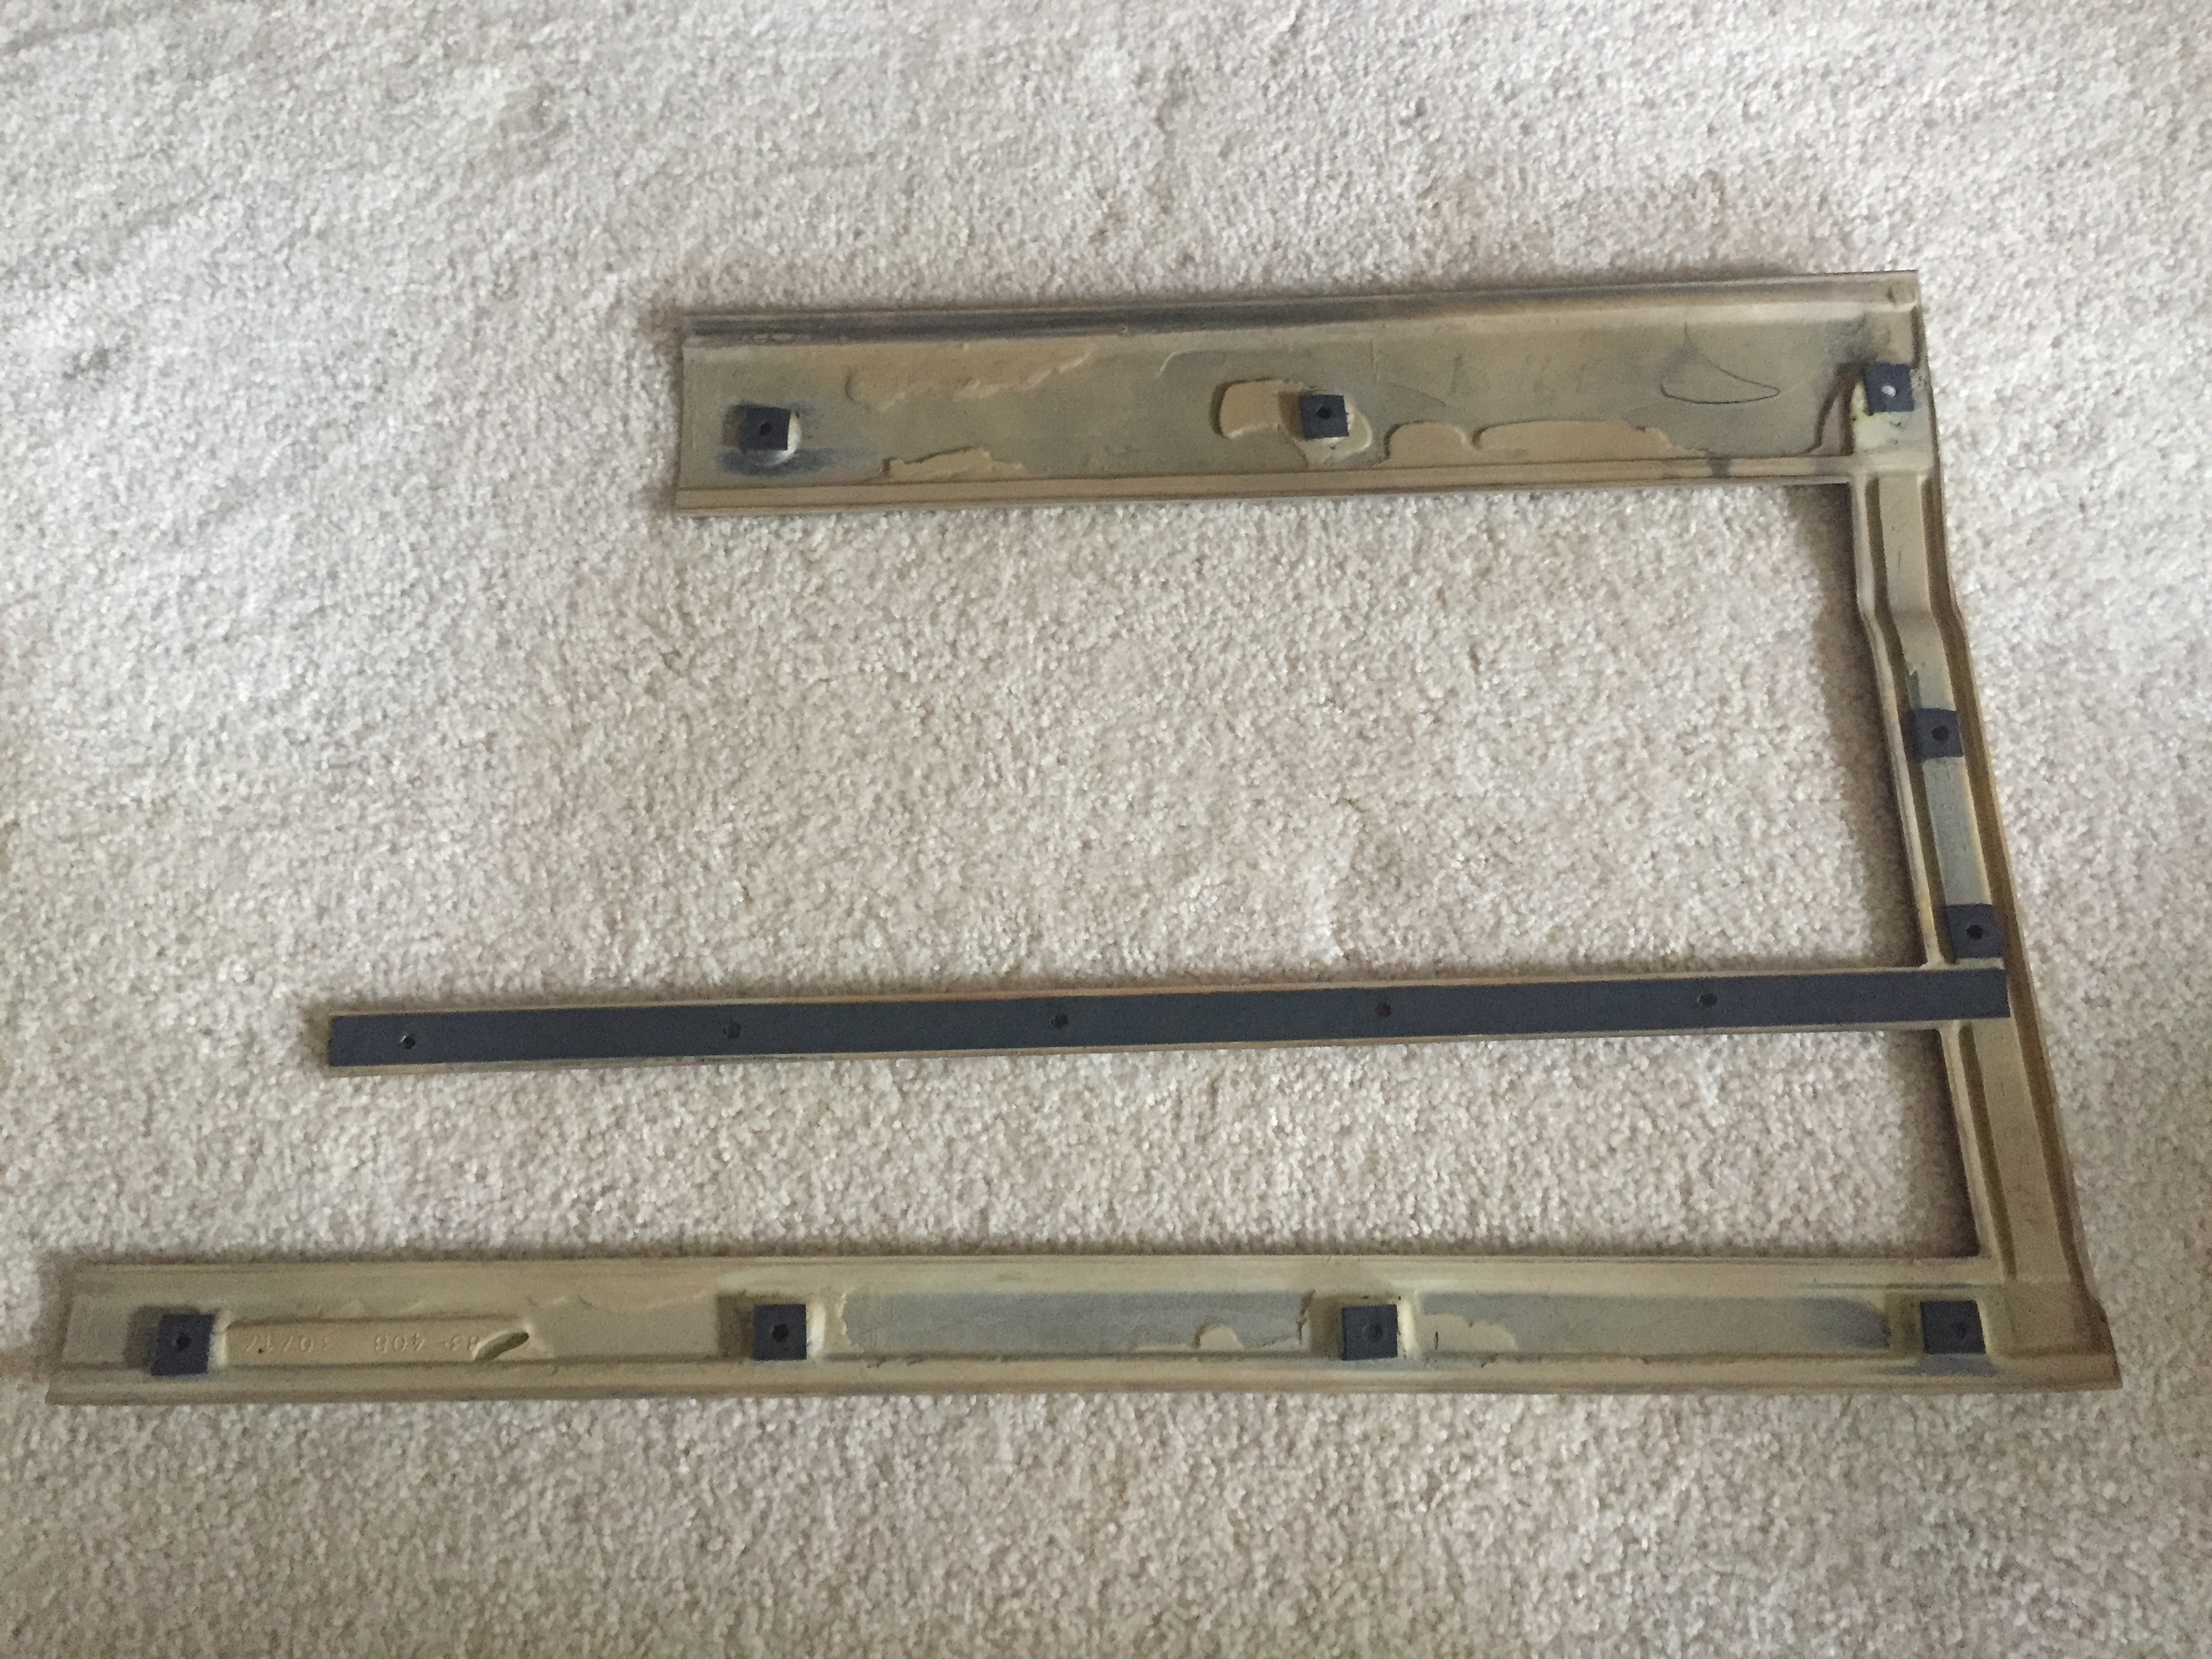
July 2016 - I removed the car's original side moldings and cut off the rivots. I disassembled the exterior's badges, moldings, lights, grilles, door handles, etc in prep for painting. July 2016 - Purchases: new windshield washer bottle and hood pad. Tested leather dyes. June 20, 2016 - After reviewing several DINOC samples, I selected the 3M Marine Teak vinyl appliqué. I also purchased chrome DINOC to update the inserts in the bumper guards. June 18, 2016 - The moldings were originally riveted to t he car. I tested a bunch of different molding fasteners before making my selection. I needed 2 sizes. I selected nylon fasteners. February 2016 - New convertible top installed November 19, 2015 - Purchased new convertible top with folding glass rear window.
October-December 2015 - The wood moldings needed to be refinished. I tested about a dozen different colors before I found the color I believed that best matched the original shade. October 31, 2015 - Purchased trunk luggage rack. October 16, 2015 - Purchased wood trim moldings and started making my plans.
1982 Chrysler LeBaron Mark Cross Convertible After spending a fun summer day with my friends, driving a '61 Continental convertible through the mountains and lakes of NC, I decided I had to have a convertible too. I purchased this car in August 2007 and flew to Indianapolis to pick it up. The 10 hour drive back home flew by.
September 4, 2014 - Exhaust repair: weld resonator and replace tailpipe and muffler November 9, 2013 - Purchased correct hood from Laurens salvage yard in SC to replace the incorrect turbo hood on the car, center console, and various extra trim pieces September 7, 2013 - Passenger side wiper became disconnected from attaching arm. I re-attached it and secured it with a new retaining clip. April 2013 - Replaced the temperature cable on the HVAC control panel and going to the blend door. January 12, 2013 - Replaced the fuel pump, fuel filter and battery (at 43,875 miles). September 9, 2012 - Installed a hood lamp that had been missing since I acquired the car. July 6, 2012 - Replaced the original front speakers. Now I should have better sound on the highway with the top and windows down. July 4, 2012 - Replaced the original rear speakers. I've ordered new front speakers and waiting for them to arrive. I also replaced 7 snaps on the convertible boot/cover. March 11, 2012 - Replaced the gas gauge because the needle broke on the original. Replaced 2 dash light bulbs. April 17, 2011 - Removed the dash pad and repainted it with its original Sable Brown color. Looks new again. March 20, 2011 - Paint dash bezel silver trim, paint convertible top latches, paint gauge needles, tighten speedometer cable to eliminate needle fluctuation and shake. March 18, 2011 - New evaporator, heater core and driver power window motor. Recharge A/C October 5, 2010 - Replaced the brake light/cruise switch and adjusted brake pedal so that the brakes lights don't stay on after the car is exited and the cruise works properly again. Also replaced the gear kit in the driver power window motor. August 2, 2010 - Replaced the battery under warranty. Previous battery kept losing charge even with a quick disconnect installed. May 22, 2010 - I spent 3 hours today working on the driver's door power window. The motor is strong and the window goes down easily. But, half way up, the window refused to go any further up without a helping hand pulling up on the glass. The problem was the motor needed to be removed and reinstalled and securely refastened to the door frame making a strong contact to the window regulator. The motor's attaching screws to the door had too much play and the motor housing's nuts were stripped. I had to plus size the screws for a secure fit. September 20, 2009 - I replaced the cruise servo. Now the cruise works again. I need to adjust the stop light / cruise switch though because the brake pedal rests too close to it and the cruise cuts off without tapping the brakes. August 22, 2009 - I took the convertible to an AACA show in Asheboro NC. The day was full of rain and we spent half the show ducking it. The A/C, replaced 13 months & 800 miles earlier did not work. With the cloud cover and rain storms, though, the day was cool and the vent was all that was needed. The following Monday I took it back to my mechanic. Turns out that the evaporator was leaking. With the previous work, we replaced just about everything, but not the evaporator. Because we are heading out of summer, for now, I just recharged it to see how long the charge will hold. I won 2nd in my class. I probably would have earned a first if I would have left the windows down, trunk open and hood up. But, with the rain and my absence when the judge appeared, 2nd was the best I could do. December 2008 - Repairs: replaced thermostat and gasket, replaced headlight bezels, replaced cowl weatherstripping July 2008 - Repairs: Replace transmission pan; A/C replacement; new parts (dryer, expansion valve, compressor, belts, fittings, condenser), flush, evacuate, re-charge June 2008 - Repairs: replaced convertible top and rear curtain, Brake job: new booster, master cylinder, wheel cylinders, shoes, turn drums; March 2008 - Repairs: new battery, new tires, September 2007 - Repairs: tune-up, new plugs, wires, filters, PCV valve and wiper blades. Replaced inside rear view mirror, added gold-plated, engraved dash plaque,
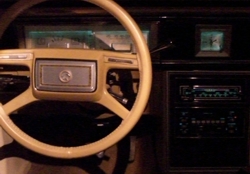
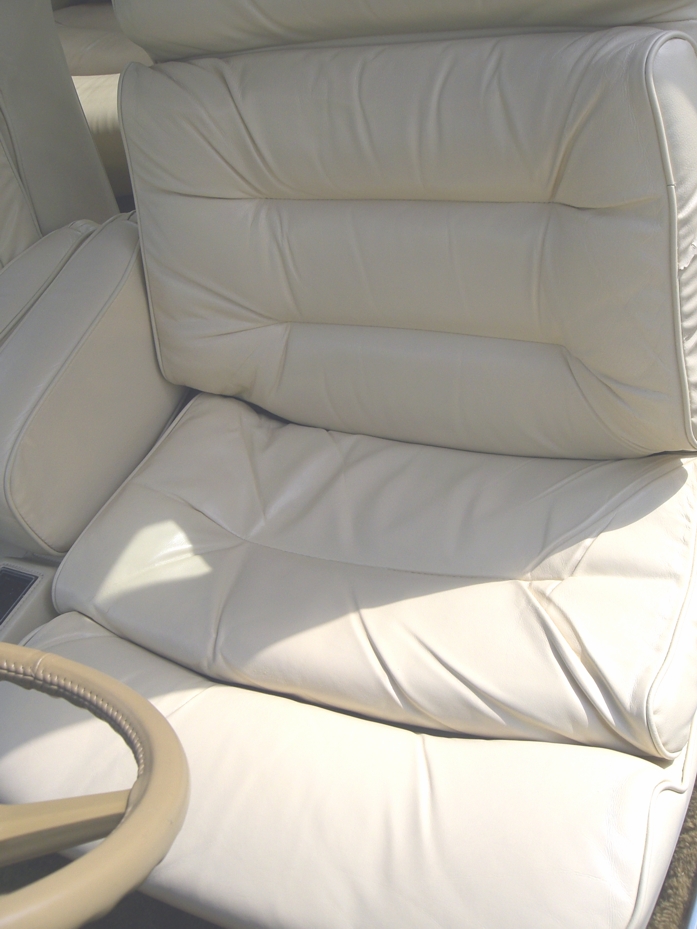
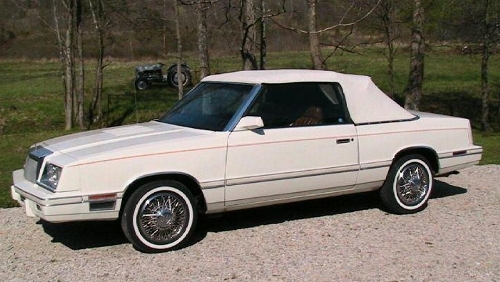
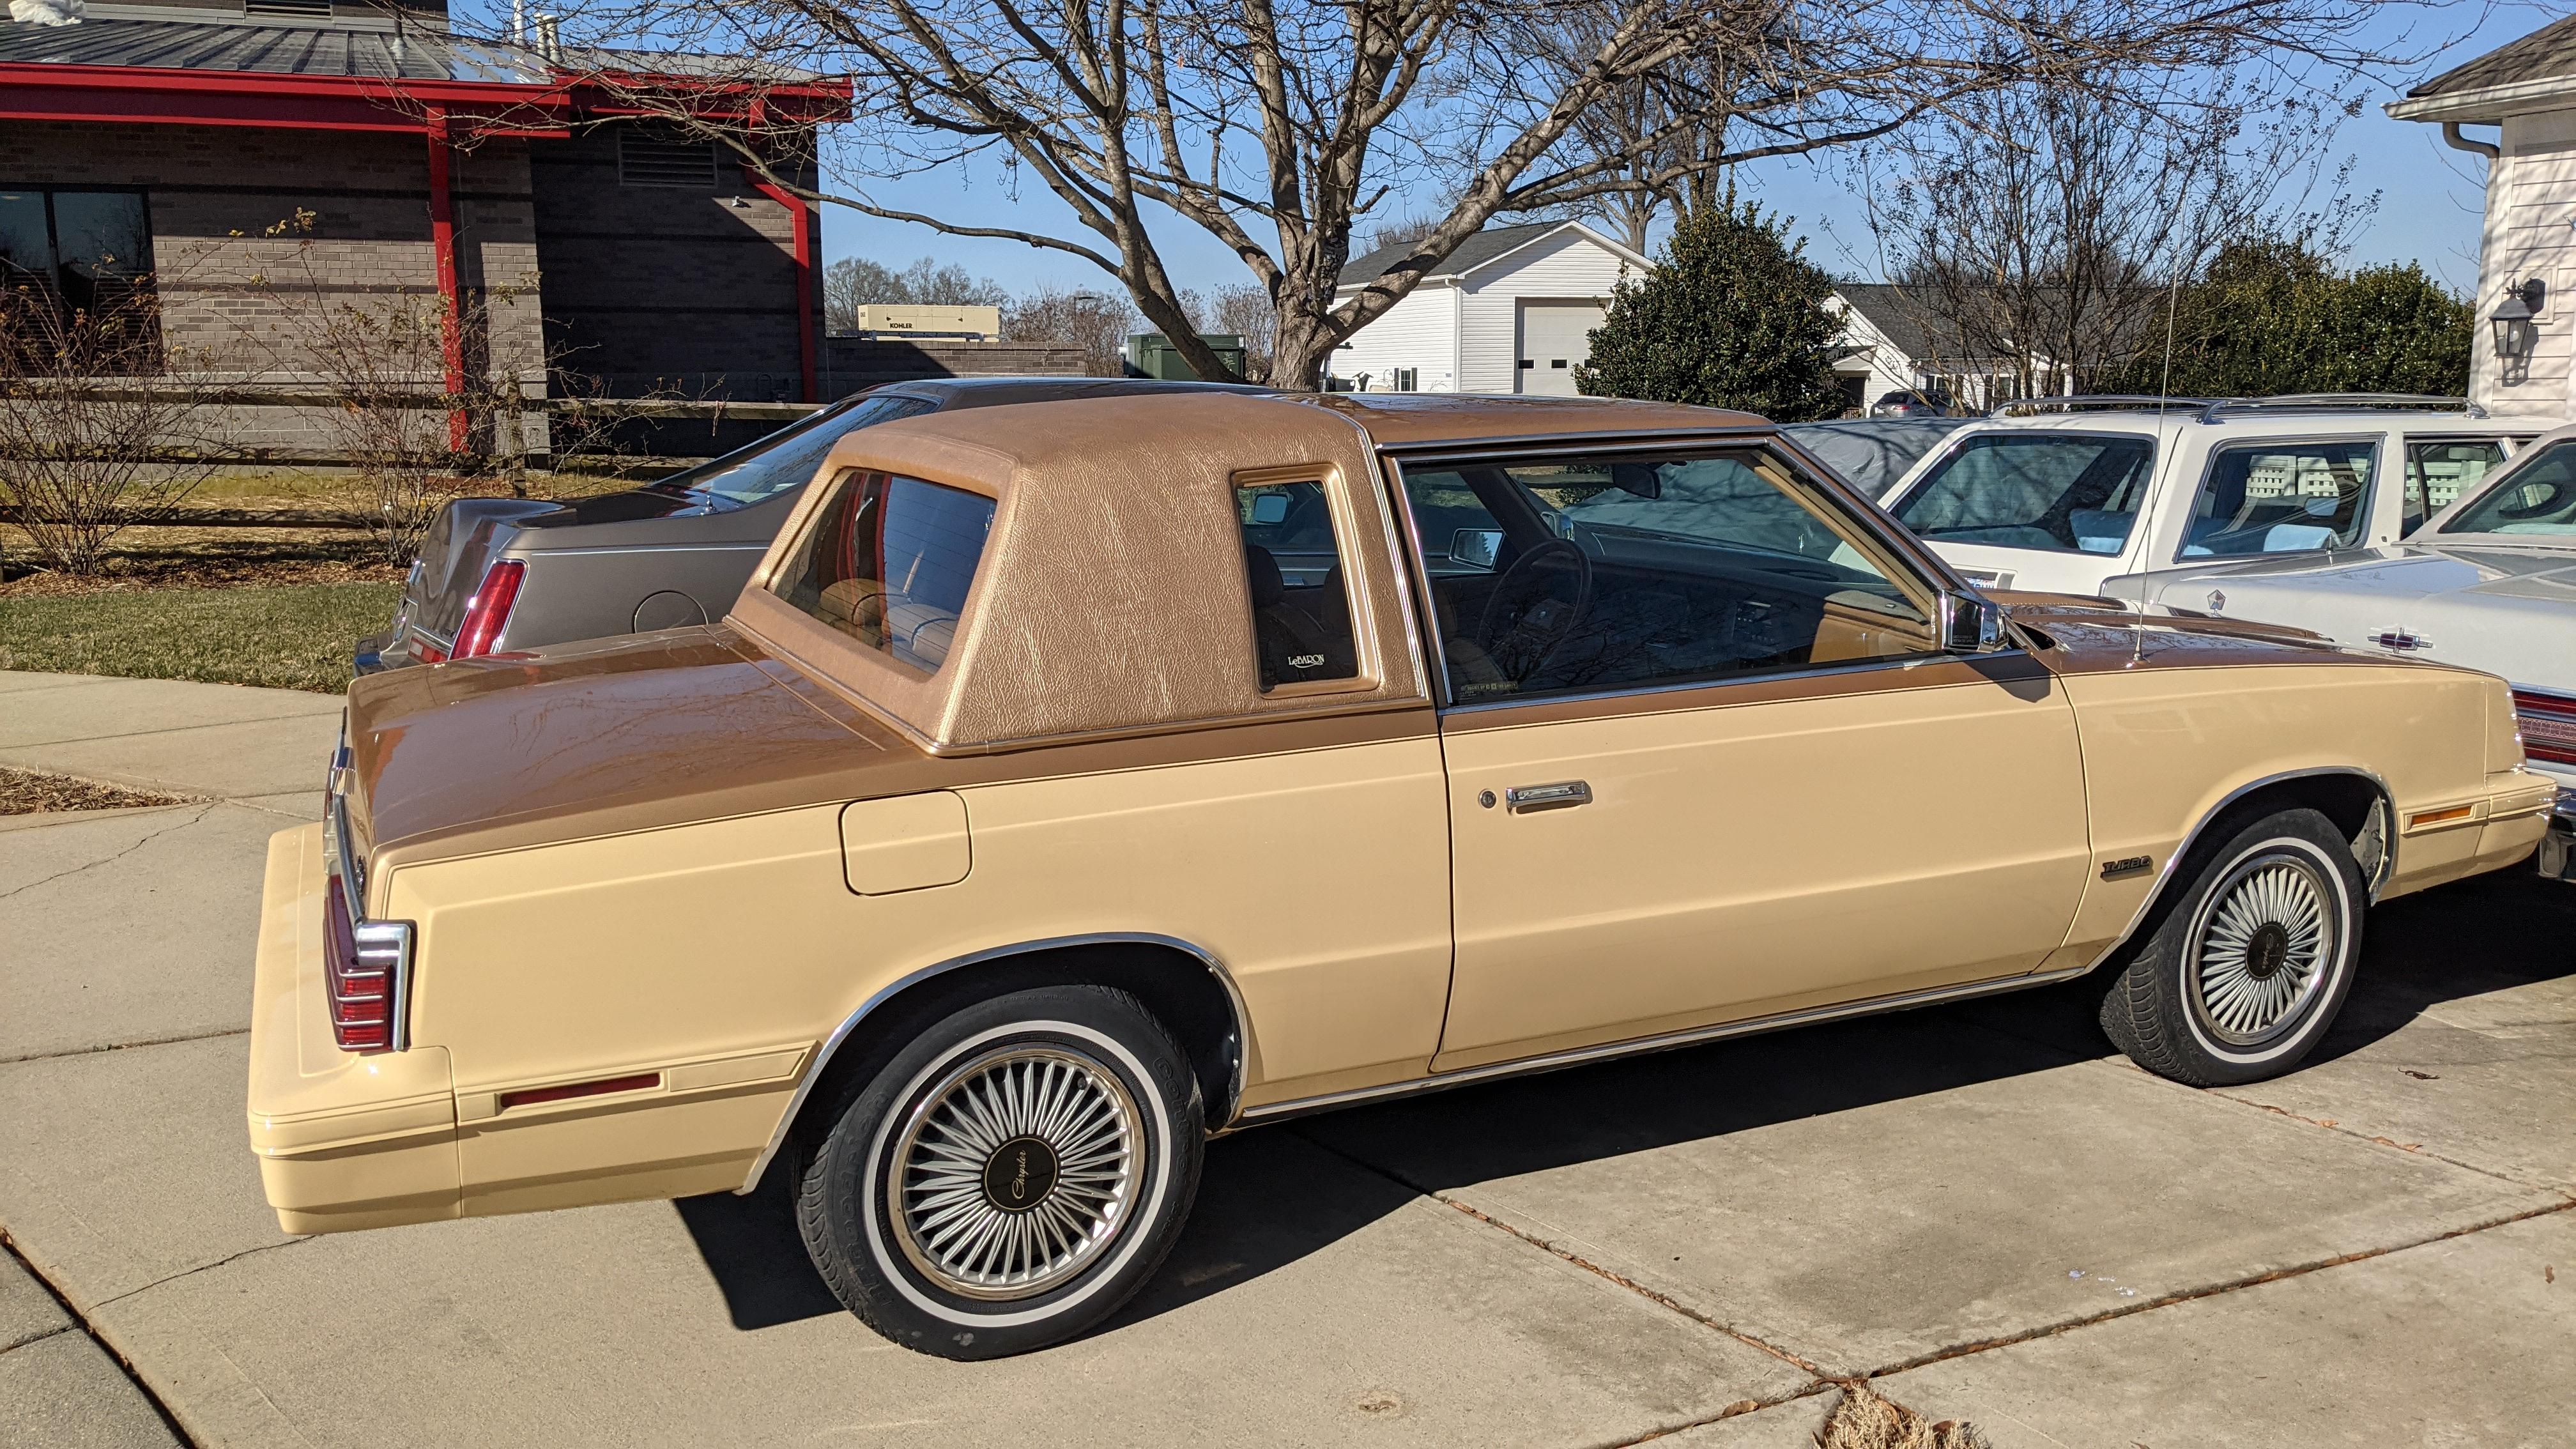
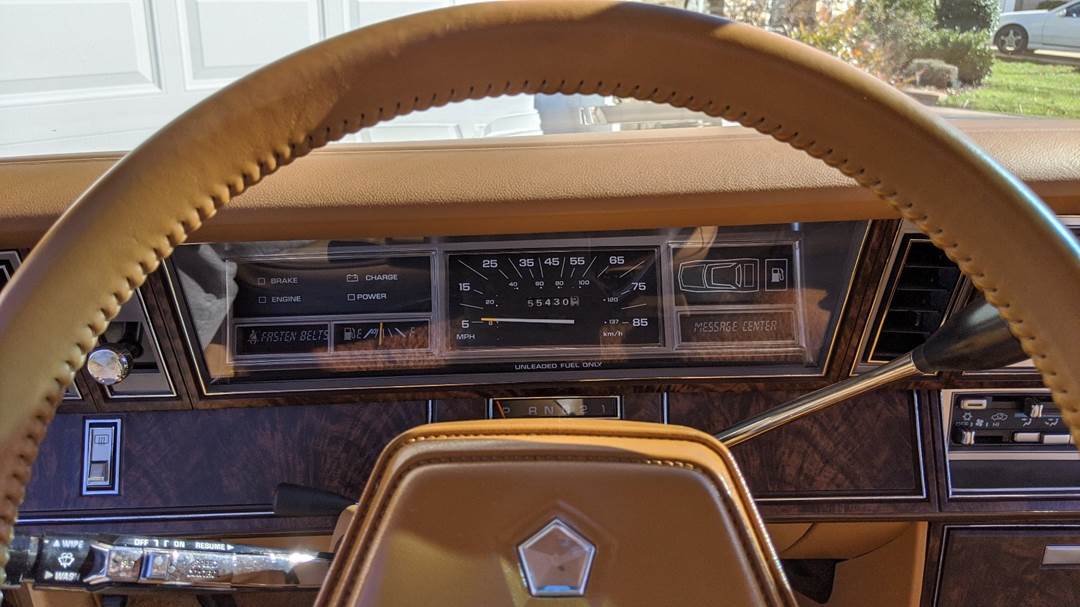
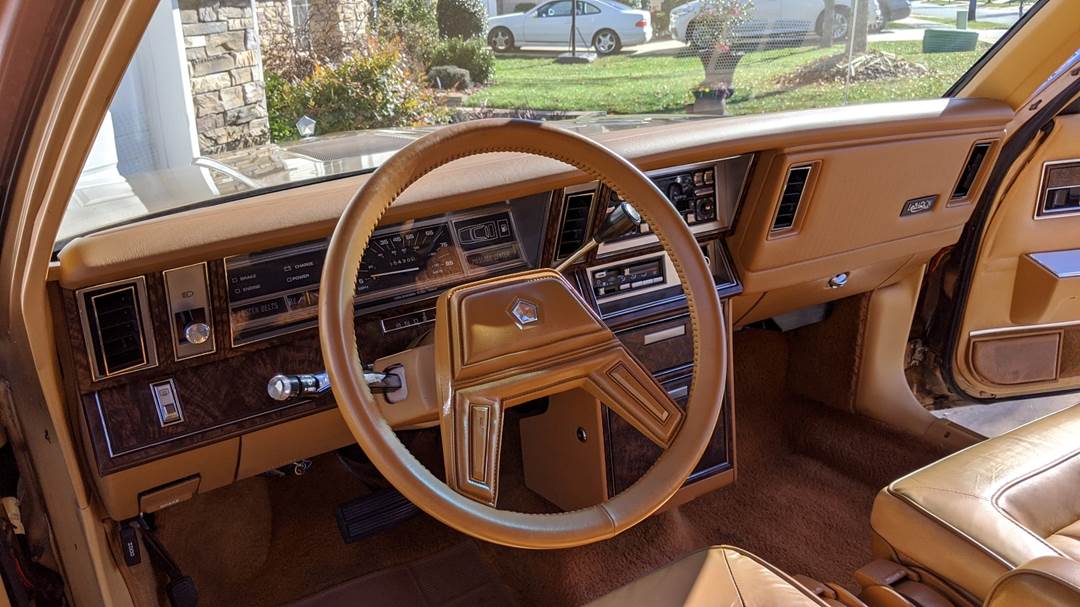
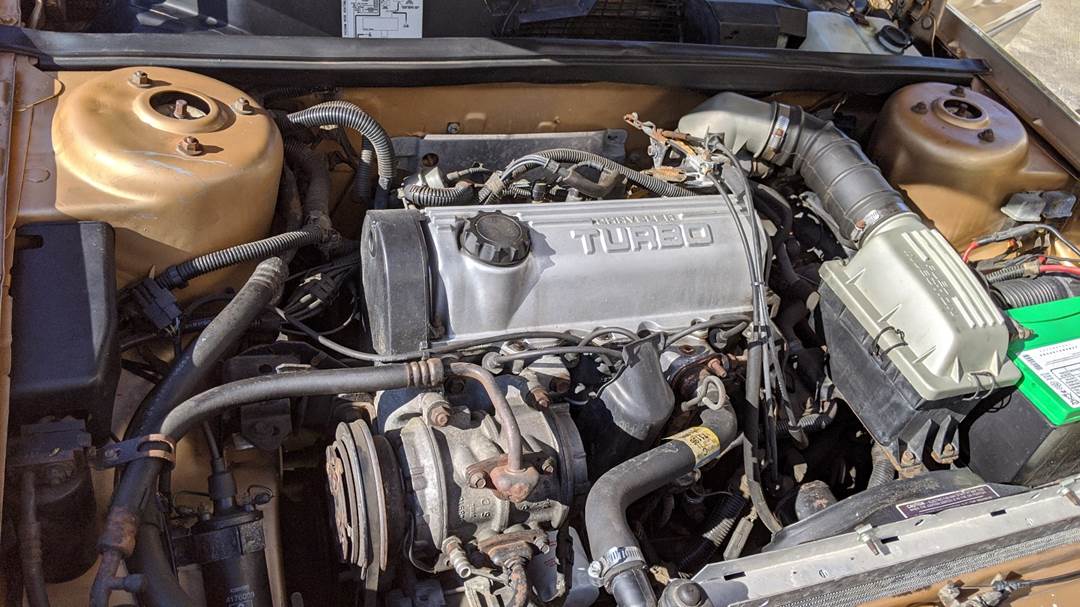
1985 Chrysler LeBaron Mark Cross Turbo Coupe I purchased this car in September 2006. Very low miles (41,882) and original. I love the seats in this car. Of the 6 cars I own, these seats are the most comfortable. Darn peppy little car with that turbo engine, but not as economical as one might think a car weighing only 2,533 pounds with a 2.2 liter 4-cylinder would be.
Q4 2020 - Fix rust in door bottoms, new paint, new top and added rear seat headrest and center armrest.
August 20, 2019 - New battery September 13, 2017 - Power steering flush and state inspection June 27, 2017 - Replaced windshield washer fluid reservoir May 6, 2016 - Repairs for blown head gasket includes: new head gasket, new distributor cap, spark plugs, ignition wires, head bolt kit, distributor rotor, new radiator and cap, thermostat, hoses and water pump. June 8, 2015 - Installed new air intake / charge temperature sensor & PCV valve January 19, 2015 - Replaced radio, lighter and A/C switch with black face units. October 25, 2014 - Replaced horn relay July 1, 2013 - Replaced front pads, rotors, hoses and calipers after the right caliper froze while driving the car. January 21, 2013 - Replaced the bushings in the power window motor on the driver door. It had been acting funny for over a year. It would keep trying to go up even after reaching the top. It occurred to me when working on the other door that perhaps the bushings were the reason why. And they were. Out of 3 bushings, there was only half a bushing remaining. Took less than 30 minutes to make the change since I am well practiced at this. January 13, 2013 - Replaced the bushings in the power window motor on the passenger door. December 6, 2012 - The refreshed paint was off color on the gold upper tone. Paint shop repainted it and got the color match right this time. August 25, 2012 - Had the paint refreshed as the finish was looking a bit faded and too many little chips needed to be addressed. I dyed the vinyl top. Car looks new, clean and fresh. June 16, 2011 - Engine light was illuminating after the car warmed up. Turned out to be a bad sensor. Replaced both oil pressure and coolant switches. Also had oil changed. Car has 49,603 miles. Won't be long before it hits 50k! February 17, 2011 - Had a rattle resolved. The power steering hose would vibrate at certain RPMs against a heat shield. Belts were also tightened. Car is quieter! May 23, 2010 - Like yesterday's work on the convertible's power window, I had to do the similar thing today. It only took 75 minutes this time due to yesterday's study and practice. I had to remove the power window motor and re-seat it ensuring good & proper contact with the regulator. As of now, all power windows work on all 6 cars. This was the year of power windows. Mar 26, 2010 - Replaced wiper blades September 2009 - Repairs: 4-wheel alignment. Feels like a new car! January 2009 - Repairs: replaced thermostat and gasket October 2008 - Repairs: replace headliner, replace headlight adjusting screws, align headlights; replace timing belt, accessory belt, water pump, coolant, adjust timing June 2007 - Repairs: replaced spark plugs March 2007 - Repairs: Added an auto-dim rearview mirror with compass and temperature reading October 2006 - Repairs: converted A/C to new refrigerant (works great!), new tires, September 2006 - Repairs: Purchased, repainted, re-keyed and installed a center stack console from a '87 New Yorker giving me more storage space and cup holders. Looks totally factory original. Replaced rear shocks, flushed brake fluid, new battery and new wheel covers (from a '94 LeBaron). |
Chrysler Cordoba - 1975-1979
1983-1986
Chrysler LeBaron - 1982-1988 second generation
1968-1971
Lincoln Versailles - 1979 Commercial
Lincoln Versailles - 1977-1980
Mercury Cougar XR-7 - 1980-1982 5th generation
|